


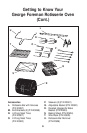
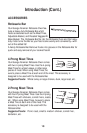
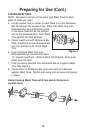
Assembling Accessories onto Rotisserie Bar
IMPORTANT: All foods must be secured onto Rotisserie Bar.
Whenever possible, you must use the End Brackets to secure the
accessory/food (Meat Tines, Adjustable Basket, Roasted Veggies/Air
Bake Basket). However, when cooking extra-large cuts of meat or
poultry, it may be necessary to eliminate the End Brackets to make
more room on the Rotisserie Bar. In this case, you MUST use the
4-prong Meat Tines and the Wing Nuts (removed from End Brackets)
to secure food into place on Rotisserie Bar. When using 4-prong
Meat Tines with EXTRA-LARGE CUTS OF MEAT, skip directly to
the "4-Prong Meat Tines" section.
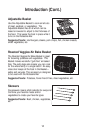
NOTE: Always place accessories and meat/food onto Rotisserie
Bar from the pointed end.
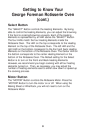
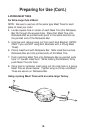
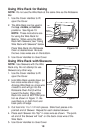
1. Determine whether you will use the 2-prong Meat Tines or the
4-prong Meat Tines (depending upon food/meat size). See Figure
4 and example turkey and chicken drawings on following pages.
When using 4-prong Meat Tines with EXTRA-LARGE CUTS
OF MEAT, skip directly to the "4-Prong Meat Tines" section.
For all other Meat Tines, proceed with steps #2 and #3 below.
If you will be using the Roasted Veggies/Air Bake Basket, pro-
ceed with steps #2 and #3 below. If
you will be using the Adjustable
Basket, skip to section "Preparing
for Use - Adjustable Basket."
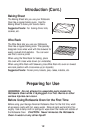
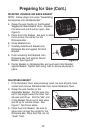
2. If the Rotisserie Oven was previously
used, be sure all parts have cooled and
remove Rotisserie Bar from inside
Rotisserie Oven.
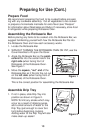
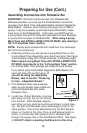
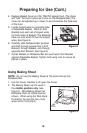
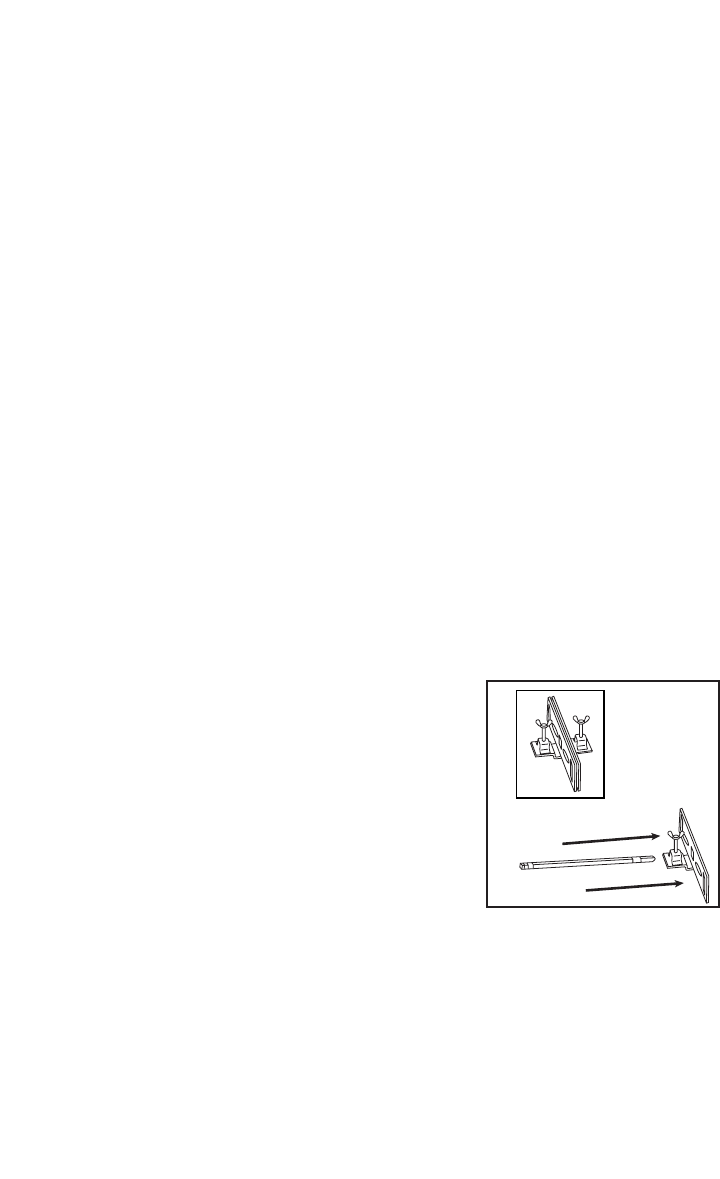
3. Locate two (2) End Brackets. Unscrew
each wing nut fully, but do not remove
from bracket. Place Brackets against
each other so long ends are touching as shown in inset draw-
ing. Set both End Brackets down while keeping them in the
same position. (You will be assembling only the End Bracket
shown on the left at this time.) Pick up End Bracket which is
shown on the left and slide pointed end of Rotisserie Bar
through the square hole in this End Bracket ONLY. See Figure
3. DO NOT attach remaining End Bracket at this time.
Preparing for Use (Cont.)
Figure 3
14