


– 11 –
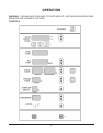
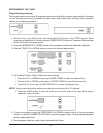
Auto ON/OFF Timer
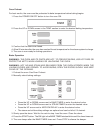
Setting Clock
Auto ON/OFF Timer display shows the current time of day. To set the clock, the control must be turned
on. Press and hold either of the arrow buttons until the colon between the hours and minutes display
stops blinking. Use the up and down arrow buttons to adjust time of day. After 5 seconds of no use, the
colon will start to blink again.
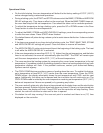
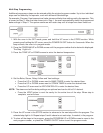
The oven can be set to turn itself on and off. After the Auto ON/OFF Timer is set, the POWER ON OFF
button can be pressed to turn the oven off. This will not disrupt the AUTO ON/OFF setting. Electrical
power to the oven must remain on.
1. To set the oven to turn on, press and
hold
the AUTO ON TIME button. The previously entered start
time will appear in the display. Use the UP and DOWN arrows to adjust the start time. Then
release the AUTO ON TIME button.
2. To set the oven to turn off, press and
hold
the AUTO OFF TIME button. The previously entered
end time will appear in the display. Use the UP and DOWN arrows to adjust the end time. Then
release the AUTO ON TIME button.
3. To enable the automatic start, press the TIMER ON/OFF button until the indicator LED to the right
of the TIMER ON/OFF button is illuminated.
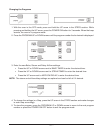
Backup Battery
The clock is backed up by a lithium battery which keeps the clock circuitry operating when all external
power is off. If the battery becomes low or dead while the external power is off, the display will read
12:00 (12 hr mode) or 0:00 (24 hr mode) and will not increment until a new time is set. The clock will
operate with a dead or missing battery, but must be set each time external power is turned on. Batteries
should be replaced when low or dead to avoid corrosive damage to the circuitry.