39
E. Thermistor Check
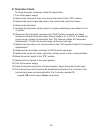
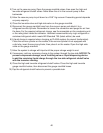
To check thermistor resistance, follow the steps below.
1) Turn off the power supply.
2) Remove the front panel, then move the control switch to the "OFF" position.
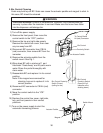
3) Remove the top and right side panels, then remove the control box cover.
4) Remove the thermistor.
5) Immerse the thermistor sensor portion in a glass containing ice and water for 2 or
3 minutes.
6) Disconnect the thermistor connector from CB K3 (white) connector and check
resistance between thermistor leads. Normal range is 4.7 to 6.2 kΩ. If outside the
normal range, replace the thermistor. See "V.B. Important Notes for Component
Replacement." If within the normal range, continue to next step.
7) Replace the thermistor in its correct position. See "V.B. Important Notes for Component
Replacement."
8) Reconnect the thermistor connector to CB K3 (white) connector.
9) Replace the control box cover, right side, and top panels in their correct positions.
10) Move the control switch to the "ICE" position.
11) Replace the front panel in its correct position.
12) Turn on the power supply.
13) Once the harvest cycle starts (Comp energizes), begin timing the harvest cycle.
14) The harvest timer and harvest cycle should terminate within 2 to 5 minutes. If the
harvest cycle does not terminate within 2 to 5 minutes, replace CB.
Legend: CB–control board; Comp–compressor


