


49
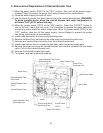
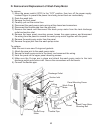
IV. Removal and Replacement of Components
WARNING
1. This unit should be diagnosed and repaired only by qualified service
personnel to reduce the risk of death, electric shock, serious injury, or fi re.
2. Move the power switch (GFCI) to the "OFF" position and turn off the power
supply before servicing. Lockout/Tagout to prevent the power from being
turned back on inadvertently.
3. When draining the internal booster tank, wait until the water temperature falls
below 104°F (40°C) to avoid possible burns.
4. To avoid possible burns and spills, be sure to drain the wash tank and
internal booster tank and let the components cool before servicing.
5. When disassembling components that have been in contact with detergent,
wear rubber gloves and goggles. Before starting disassembly, thoroughly
read the detergent safety instructions. Contact with skin may cause irritation
and contact with eyes may cause blindness.
6. When reassembling components, be sure to use new O-rings and gaskets.
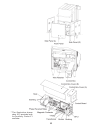
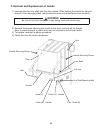
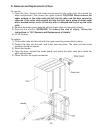
A. Removal of Panels
1) The front panel and side panels (L) and (R) are inserted inside the tank rim at the top
and secured with 2 screws at the bottom. Unscrew and pull down to remove.
2) To replace, reverse the above procedure.
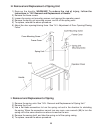
B. Accessing the Control Box
1) Remove the front panel.
2) Remove the screw securing the control box, then pull it straight towards you.
3) Remove the 1 screw at the front, 3 screws at the left side and 1 screw at the right side
of the control box securing control box covers (A) and (B). Pull control box cover (A)
towards you to avoid the GFCI switch, then lift off. Next, remove control box cover (B).
4) To replace, reverse the above procedure. Insert control box cover (B) under the rear
hook of the control box. Place control box cover (A) over control box cover (B).
Note: When sliding in the control box, be careful not to damage the wiring and fan at
the rear.
5) The wires coming out of the bushing at the front of the control box must be sloped
downward to prevent entrance of water into the control box. Use the wire retainer in
front of the rinse pump motor to secure the wiring.
6) Make a trial run to check for proper operation.