6
GB
PLEASE PHONE US TO REGISTER YOUR APPLIANCE AND ACTIVATE YOUR PARTS GUARANTEE ON 08448 24 24 24
UNPACKING THE COOKER
Unpack the components from inside the grill and oven.
Check that the following parts are present:
Meat pan Pan supports
Grill pan, grid and handle Griddle
Hotplate burners parts Oven and Grill shelves
Wok Stand Literature pack
After unpacking your cooker, make sure that you remove all
the packing from the oven and grill, and any stickers from
the oven door and the hob.
Levelling
Your cooker is heavy, so it would be advisable for two people
to move it. The cooker is tted with rear wheels and will slide
into position easily. Movement of your cooker is most easily
achieved as follows. Open the grill/oven door sufciently to
allow a comfortable grip on the underside front edge of the
oven roof, avoiding any grill or oven interior furniture, and
then lift and slide back at the same time.
Your cooker must stand on a at surface so that the hob
is perfectly level, and the cooker is stable and cannot be
rocked, this is easily achieved by adjusting the three feet
which are under the front of the cooker and the 3 castors
under the rear of the cooker, if necessary.
NOTE: If the cooker is to be placed on a base, precautions
must be taken to prevent it from slipping off the base.
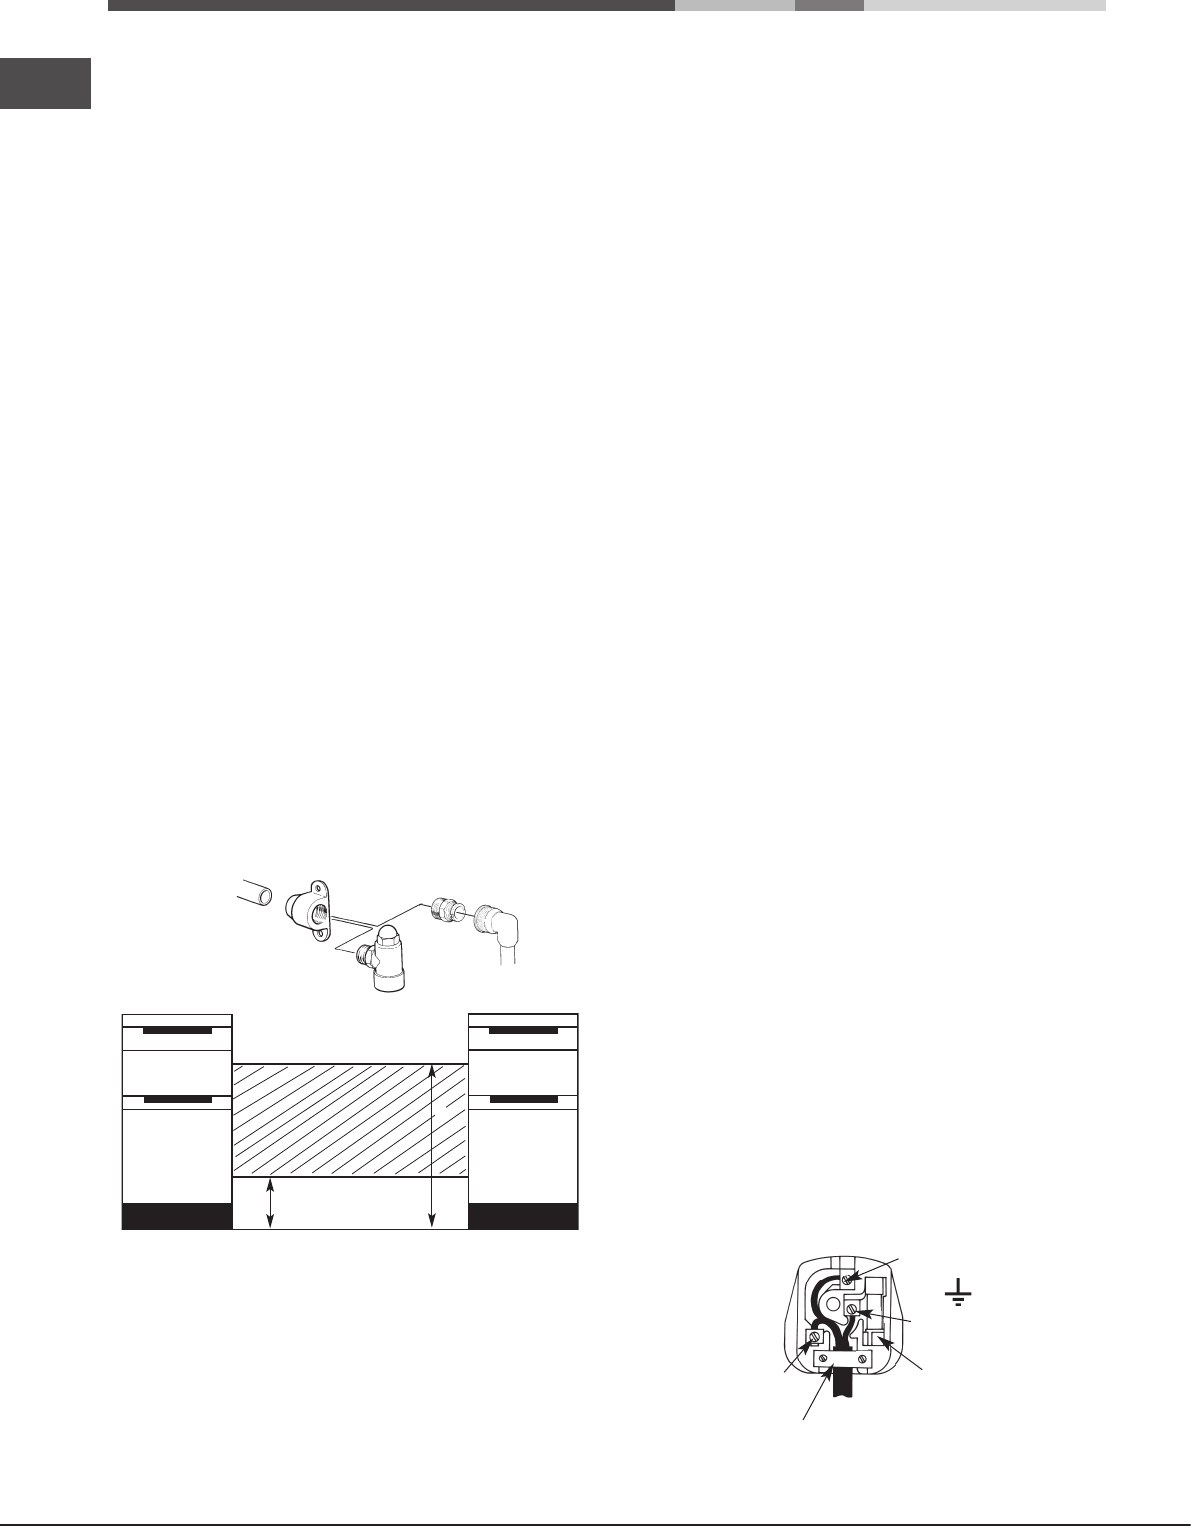
The cooker is designed to match the depth of standard
600mm worktops. An adaptor backplate should, therefore,
be tted within the shaded area shown to allow the cooker
to be pushed fully to the wall. If a forward facing backplate
is used, it must be chased into the wall.
250
750
Connection to the cooker should be made with an approved
appliance flexible connection in according to National
Legislation. A length of 0.9 to 1.25m is recommended. The
length of hose chosen should be such that when the cooker
is in situ, the hose does not touch the oor.
The temperature rise of areas at the rear of the cooker that
are likely to come in contact with the exible hose do not
exceed 70°C.
Installation & Operational Checks
After installation, check for gas soundness.
Fit the hotplate burner bodies, burner port rings, enamelled
discs and pan supports referring to the instructions for use
where necessary.
1. Check that the hotplate burners ignite correctly and burn
with a steady ame.
Check for a steady ame on the low setting.
2. Check that with the left hand oven set at 230°C, the oven
fan operates and the oven heats up.
3. Check that with the right hand oven set at 230°C, the
oven heats up.
4. Check that the twin grill heats up.
5. Check that the warming drawer heats up.
6. Check operation of clock.
Instruct the user on the operation of the cooker.
Electrical connection
WARNING - THIS APPLIANCE MUST BE EARTHED.
CONNECT TO A 230-240V A.C. SUPPLY ONLY.
Connection to the electricity supply should be made via a
properly earthed, readily accessible wall socket which is
adjacent to but not directly above, and not more than 1.25m
away from the appliance and capable of electrical isolation.
The mains lead should be routed such that it cannot touch
hot parts of the cooker i.e. the back panel above a height
of 650mm from the oor.
Should this plug not t the socket outlet in your home it should
be cut off and replaced with a suitable plug as outlined below.
NOTE: The removed plug cannot be used for any other
appliance and should therefore be properly disposed of and
not left where children might nd it and plug it into a supply
socket - with the obvious consequent danger.
IF THE FITTED PLUG IS REMOVED
The exible mains lead must be correctly connected as
below to a three pin plug of not less than 13 amp capacity.
If a B.S. 1363 fused plug is used, it must be tted with a
fuse which is approved to B.S. 1362.
IMPORTANT: The wires in the mains lead tted to this
appliance are coloured in accordance with the following code:
GREEN AND YELLOW - EARTH
BLUE - NEUTRAL
BROWN - LIVE
The power supply cable must be type H05RR-F
Yellow to
Earth
Brown
to Live
Blue to
Neutral
Cord
Clamp
3 Amp
Fuse


