GB
9
PLEASE PHONE US TO REGISTER YOUR APPLIANCE AND ACTIVATE YOUR PARTS GUARANTEE ON 08448 24 24 24
7. On warm days, to prevent harmful bacterial growth in
certain foods (ie poultry, joints, etc) the delayed start
should be kept to a minimum.
8. Wine or beer may ferment and cream may curdle during
the delay period, so it is best to add these ingredients
just before serving.
9. Foods which discolour should be protected by coating
in fat or tossing in water to which lemon juice has been
added, prior to placing food in the oven.
10. Dishes containing liquid should not be lled too full to
prevent boiling over.
11. Food should be well sealed (but not airtight) in a
container to prevent the loss of liquid during cooking.
Aluminium foil gives a good seal.
12. Ensure food is cooked thoroughly before serving.
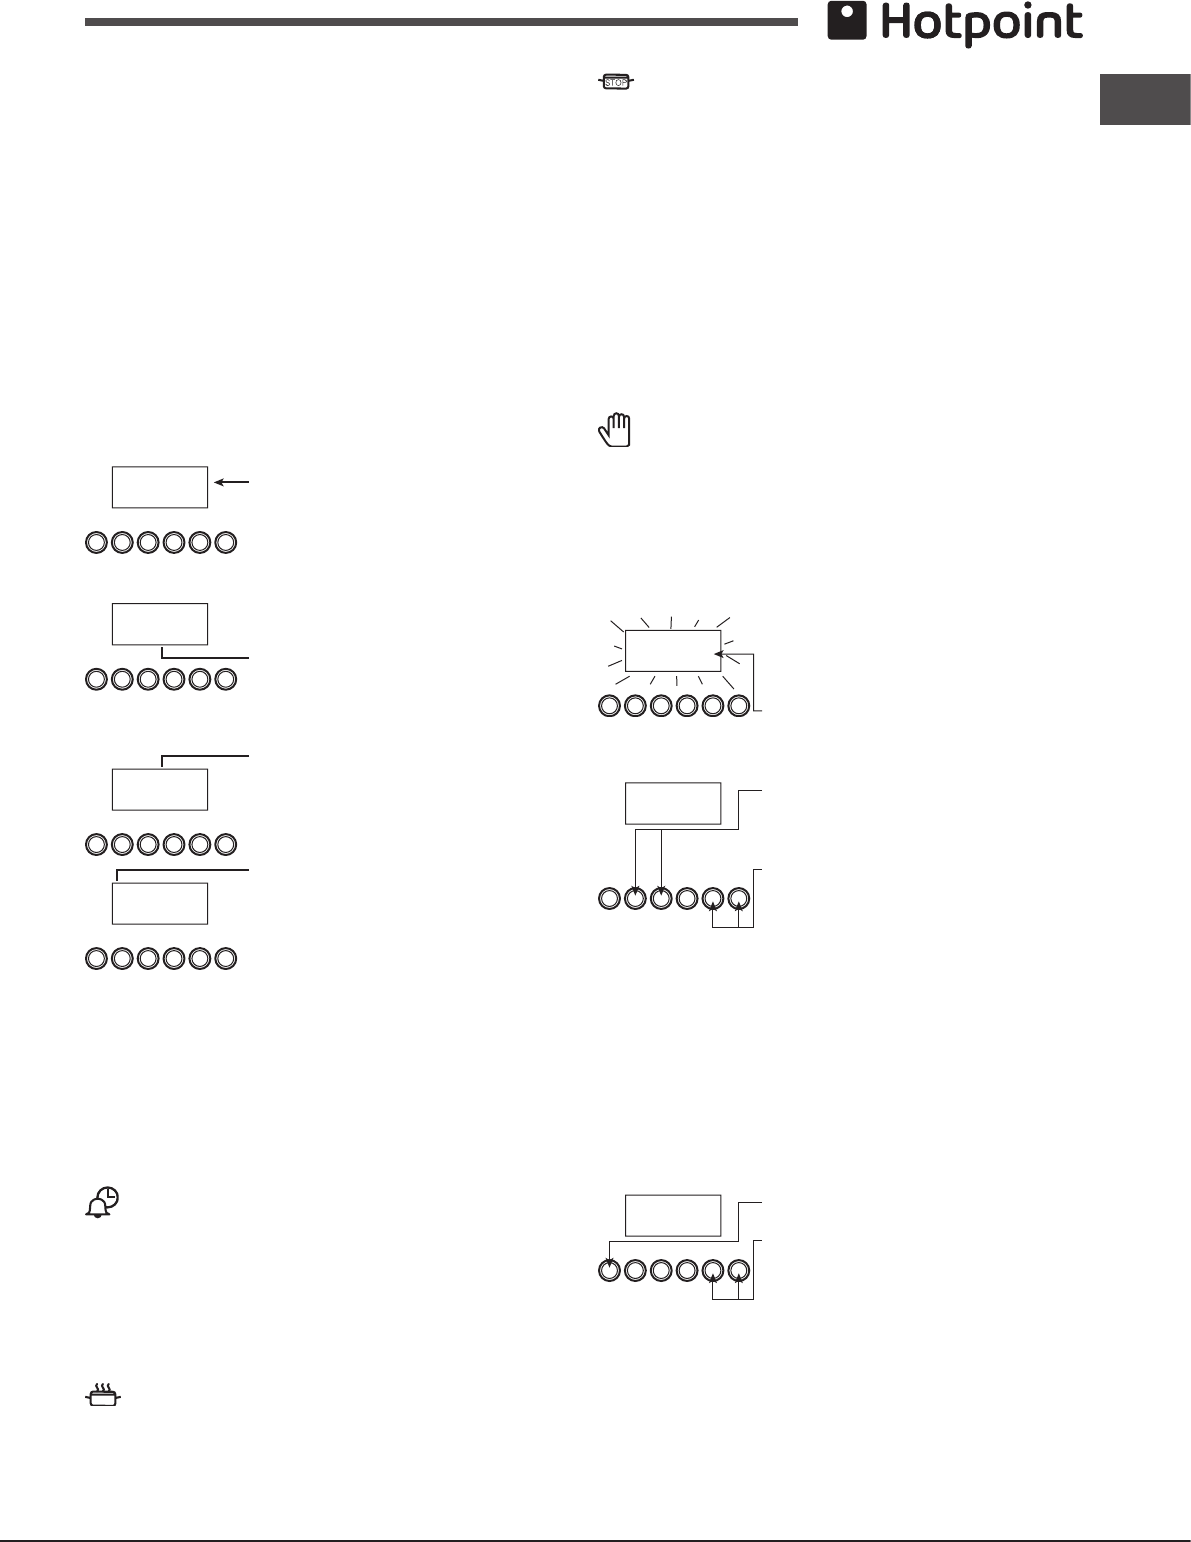
CLOCKFACE
A
U
T
O
000
The timer incorporates a 24 hour clock.
Ensure the correct time of day
is always set, before using your
cooker.
SYMBOLS
000
A ‘bell’ symbol will light up when you
select a Minute Minder Period and
will remain lit for the period set.
At the end of the Minute Minder
Period, the timer will emit an audible
tone and the ‘bell’ symbol will disappear.
000
The ‘cookpot’ symbol will light up
either:-
- When the timer is in manual mode, or
- During the actual Cook Period.
000
A
U
T
O
‘AUTO’ will light up:-
- When the timer is rst turned on
it will ash. It will go out when a time
of day is set or when the timer is set
to manual.
The ‘AUTO’ symbol will ash at the end of an Auto Cooking
programme to indicate that the programme has nished.
(When the ‘AUTO’ symbol is ashing, to return the
oven to Manual operation, turn the oven controls off,
ensure that the correct time of day is set, and press
the “Manual” button - The ‘AUTO’ symbol will go out).
Timer function buttons
Minute Minder Button
Here you can set a time period of up to 23 hours 59 minutes,
that will count down. When it reaches zero, the timer will
emit an audible tone.
For Example: If you set 20 minutes, the audible tone will
occur 20 minutes later.
Auto cooking programme
Cook Period Button
Cook Period is the actual length of time for which, the timer will
switch the oven(s) on as part of an “Auto Cooking” programme.
(e.g. If you set 2 hours, the food will be cooked for 2 hours).
End Time Button
The time of day at which you want an “Auto Cooking”
programme to end.
For Example: If you set a “Cook Period” for 2 hours, and “End
Time” of 11:00. The timer will switch the oven(s) on at 9:00 and
turn the oven(s) off at 11:00. You will hear a audible tone at 11:00,
to indicate that the Auto Cooking Programme has nished.
Notes:
- When setting an Auto Cooking programme you will need
to set the oven control(s) to the required temperature(s)
when you set the timer.
- If an Auto Cooking programme has been set the oven(s)
will only operate during the pre-programmed time.
Manual Button
Needs to be pressed to cancel an Auto Cooking programme
and return the oven(s) to Manual operation.
“+” and “-” Buttons
Used to adjust the various timer function settings.
Setting the time of day
A
U
T
O
000
Step 1 Make sure all oven controls
are turned Off.
Step 2 Check the electricity supply
to the cooker is turned on.
Step 3 When switched on the
display will show 0.00 and the Auto
symbol, ashing intermittently.
A
U
T
O
000
.
Step 4 Press & hold in both the Cook
Period & End Time buttons together.
Step 5 With the Cook Period &
End Time buttons still held in,
press either the “+” or “-” buttons to
set the correct time of day.
Step 6 Release all the buttons simultaneously. THE TIME
OF DAY IS NOW SET.
To change the time of day repeat Steps 4, 5 & 6 above.
Note: You cannot adjust the time of day if the timer
has been set for an Auto Cooking Programme.
Setting the minute minder
Step 1 Ensure the time of day is set correctly.
000
.
Step 2 Press and hold the Minute
Minder button.
Step 3 With the Minute Minder button
held in, set the required Minute
Minder period using the “+” and “-”
buttons. A ‘bell’ symbol will light up.
Release all buttons and the timer display will revert back
to the time of day. The ‘bell’ symbol will remain lit to signify
that a Minute Minder period has been set.
At the end of the set time an audible tone will be heard, and
the ‘bell’ symbol will disappear.


