


20
Buccaneer GT, Falcon GTE - Installation, Assembly & Servicing
5. COMMISSIONING
ASSEMBLY
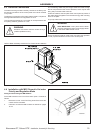
- Ensure connections are watertight.
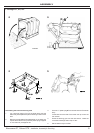
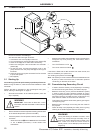
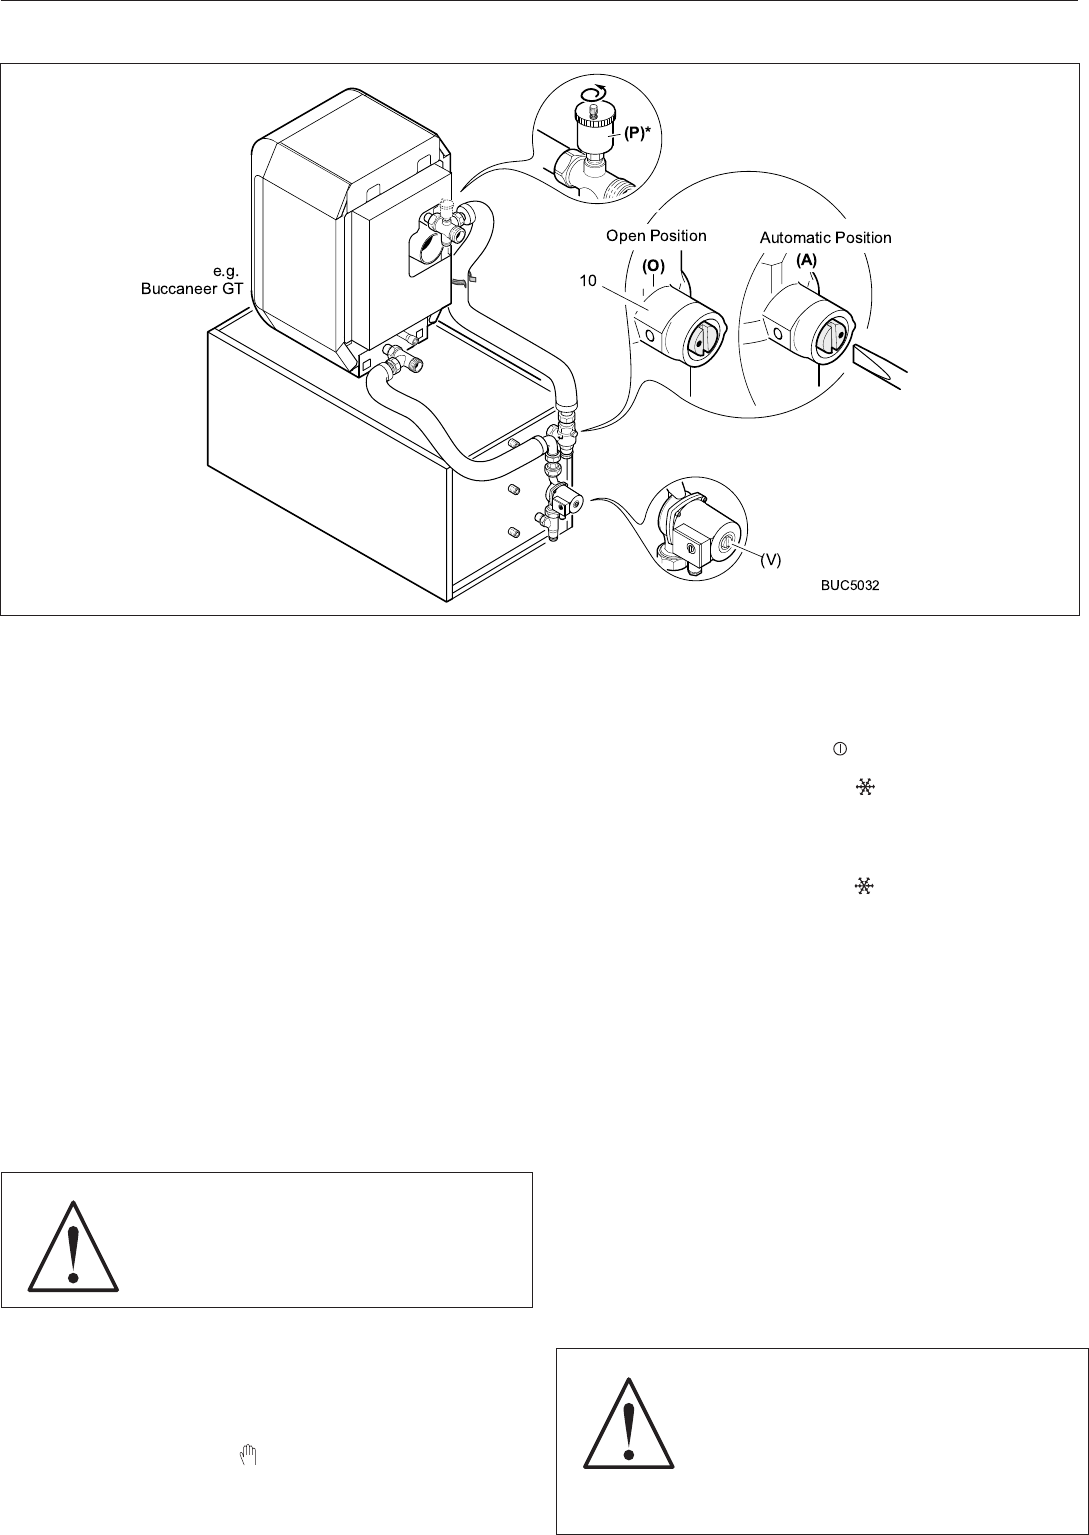
- Vent the tank heat exchanger as follows:
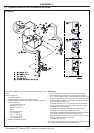
1. Unscrew the auto vent cap (P)* a few turns.
2. Turn the antisyphon valve screw 10 to open position (O)
3. Close the vent (P)* when water flows continuously.
4. Return the antisyphon valve screw 10 to the automatic
position (A)
5. To vent the pump, unscrew the protection cover in the
pump head and turn the pump shaft (V) left and right a
few times.
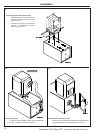
6. Leave the pump running with cold water for a few minutes
to prime the system.
(* Not supplied)
5.1 Starting Up
Initial starting up shall be performed by a qualified professional.
Before turning the boiler on, make sure that the installation is filled
with water.
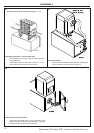
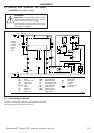
Perform the start-up operations in the chronological order given
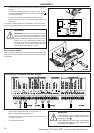
below, referring to the diagram on page 14.
• Set boiler thermostat 7 to the selected position (move the
stop if required).
WARNING
IMPORTANT: if the boiler is fitted with a room
thermostat, set boiler thermostat 7 to the maximum
position.
If the boiler is fitted with an MB1 domestic hot water module, this
switch is disabled by the optional unit.
Turn heating pump switch 3 to Winter .
Note: We advise you never to set the boiler thermostat below mark
4 (40ºC) in order to avoid the risk of combustion products
condensing on the walls of the boiler.
5.2 Commissioning Secondary Circuit
• If needed, flush the sanitary circuit (especially if re-starting)
and fill the tank using the sanitary cold water inlet pipe.
• Bleed the secondary circuit (tank and distribution system)
in order to avoid any noise caused by trapped air moving
during re-heating and drawing off. To do this, fill it completely
with water, leaving a hot water tap open; close this tap only
when the flow of water is continuous and noise-free.
• Then bleed in succession all hot water pipes by opening the
corresponding taps.
• Bleed the tank's exchanger circuit using the vent made for
the purpose.
• Check all safety units (especially the safety valve or group)
referring to the leaflet supplied with the component.
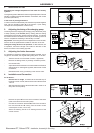
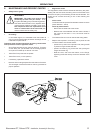
• Make sure that safety thermostat 6 is set by unscrewing the
hexagonal cap and pressing the reset button with a
screwdriver.
• Turn On/Off switch 1 to On .
• Turn burner switch 2 to Winter .
WARNING
During the heating of domestic hot water, some
water may escape through the safety valve or
group as a result of the expansion of water in the
unit. There is no cause for concern as this is
entirely normal. Do no attempt to prevent this from
happening
• Set the domestic hot water temperature setting potentiometer
to the desired temperature (versions with MB1).
• Check the position of three-position switch 5, which must be
as follows:
- either set to manual : boilers without room thermostats
- or set to AUTO (automatic): boilers with room
thermostats.