


JFT Series Technical Manual 7610-002-77-38
Issued: 03-16-2006 Revised: N/A
13
SECTION 2: INSTALLATION/OPERATION INSTRUCTIONS
INSTALLING THE JFT DISHMACHINE
NOTE: All JFT models are accompanied by a certified Jackson technician for the initial installation. Many of the ques-
tions and problems that arise, as well as the proper procedures for installation, should be directed to this person.
VISUAL INSPECTION: Before installing the unit, check the container and machine for damage. A damaged container is an indi-
cator that there may be some damage to the machine. If there is damage to both the container and machine, do not throw away
the container. The dishmachine has been inspected and packed at the factory and is expected to arrive to you in new, undam-
aged condition. However, rough handling by carriers or others may result in there being damage to the unit while in transit. If
such a situation occurs, do not return the unit to Jackson; instead, contact the carrier and ask them to send a representative to
the site to inspect the damage to the unit and to complete an inspection report. You must contact the carrier within 48 hours of
receiving the machine.
UNPACKING THE DISHMACHINE: Your JFT model dishmachine will come packaged in several containers as each individual
section is packed separately. Once the machine sections have been removed from the container, ensure that there are no miss-
ing parts from the machine. This may not be obvious at first. If it is discovered that an item is missing, contact Jackson imme-
diately.
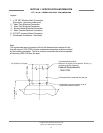
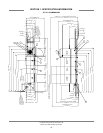
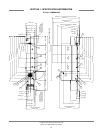
CONNECTION OF MACHINE COMPONENTS: The dishmachine will arrive in separate pieces for ease of installation. Silicone
will have to be used between each section for sealing purposes before each is bolted together. Apply the sealant onto each
surface to be connected together. Observe that the openings and bolt holes are covered with the sealant. When connecting the
sections, use pins or spikes to center components before clamping the machine together. Once clamped, the sealant will be
squeezed from all cracks where applied. The sections are now ready to have the hardware inserted into place.
DO NOT TIGHTEN THE HARDWARE AT THIS POINT!
Check that all sheet joints, bends, and especially, guiding rails are properly aligned and if necessary, readjust at this point. After
all connections are ready, tighten the hardware. Excess protruding sealant is to be removed with a plastic scraper. Once
removed, smooth the sealant seam with the fingers and soapy water.
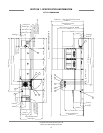
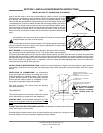
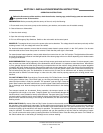
LEVEL THE DISHMACHINE: The dishmachine is designed to operate while being level. This
is important to prevent any damage to the machine during operation and to ensure the best
results when washing ware. The unit comes with adjustable bullet feet, which can be turned
using a pair of pliers or by hand if the unit can be raised safely. Ensure that the unit is level
from side to side and from front to back before making any connections.
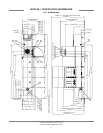
PLUMBING THE DISHMACHINE: All plumbing connections must comply with all applicable
local, state, and national plumbing codes. The plumber is responsible for ensuring that the
incoming water line is thoroughly flushed prior to connecting it to any component of the dishmachine. It is necessary to remove
all foreign debris from the water line that may potentially get trapped in the valves or cause an obstruction.
Any valves that are fouled as a result of foreign matter left in the water line, and any expenses resulting from this fouling, are
not the responsibility of the manufacturer.
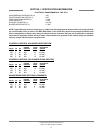
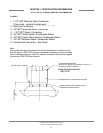
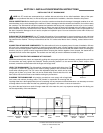
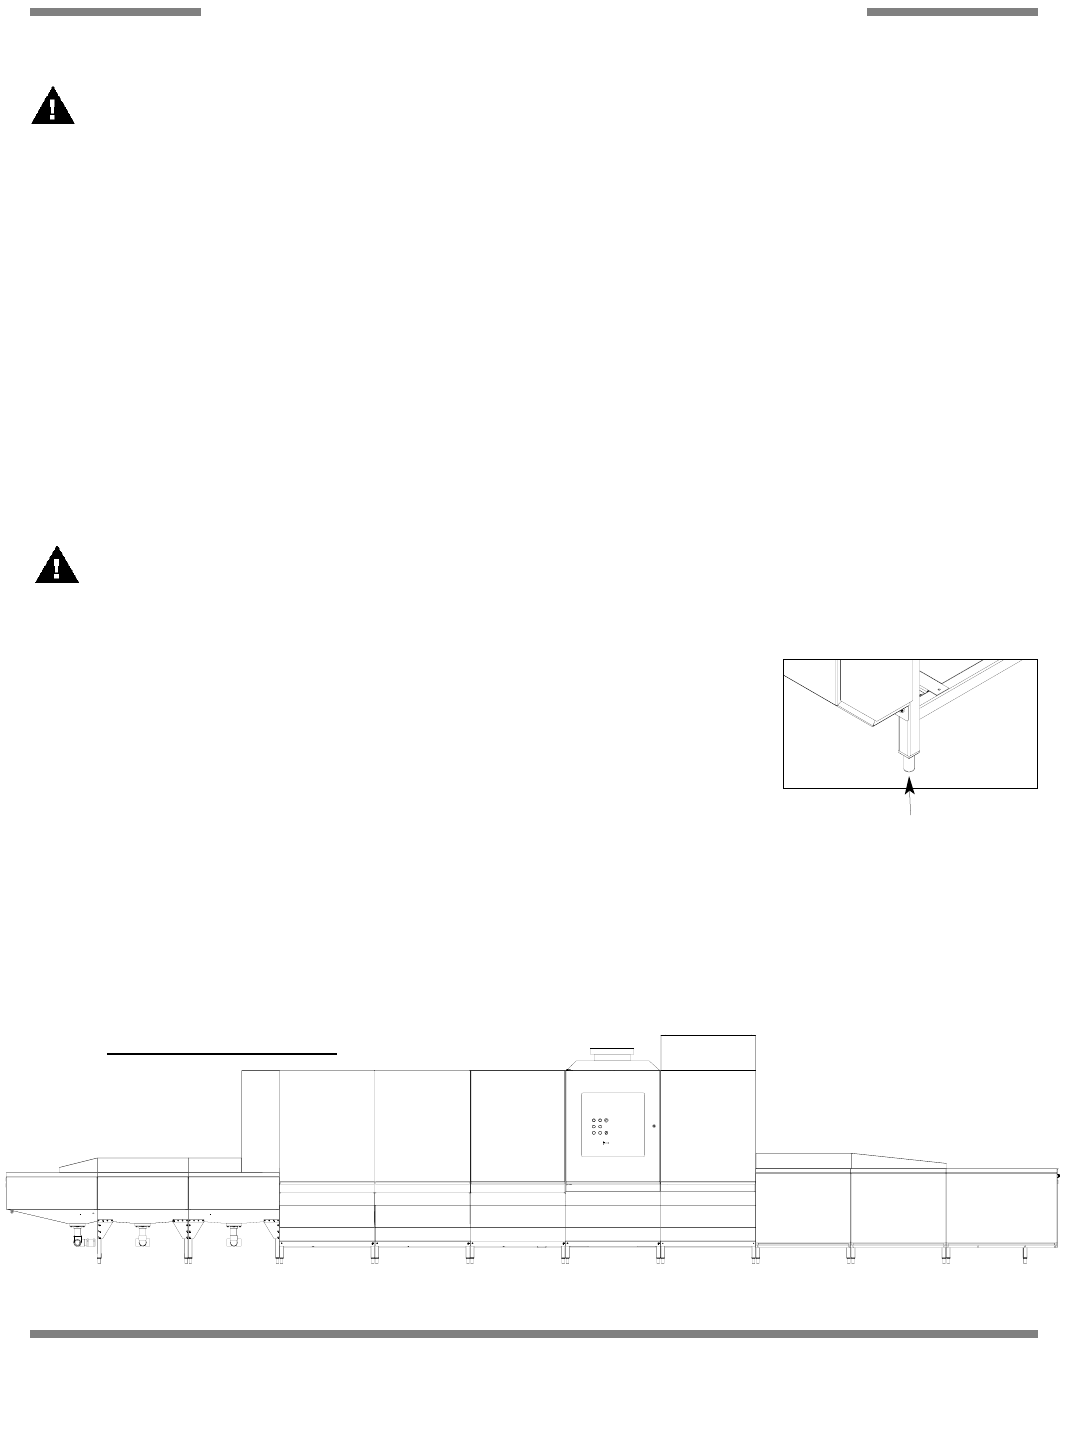
Prewash Wash
Load End
Power
Rinse
Unload End
Control
Individual Named Sections
Blower
Dryer
Angled
Expansion
Section
Straight
Expansion
Section
Angled
Expansion
Section
Straight
Expansion
Section
Bullet Foot