


B. How to program the “Keating” Electronic Timer
The Keating Electronic Timer is programmable to
four different timer ranges with two different alarm
modes for each time range.
The timers are shipped from the factory preset to
program 5: Minutes : seconds (00:01 to 59:59) with
continuous alarm
To program another time range or alarm mode
perform the following steps:
1. Turn off the power
2. Press the “down arrow “ button while turning the
power on.
3. Release the button after the display turns on.
4. A number from 0 to 7 will appear.
This number corresponds to:
0 = Seconds (000.1 to 999.9) 5 second alarm
1 = Minutes : Seconds (00:01 to 59:59) 5 second
alarm
2 = Seconds (0001 to 9999) 5 second alarm
3 = Hours : Minutes (00:01 to 23:59) 5 second
alarm
4 = Seconds (000.1 to 999.9) continuous alarm
5 = Minutes : Seconds (00:01 to 59:59)
continuous alarm
6 = Seconds (0001 to 9999) continuous alarm
7 = Hours : Minutes (00:01 to 23:59) continuous
alarm
5.
Use the “down arrow “ button to select the desired
time range.
6. Turn off the power.
7. Wait 2 seconds.
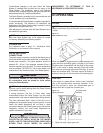
8. Turn on the power. (The timer will remain in the
new time range until programmed.) The electronic
timers, used on 18" and above Basket-Lift
models, provide a clearly visible and accurate
display and are very easy to use. One knob sets
the time and one button controls all operations.
The display can show cooking or clock time.
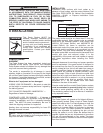
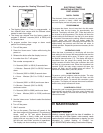
ELECTRONIC TIMER
OPERATING INSTRUCTIONS
PART # 056921
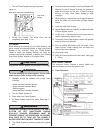
DIGITAL TIMERS
The electronic timers, standard on pasta
cookers, provide a clearly visible and
accurate display and are very easy to use.
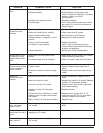
PROGRAMMING
To program the timers, the unit must be in the idle mode.
Press and hold the set button for approximately two
seconds. The display will show “SEt”. Press the button for
the channel to be programmed. The display will show the
current setting for that channel. Use the up or down button
to increment or decrement the setting. When the setting is
correct, press and hold the set button again for
approximately two seconds. The display will show "StO" for
approximately two seconds and the timer will return to
normal operation. Repeat the process as necessary for the
other timers.
OPERATING LOGIC
When the timer is powered up, the display will show the
time setting for the channel that was operated last and the
relay output contacts will be open. To start a cycle, press
the desired channel button (1-3). The display will begin to
count
down from the preset time setting and the relay
output contacts will close. During the countdown the colon
will flash at a one-second rate. When the countdown has
reached "00:00" the relay output contacts will open, the
display will flash, and the audible alarm will sound.
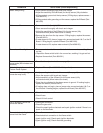
To
cancel the audible alarm, press any button.
PAUSE FEATURE
To pause a cycle in progress, press any button. The relay
output contacts will open, the display will flash, and the
countdown will pause. To resume the countdown, press
any button. The display will resume the normal countdown
and the relay output cont
acts will close.
CANCELING
A CYCLE
T
o cancel a cycle in progress press and hold any button for
approximately two seconds. The relay output contacts will
open and the display will show the time setting for the
channel last used.
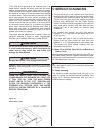
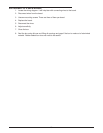
IV MAINTENANCE
WARRANTY REPAIRS
Keating’
s warranty begins with the date of inst
allation. In
the event that your Past
a System, under warranty
,
needs
rep
airs other than routine maintenance or cleaning, you are
requested to cont
act Keating of Chicago
, Inc.
(at 1-
800
-
KEATING) before calling a local service company
9