Impinger I -–1000 Series Service Manual - International 37
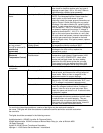
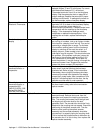
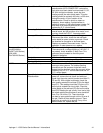
Thermocouple Probe Place your pyrometer thermocouple into the center
between fingers T2 and T3 in the oven. For ovens
with Mechanical Measure D.C. millivolts at
Thermostat terminals 9 and 10 on the time/temp
display. See thermocouple chart on page 59 for
proper readings. Replace thermocouple if proper
readings not achieved. If readings are correct on
the thermocouple, replace time/temp display.
For ovens with
Electronic Thermostat
Connect temperature meter to thermocouple at
terminals 9 & 10 on back of the time/temp display.
(Be sure to maintain proper polarity on
thermocouple connections.) Compare actual oven
temperature with the readings at the time/temp
display. If the temperature readings match,
recalibrate or replace time/temp display. If the
readings do not match, replace thermocouple
probe.
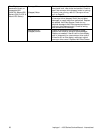
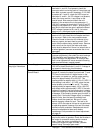
Erratic time/temp
display
If strange or unusual behavior is experienced such
as a rolling of numbers, lock up at a given number,
first check for a display circuit lock up. This can be
caused by a voltage spike or surge. To eliminate
this condition remove power from the time/temp.
display by shutting off the main fan switch, or if
display stays on, (older models) circuit breaker
interruption may be required. This should eliminate
the problem. If the problem continues, jumper the
two fuses in the red wires leading from the 12.6
VAC transformer to the display. If this does not
solve the problem, it may be coming in through the
commercial power lines. Suggest that customer
contact his power company for evaluation.
Temp Display
inaccurate erratic, or
inoperative
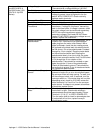
Perform the power supply check, the thermistor
probe check, and then perform the time/temp
simulator test. Refer to page 72 for instructions.
Remember, when using the time/temp simulator,
remove all the leads from the back of the display
except the 3 power leads. After completion of this
test and if reinstalling back into the oven, the dip
switches must be reset for oven operation.
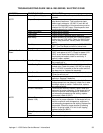
Time display
inaccurate erratic, or
inoperative(S/N
Q4615-Q14970) 1000
Series(S/N Q4615-
Q14790) 1200 Series
Perform all checks as in the above evaluation. If
the time check is okay, refer to the next section
optical encoder.
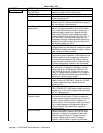
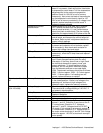
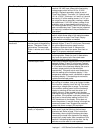
Optical Encoder The above time/temp test should have already
been performed. Remove dust cover from the
gearmotor and inspect the coupling and encoder
disc. The coupling set screws should be tight and
not slipping on the motor shaft or the tach.
generator shaft. The encoder disc should be firmly
attached to the coupling and not warped. Check the
positioning of the optical encoder disc. The disc
should not be touching the optical encoder
assembly and the encoder assembly should be
mounted so it is squarely facing the coupling shaft.
This is to allow the infrared beams to be broken by
the encoder disc. If all this is okay, then replace the
optical encoder assembly.


