


8
COOK TIME/STOP TIME PADS
C
LOCK
C
ONTROLLED
O
VEN
C
OOKING
Use to program the ovens to start and stop
automatically. Cook time may be set for up to
11 hours and 59 minutes (11:59). The clock
must be functioning and correctly set for this
feature to work.
To Start Immediately and Turn Off
Automatically:
1. Press COOK TIME pad once for the upper
oven or twice for the lower oven. COOK
TIME will flash, then press the appropriate
number pads to enter cooking time in hours
and minutes.
2. Press the upper or lower oven BAKE pad
and select the bake temperature. COOK
TIME will be displayed along with the tem-
perature.
3. One minute before the end of the pro-
grammed cook time, the light will turn on, a
beep will sound and CHECK FOOD will be
displayed. Light will turn off automatically
when CANCEL pad is pressed or after oven
door is opened and closed.
4. At the end of cook time, the oven will shut off
automatically, "End" and COOK TIME will
be displayed and four beeps will sound.
5. Press CANCEL pad. Remove food from
oven. If the program is not canceled, there
will be 1 reminder beep every minute for up
to 30 minutes.
NOTE: The Cook Time/Stop Time reminder
beeps may be changed. See Control Op-
tions (Cook Time Beeps, page 9).
To Delay the Start of Cooking and Turn
Off Automatically:
1. Press COOK TIME pad. COOK TIME will
flash, then press the appropriate number
pads to enter cooking time in hours and
minutes.
2. Press the upper or lower oven BAKE pad
and select the bake temperature. COOK
TIME will be displayed along with the tem-
perature.
3. Press STOP TIME pad. Display shows when
the oven will stop based on an immediate
start.
4. Press STOP TIME pad again. STOP TIME
must be flashing to set the delay stop
time.
❚ Highly perishable foods such as dairy
products, pork, poultry or seafood
are not recommended for delayed
cooking.
❚ Clock controlled baking is not recom-
mended for baked items that require
a preheated oven, such as cakes,
cookies and breads.
NOTES:
5. Press the appropriate number pads to
enter the time you want the oven to stop.
6. DELAY and BAKE will be displayed.
7. At the end of the delay period, COOK
TIME will be displayed along with the
temperature.
8. Follow steps 3-5 in preceding section.
Both Ovens May Be Set for Clock Con-
trolled Cooking. To Start Immediately
and Turn Off Automatically:
1. Set COOK TIME and Oven Temperature
for the upper oven.
2. Press COOK TIME pad twice and set
COOK TIME and Oven Temperature for
the lower oven.
To delay the start and turn off automati-
cally follow steps 1 & 2 above.
3. Set STOP TIME for both ovens.
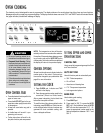
TIMER PADS
The timer(s) may be set for any time period
up to 99 hours and 59 minutes (99:59).
The timer(s) operate independently of any
other function and can be set while another
oven function is operating. THE TIMER
DOES NOT CONTROL THE OVEN.
1. Press the TIMER 1 or 2 pad. TIMER 1
or 2 will flash respectively. 0HR:00 will
appear in the display.
2. Press the appropriate number pads to
enter desired time.
3. TIMER 1 or TIMER 2 will be displayed.
If both timers are active TIMER 1 + 2 will
be displayed.
EXAMPLE: To set a timer for 5 minutes,
press the TIMER 1 pad and the number
pad 5. The control will begin countdown
after a four second delay.
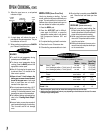
KEEP WARM PAD
(U
PPER
O
VEN
O
NLY
)
For safely keeping foods warm or for warming
breads and plates.
1. Press KEEP WARM pad.
2. Press AUTO SET pad for 170° F or press the
appropriate number pads for temperatures
between 145° and 190° F.
3. KEEP WARM and the temperature selected
will be displayed when the function is active.
4. When warming is complete, press CANCEL
pad. Remove food from the oven.
KEEP WARM
❚ For optimal food quality and nutrition,
oven cooked foods should be kept warm
for no longer than 1 to 2 hours.
❚ For optimal food quality and color, foods
cooked on the range top should be kept
warm for an hour or less.
❚ To keep foods from drying, cover loosely
with foil or a lid.
❚ To warm dinner rolls:
- cover rolls loosely with foil and place in
upper oven.
- press KEEP WARM and AUTO SET
pads.
- warm for 12-15 minutes.
❚ To warm plates:
- place 2 stacks of up to four plates each
in the upper oven.
- press KEEP WARM and AUTO SET
pads.
- warm for five minutes, turn off the oven
and leave plates in the oven for 15
minutes more.
- use only oven-safe plates, check with
the manufacturer.
- do not set warm dishes on a cold sur-
face as rapid temperature changes
could cause crazing.
NOTES: