


26P/N60250September28,2012
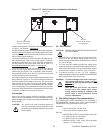
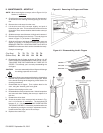
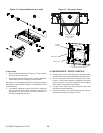
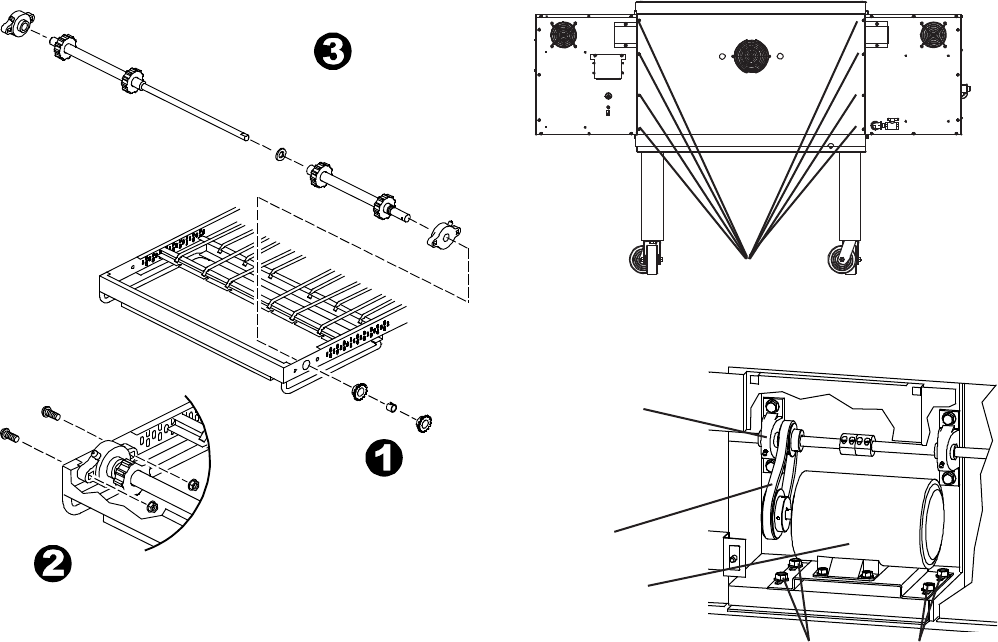
Figure 4-6. Disassembling the drive shaft
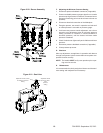
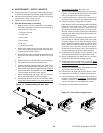
E. Blower Belt
1. Remove the six screws shown in Figure 4-7. Then, remove
the rear panel from the oven.
2. Check the blower belt for the proper 1/4″ (6mm) deection
at the center, and for cracking or excessive wear.
See Figure 4-7. Overtightening the belt will cause premature
bearing failure and possible vibrations. A loose belt may also
cause vibrations.
3. If necessary, adjust the tension of the belt by loosening
the four motor mounting bolts. Reposition the motor as
neccessary until the correct 1/4″ (6mm) deection is
reached, then tighten the bolts.
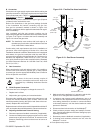
Figure 4-7. Rear panel access
Remove eight (8)
screws to remove
rear panel
Blower belt
Bearings
(2total)
Blower motor
Loosen four (4) screws to adjust mo-
tor position and belt tension
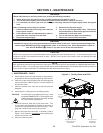
IV. MAINTENANCE - EVERY 6 MONTHS
A. Check that the oven is cool and the power is disconnected,
as described in the warning at the beginning of this Section.
B. Check for excessive wear on the conveyor drive motor
brushes. The brushes should be replaced if they have
worn to less than 1/4" (6mm) in length. Be sure to replace
the brushes in exactly the same position.
C. For gas ovens, inspect and clean the burner nozzle and
the spark electrode assembly.
D. Check the conveyor drive shaft bushings and spacers.
Replace the components if they are worn.