BEFORE BAKING
(Use For All Settings)
CONT.
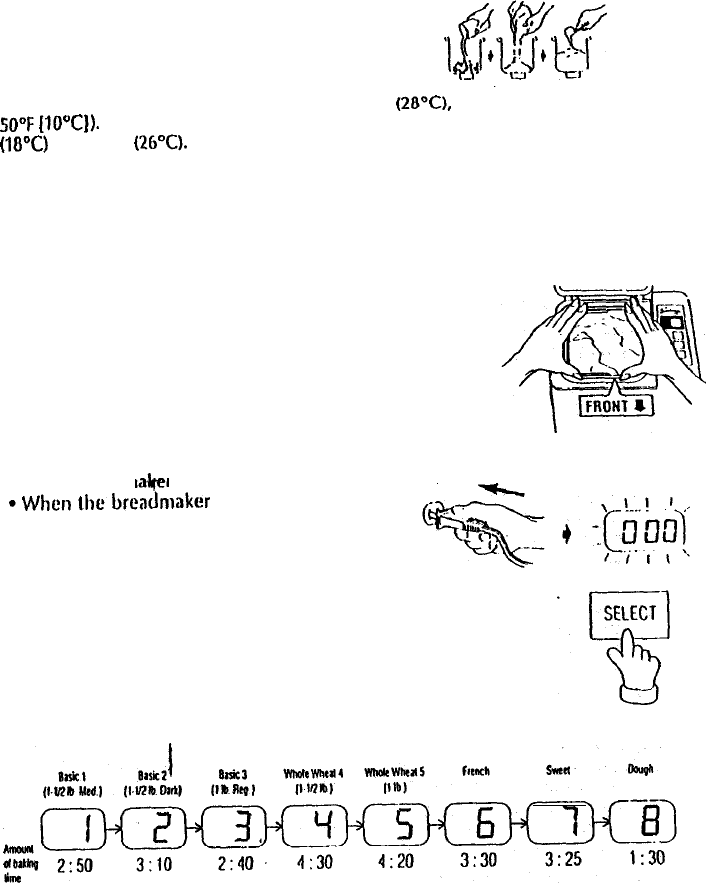
6. Assemble ingredients on your kitchen counter in order of use before adding them
to the inner pot. Measure ingredients into the inner pot in the order given in the
recipe. Once all ingredients have been-added lo the inner pot, recheck the recipe
lo be sure each one was used, and in the correct quantity and order.
l
The correct order of adding ingredients is:
1. Water and other liquids (including eggs)
2. Flour, shortening, sugar, salt, elc.
3. Active dry yeast
I
Note: When
the
room temperature is over 02°F (28’C), use cold water (about
SO”F
[IOYI)). When room temperature is normal, use waler between 65°F
(10°C)
and 70°F
(26°C).
IMPORTANT: When using the Delayed Finish
feature,
please
pay special
attention
to
the order of ingredients. When adding
the
dry yeast, make a
hollow depression in the mound of flour ancl pour the dry yeast into il.
Do
not let the yeast touch the water or the dough may
not
rise properly.
7. Place the inner pot into the inner case.
l Wipe off any moisture from the outer side of
the
inner
pot before placing it into the inner case.
l Make sure the word FRONT on
the
upper rim of the
inner pot is facing toward the front of the breadmaker.
l Push down on rim until inner
pot
locks into place.
l Unless the inner pot is securely placed inside the
breadmaker, the
bread
will not bake correctly.
8, Close the lid.
9. Plug the
breadm
r into a 120 volt 60
Hz
AC outlet.
is plugged in, the
display window will flash “0
00,"
within
, a
minute.
10. Select the desired setting.
l
Press the SELECT pad until the number of the desired
setting appears in the display window.
l
Each time the SELECT pad is pressed, the display window
changes IO the number of the
next
setting.
l The number of the setting and the required amount of
time in hours and minutes for each setting will appear.
CRUST CONTROL


