


4
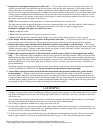
Wash sealing ring, cover, body, and cooking rack (Fig. C) in hot, sudsy water to remove any packaging material and white
manufacturing lubricant. Rinse all parts with warm water and dry. Then, replace the sealing ring, being careful to t it
under the stop tabs and the lock pin (Fig. D) which are located on the inside rim of the cover.
how To use
To assure the very best results every time, carefully follow these step-by-step instructions for pressure cooking. You may
nd it helpful to refer back to Fig. C on page 3.
1. Prepare ingredients according to the directions in the pressure cooking recipe you have
selected. If a larger quantity is desired, you may increase the ingredients by
1
⁄
2
. Be sure not to
overll the pressure cooker (see page 5 for guidance on lling).
Pour liquid into the cooker body, as specied in the recipe or timetable. This liquid is usually
water. However, some recipes specify other liquids, such as wine.
2. Place the cooking rack into the cooker, if called for in the recipe (see Helpful Hints on
page 8 for guidance on when to use).
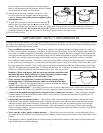
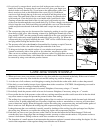
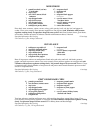
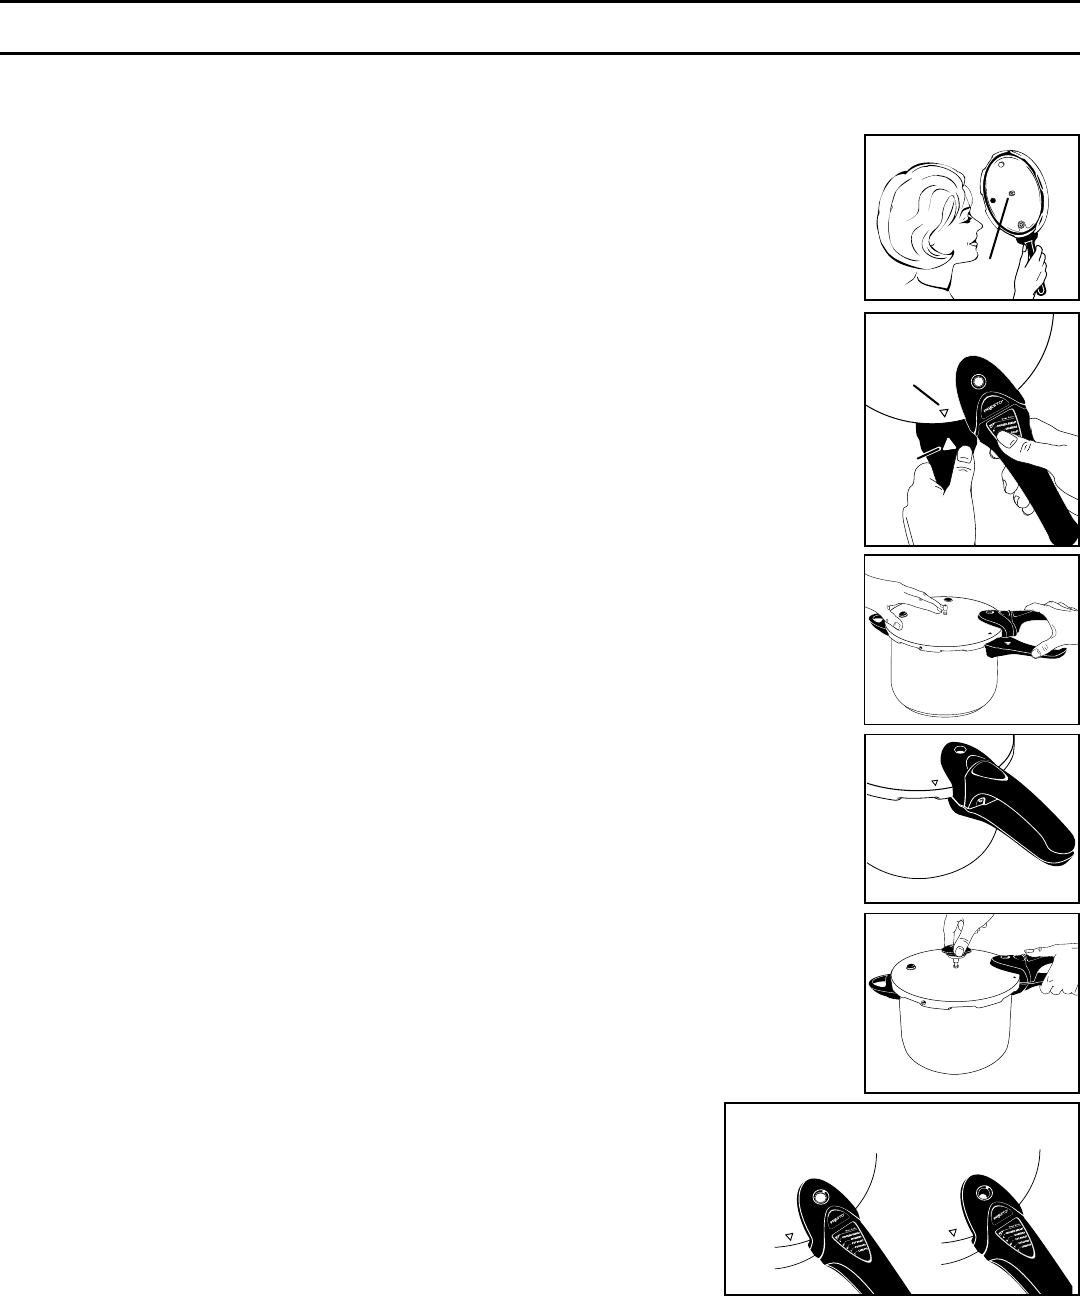
3. IMPORTANT: Look through the vent pipe to make certain that it is clear (Fig. E) before
placing cover on cooker body. See safety information on page 5 and 6. If blocked, clean as
described on page 6, step 3.
Holding the body handle with your left hand and the cover handle with your right hand, align
the mark on the cover with the mark on the body handle and place the cover on the
cooker body (Fig. F).
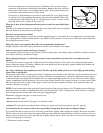
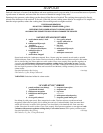
4. After placing the cover on the cooker body, place one hand on the cover opposite the body
handle and apply a slight downward pressure. Place the thumb of your other hand on the side
of the body handle and wrap your ngers around the cover handle (Fig. G). Then rotate the
cover clockwise until the cover handle lines up with the body handle. The pressure cooker
is completely closed when the cover handle is directly above the body handle (Fig. H).
5. Place the pressure regulator on the vent pipe (Fig. I). The pressure regulator will t loosely
on the vent pipe. It will not touch the top of the pressure cooker cover.
6. Using a high heat setting on your stove, heat the pressure cooker until the pressure regulator
attains a gentle rocking motion.
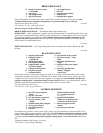
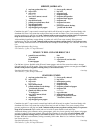
NOTE: The air vent/cover lock may move up and down a few times when cooking rst be-
gins as it automatically exhausts air from the pressure cooker. Steam will be noticeable. This
is normal. When pressure begins to build, it slides up, locking the cover on.
Once the cooker has sealed, the air vent/cover lock will remain in the up position until pres-
sure is released (Fig. J).
7. Cooking time begins when the pressure regulator begins to rock gently. Gradually lower the
heat as necessary to maintain a slow, steady rocking motion and cook for the length of time
indicated in the recipe or timetable. If the pressure regulator is allowed to rock vigorously,
excess steam will escape. Therefore, too much liquid will evaporate and food may scorch.
Never leave your pressure cooker unattended at high heat settings. It could boil dry, overheat,
and cause damage to the pressure cooker.
8. When cooking time is complete, turn off burner. If using an electric stove, remove pressure
cooker from burner. Caution: Lift pressure cooker to remove it from burner. Sliding
cookware can leave scratches on stovetops.
9. Reduce pressure according to the recipe or timetable instructions. If the
instructions say “Let the pressure drop of its own accord,” set the pressure
cooker aside to cool until pressure is completely reduced. If the instructions
state, “Cool cooker at once,” cool the pressure cooker under a running water
faucet (Fig. K, page 5) or pour cold water over it, or place it in a pan of cold
water (Fig. L, page 5) until pressure is completely reduced. Note: Do not
set hot cooker in a sink that is not heat resistant, as it could damage
the sink. Pressure is completely reduced when the air vent/cover lock has
dropped.
Fig. E
Vent
Pipe
Mark
Fig. F
Mark
Fig. I
Fig. H
Fig. G
Air Vent/Cover
Lock in UP Position.
Pressure in Unit.
Air Vent/Cover Lock
in DOWN Position.
No Pressure in Unit.
Fig. J