


11
Refit the cable, pipe, door and top cover in the reverse
sequence.
When removing the hinge and separating it from the
door body make sure to support the door to stop it
falling forward.
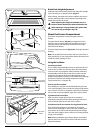
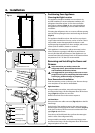
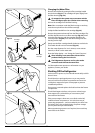
Removing the Upper Freezer Drawer
Open the drawer as far as possible. Remove the ice tray and
divider. Pull the rear section of the drawer inner compartment
upwards slightly to enable the front section to be released
from the door.
Hold and pull the front section of the inner compartment
upwards to remove it from the refrigerator.
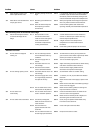
Undo the retaining screws (Fig.4-7) holding the upper
drawer to the telescopic runners. Lift the drawer upwards and
remove.
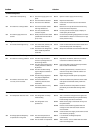
Removing the Lower Freezer Drawer Inner
Compartment
Open the drawer as far as possible. Pull the rear section of the
drawer inner compartment upwards slightly to enable the
front section to be released from the door (Fig.4-8).
Hold the front section of the inner compartment and pull it
upwards to remove it from the refrigerator.
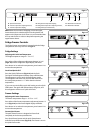
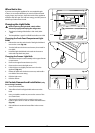
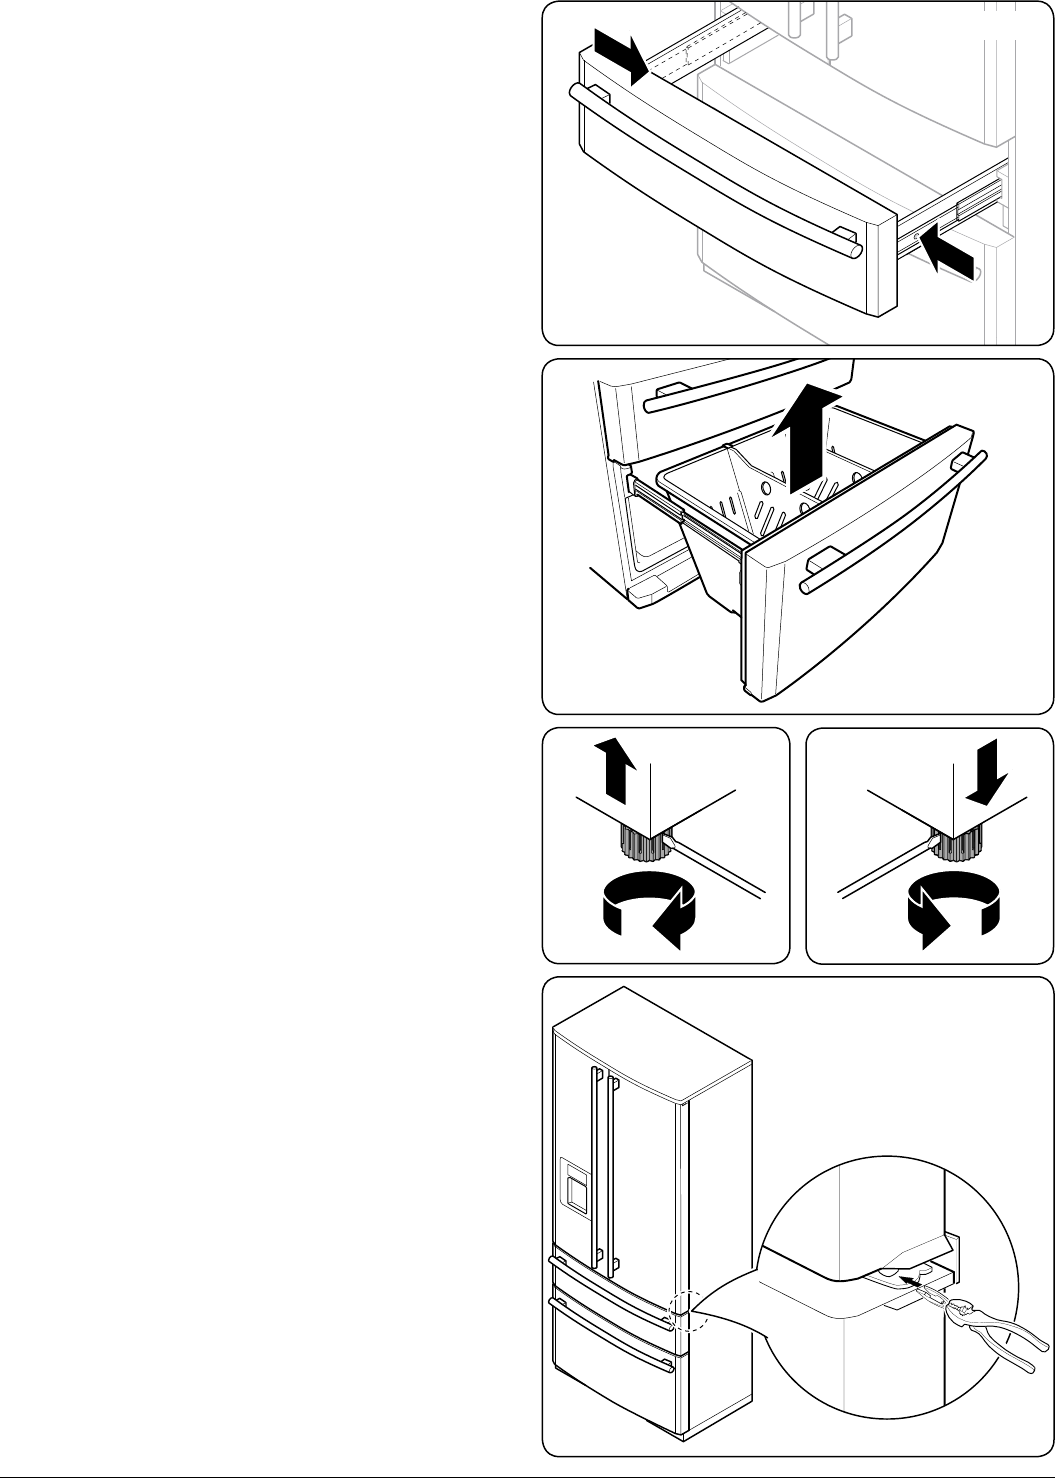
Adjustable Feet
Make sure that the appliance is on solid level flooring. If the
refrigerator is placed on a plinth, flat, strong and fire resistant
materials must be used.
This appliance has front adjustable feet, which can be used to
level the appliance.
Insert a suitable flat screwdriver into the slots of the
adjustable feet. Turn the screwdriver clockwise to raise the
feet (Fig.4-9), and anti-clockwise to lower the feet (Fig.4-10).
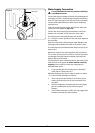
Levelling the Doors
If the door heights are uneven, spacer rings (supplied) can be
inserted to raise the door level.
Raise the door up from the lower hinge. Using a suitable pair
of pliers, insert a clip ring between the door and hinge
(Fig.4-11). Up to three clip rings can be inserted as required.
Electrical Supply Connection
Connect the appliance to the electrical supply (220–240V ~
50Hz) with the plug and lead, which are fitted.
Connections to the mains supply should be in accordance
with local regulations.
The appliance must be plugged into an earthed
socket.
Always make sure that the plug is accessible after
the appliance has been positioned.
ArtNo.600-0013 - Removing the deep freezer drawer
ArtNo.600-0035 - Adjusting the feet
ArtNo.600-0035 - Adjusting the feet
ArtNo.600-0003 - Door alignment
Fig.4-8
Fig.4-10
Fig.4-11
Fig.4-9
ArtNo.600-0012 - Removing the upper drawer
Fig.4-7