32 Chapter 1
Getting Started
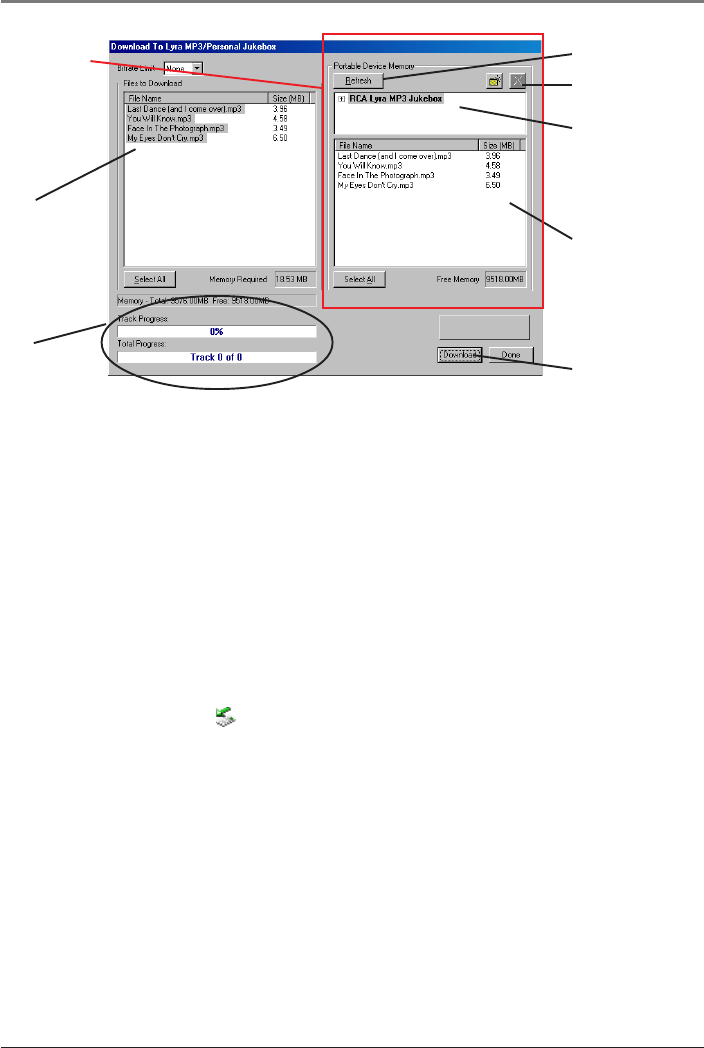
4. After you have selected all of the music you want to transfer to your Lyra Jukebox,
click the Download button on the bottom of the screen.
IMPORTANT: If your Lyra Jukebox doesn’t appear in the Portable Device Memory
area, click the REFRESH button.
During transfer a progress indicator appears in the Download to Lyra MP3/Personal
Jukebox screen (shown above), and Transfer in progress appears in the Lyra
Jukebox’s LCD.
When the transfer is finished, the Lyra MP3/Personal Jukebox Profiler application
automatically runs so it can sort/profile the newly transferred files.
Caution: Make sure all data are transferred to the Lyra Jukebox before unplugging
the USB cable.
If you’re running Windows 2000, XP, or Me, you must stop the device before
unplugging it. Click the icon (the Unplug or Eject hardware icon) from the system
tray and select the USB Mass Storage device for the drive letter associated with the
Lyra Jukebox, and click STOP. See the Windows Help for details about the Unplug or
Eject Hardware topic.
Deleting Files
To delete files from the Lyra Jukebox:
1. Select the Jukebox device item from the Portable Device Memory area.
2. Select the files to be deleted.
3. Press the DELETE button on the screen.
Note: For information about the drag and drop method for transferring files, go to
page 24.
Files to
Download
area
This is the
Portable
Device
Memory
area
Files stored on your
Lyra Jukebox’s hard
drive
Refresh button
Progress
indicator
Delete button
Download button
Device connected to
your computer’s USB
port (in this example,
your Lyra Jukebox)


