


2
2 - 29
W-2WAY ECO-i SYSTEM
Outdoor Unit Repair Procedures
10. Compressor
Removal
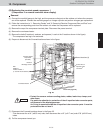
(1) Connect a manifold gauge to the high- and low-pressure outlet ports at the outdoor unit where the compressor
will be replaced. Connect the manifold gauge to a nitrogen cylinder and perform nitrogen gas replacement in
the outdoor unit tubings.
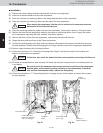
(2) Follow the instructions in “1. Removing Panels” and “2. Removing Electrical Component Box and Duct” and
remove the corresponding parts from the outdoor unit where the compressor will be replaced.
(3) Remove the cap at the compressor terminal plate. Disconnect the power terminal.
(4)
(5)
(6)
(7)
(8)
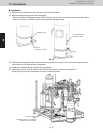
(9) Pull the compressor toward you.
NOTE
CAUTION
CAUTION
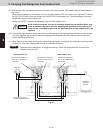
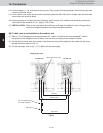
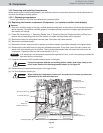
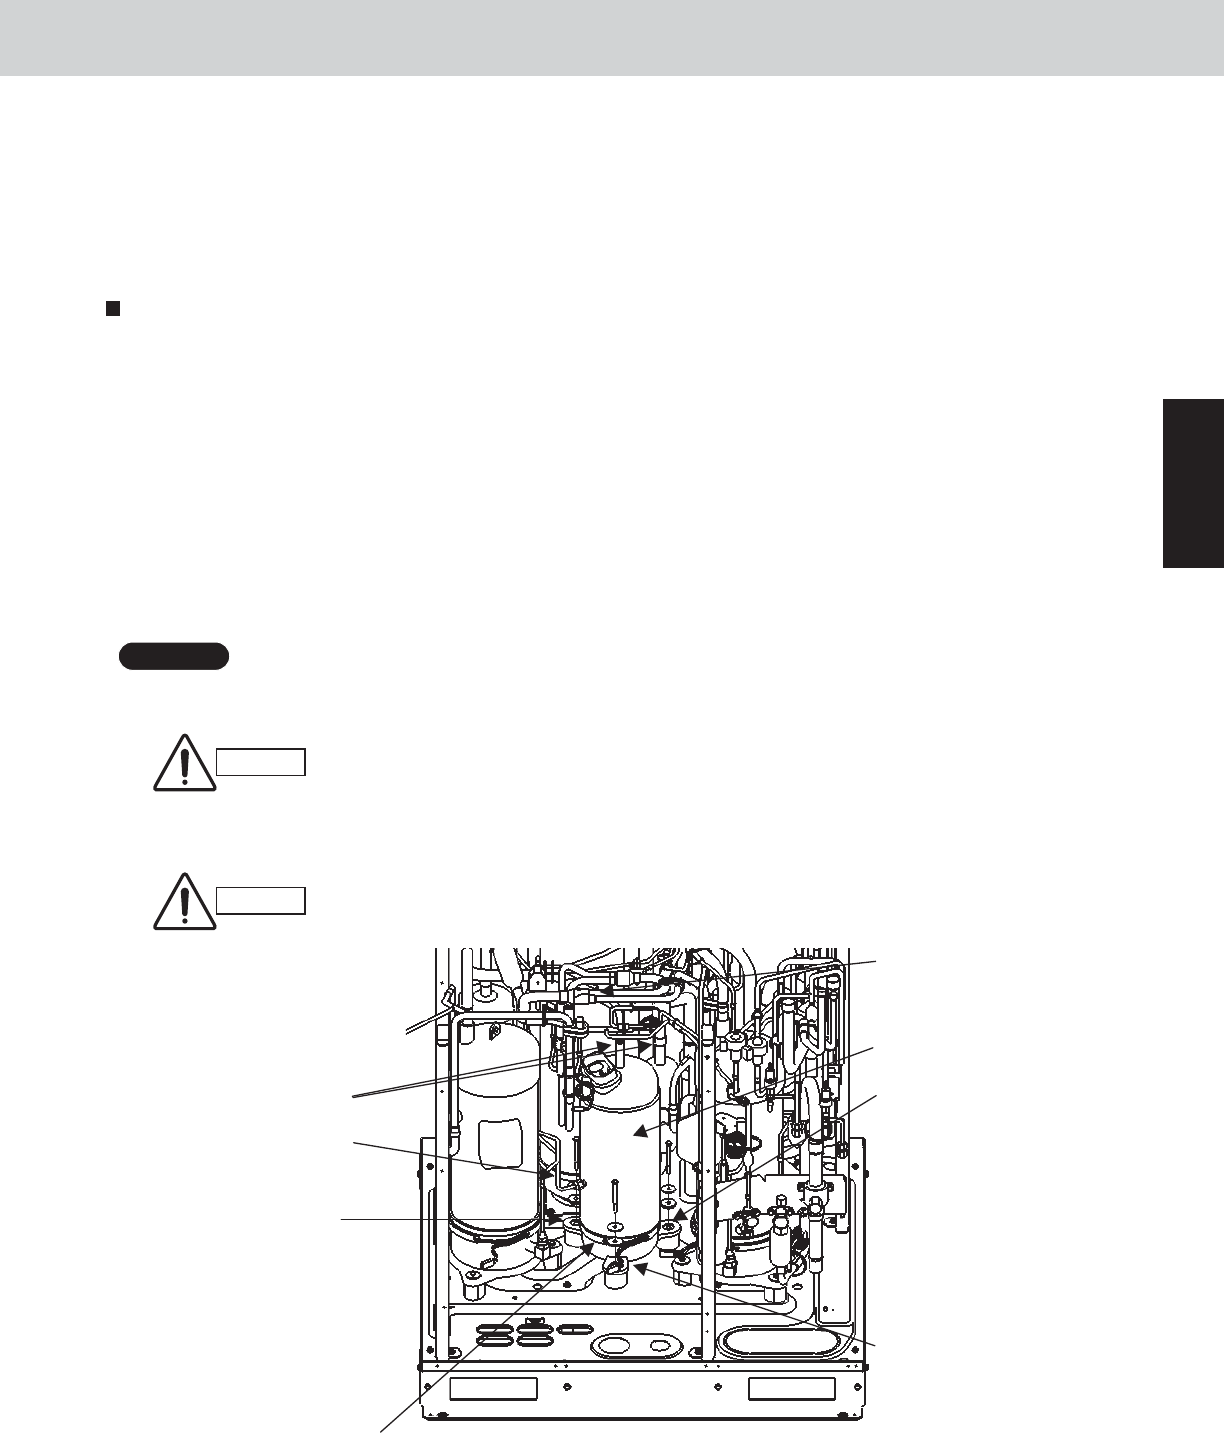
Fig. 22
Remove the
discharge sensor
Bolt
Washer (1)
Rubber washer (1)
Bolt
Washer (1)
Rubber washer (1)
Front view
10-3. Removing and Installing Compressors
When removing and installing compressors, use sufficient caution to ensure that moisture or other substances do
not enter the refrigerant tubing system.
10-3-1. Replacing compressors
* For all types 90 and 140, follow the replacement procedure below.
(A) Replacing the inverter compressor (Compressor 1 on remote controller alarm display)
Remove the crankcase heater.
Remove the 3 bolts, and remove the washers and rubber washers (quantities indicated in the figure below).
Disconnect the tube-with-flare-nut using two adjustable wrenches. At this time, cover the tube in place with
waste cloth while watching out for oil leaks. Then cap the disconnected tube and mount the flare nut on the
compressor. Tighten the flare nut with a seal bonnet (1/4") in it.
If oil remaining in the compressor reaches the equalized oil level, oil will come pouring out when the
tube-with-flare-nut is removed.
Prepare to disconnect the 2 brazed locations shown in the figure.
Protect the sensors and the surrounding plates, rubber, lead wires, clamps, and
other items. Remove the discharge sensor shown in the figure 22.
Disconnect the 2 brazed locations shown in the figure below.
When pulling the compressor toward you, be careful not to cause any abnormal
deformation of the tube-with-flare-nut.
Brazed locations (2)
Tube-with-flare-nut
Bolt
Washer (1)
Rubber washer (1)
Crankcase heater
Inverter compressor