


2
2 - 36
12. Replacing 4-way Valve
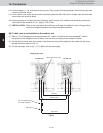
W-2WAY ECO-i SYSTEM
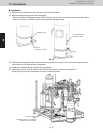
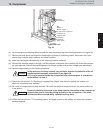
Outdoor Unit Repair Procedures
(1)
(2)
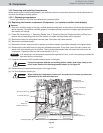
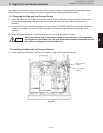
(3) Connect the manifold gauge to the high and low-pressure outlet ports at the outdoor unit where the 4-way
valve will be replaced. Connect the manifold gauge to a nitrogen cylinder and perform nitrogen gas replace-
ment.
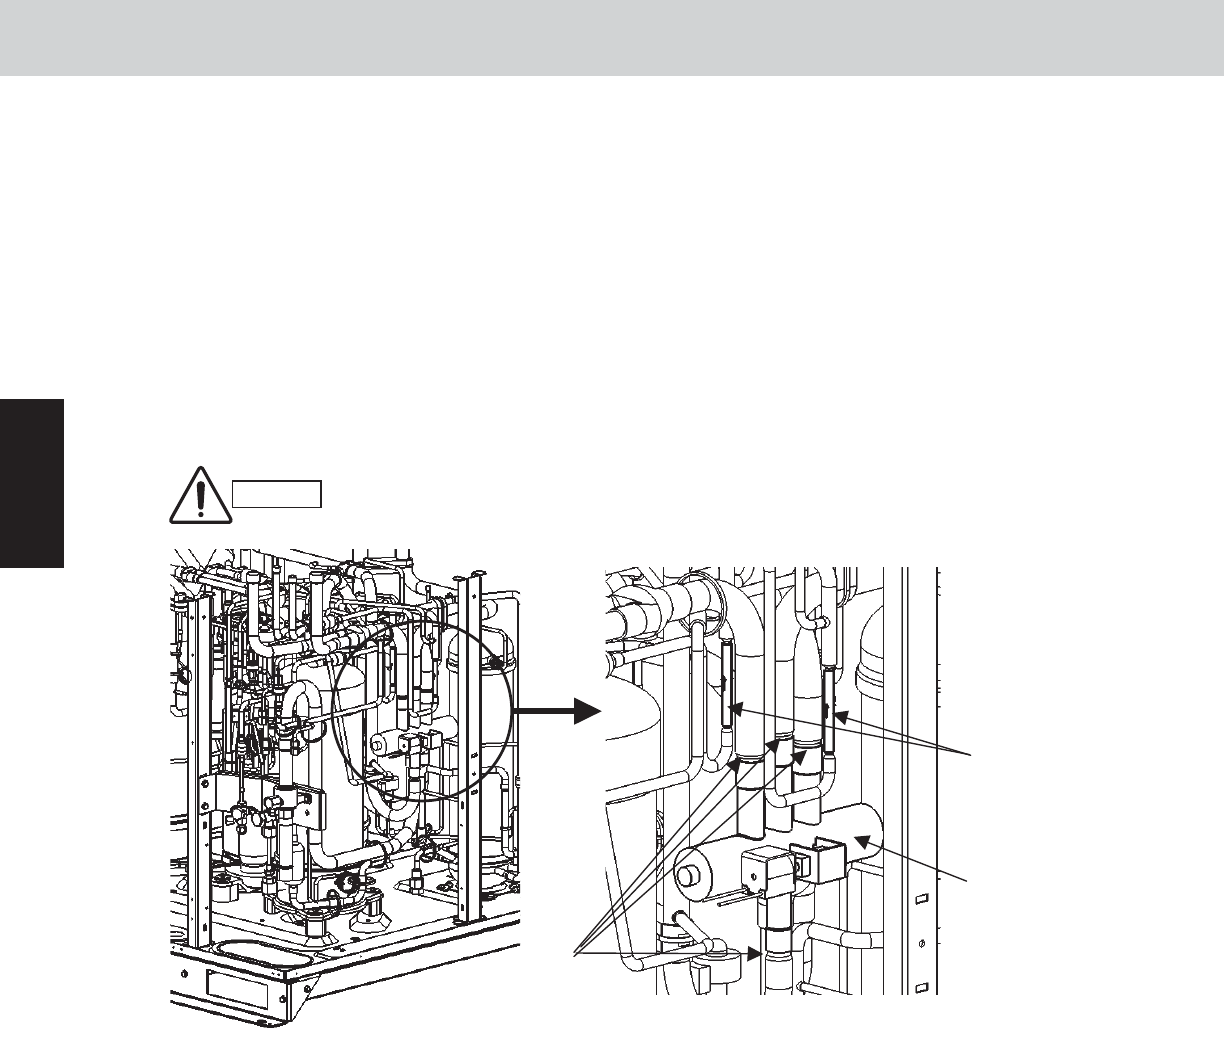
(4) Prepare the brazing kit to disconnect the brazed parts (4 locations).
(5)
(6)
(7)
CAUTION
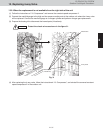
Brazed parts
(4 locations)
Fig. 30
When replacing 4-way valve of type 96 (for type with 1 or 2 compressor), be sure to protect check valves, which ar
e
located adjacent to the 4-way valve, while performing replacement work. Type 72 (for type with 1 compressor) is
not located near to the check valves, therefore no protection is necessary.
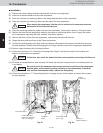
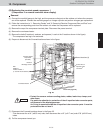
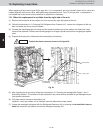
12-1. When the replacement is available from the right side of the unit
Remove the front panel of the outdoor unit, then remove the right side panel of the unit.
Follow the instructions in “9. Pumping Out Refrigerant from Outdoor Unit”, recover the refrigerant of the out-
door unit where the 4-way valve is located.
Protect the check valves as shown in the figure 30.
4-way valve
Check valve
After replacing the 4-way valve, follow the instructions in “6. Checking for Leakage After Repair”, and “7.
Evacuating System”. The outdoor unit after replaced 4-way valve shall be checked for gas leakage and per-
form system evacuation.
Fully open service valves on the outdoor unit.
However, if only one outdoor unit is installed, leave the balance tube kept closed.
Charge the recovered refrigerant with the Refrigerant Recovery Unit by referring to the Installation Instruc-
tions that came with the outdoor unit and the refrigerant recovery unit.