47
4
SCANNING USING THE KEYS ON
THE MACHINE
When scanning is performed by this method, the application that has been set in Button Manager will automatically
start and the scanned image will be pasted into the application. For the steps to allocate applications using the
Button Manager or other settings, see "BUTTON MANAGER SETTINGS" (p.49).
Scanning from the operation panel of the machine
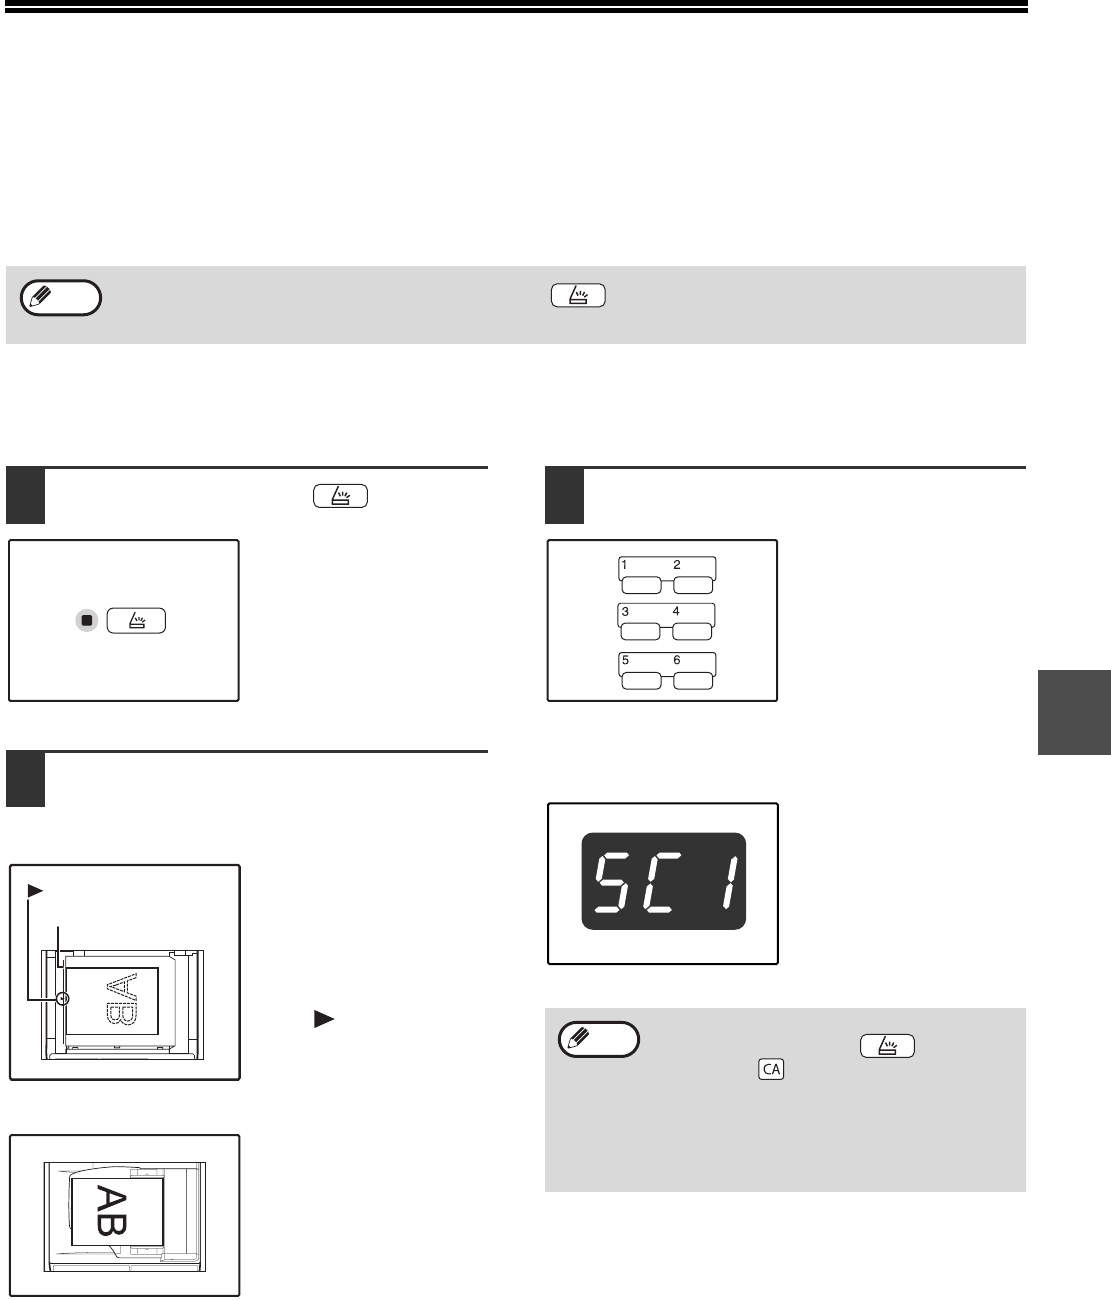
1
Press the [SCAN] key ( ).
When the SCAN indicator
lights up, the machine
enters scanner mode.
2
Place the original(s) that you wish to
scan on the document glass/RSPF.
[When scanning from the document glass]
Place the original face
down on the document
glass. Align the edge of
the original with the
original size scale, to be
centred with the centring
mark ( ).
[When scanning from the RSPF]
Set the original(s) face up
in the document feeder
tray.
3
Press the [SCAN MENU] key to begin
scanning.
Scanning will start and the
scanned data will be
transferred to the
application.
The target application can
be selected by the [SCAN
MENU] key.
For the default application
allocated to each key, see
"BUTTON MANAGER
SETTINGS" (p.49).
The display will show the
number of the [SCAN
MENU] key that you
pressed, and the number
will light and the SCAN
indicator will be blinking.
If the machine is in copy mode, press the [SCAN] key ( ) to switch to scanner mode and clear the previously
set copy settings.
Note
Original size scale
mark
• To return to copy mode from scanner mode,
press the [SCAN] key ( ) or [CLEAR
ALL] key ( ).
• For limitations on copying and printing in
scanner mode, and scanner mode while
copying or printing, see "OPERATION IN
COPY, PRINTER, AND SCANNER
MODES" (p.14).
Note
