


5
R-820BK
R-820BW
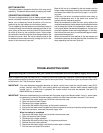
A short power-supply cord is provided to reduce risks of becoming
entangled in or tripping over a longer cord.
Where a two-pronged wall-receptacle is encountered, it is the personal
responsibility and obligation of the customer to contact a qualified
electrician and have it replaced with a properly grounded three-pronged
wall receptacle or have a grounding adapter properly grounded and
polarized. If the extension cord must be used, it should be a 3-wire, 15
amp. or higher rated cord. Do not drape over a countertop or table where
it can be pulled on by children or tripped over accidentally.
CAUTION: DO NOT UNDER ANY CIRCUMSTANCES CUT OR RE-
MOVE THE ROUND GROUNDING PRONG FROM THIS
PLUG.
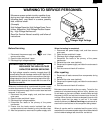
3-Pronged Plug
Grounded
Receptacle Box
Grounding Pin
3-Pronged Receptacle
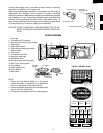
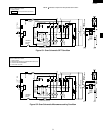
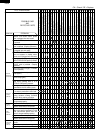
OVEN DIAGRAM
1. Oven light
2. Top heaters (Grill heaters)
3. Oven door with see through window
4. Door hinges
5. Safety door latches
6. Door seals and sealing surfaces
7. Bottom heater
8. Oven cavity
9. Turntable motor shaft
10.Ventilation openings
11.Waveguide cover
12.One touch door opening button
13.Auto-Touch control panel
14.Time display
15.Power supply cord
16.Outer cabinet
17.Menu label
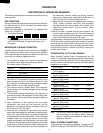
NOTE:
1. Ensure that the bottom heater is in the lowest
position as shown in the figure, as it is possible to
move it up and down to help with cleaning.
2. Place the turntable support over the turntable motor
shaft on the floor of the cavity.
3. Then place the turntable onto the turntable support.
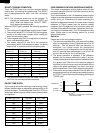
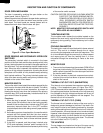
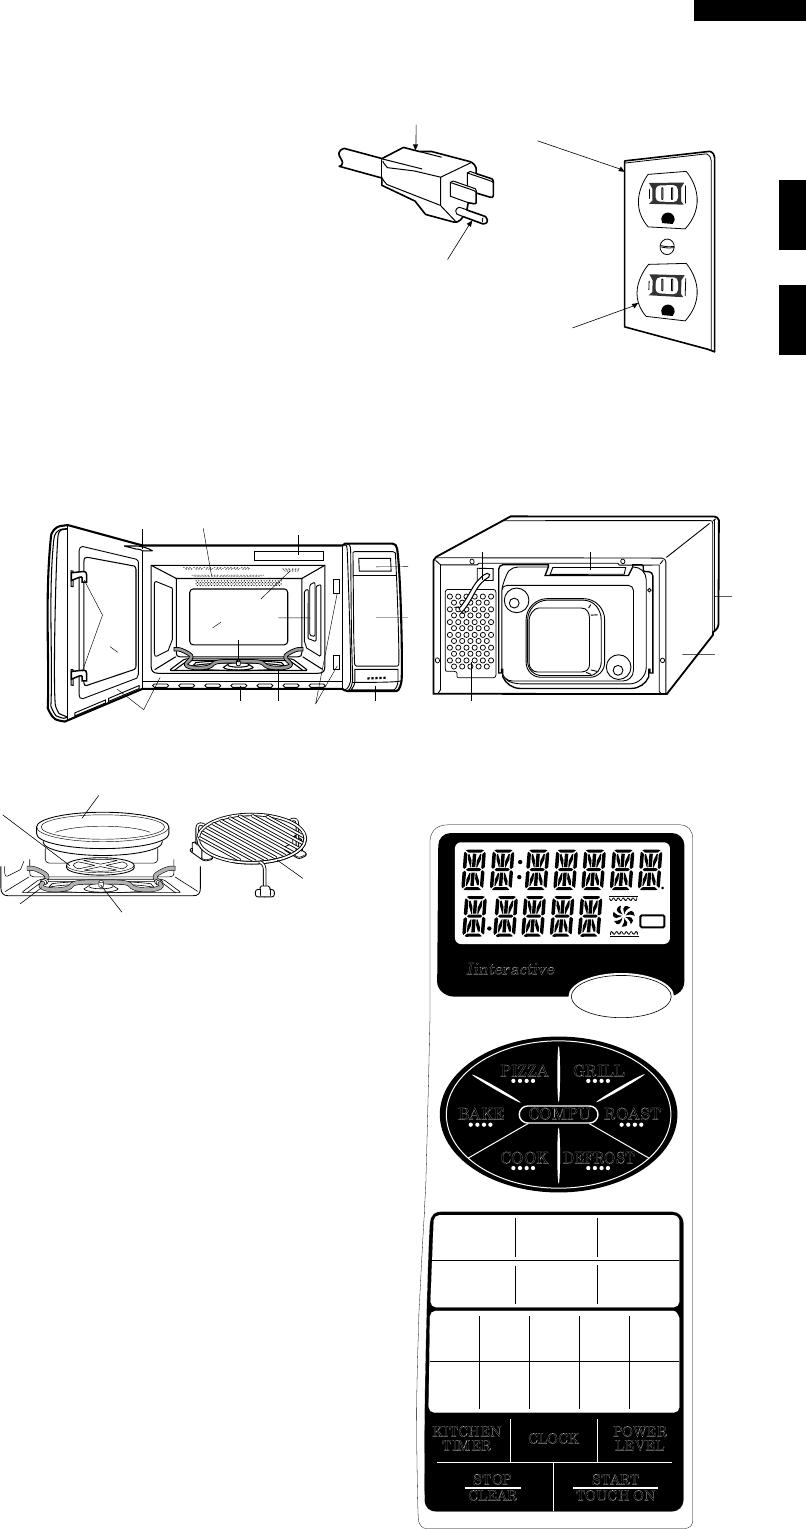
TOUCH CONTROL PANEL
Turntable Turntable
support
Rack
Turntable
motor shaft
Bottom
heater
COOK
HELP
CUSTOM
HELP
Iinteractive
COMPU
PIZZA GRILL
BAKE ROAST
COOK
DEFROST
CONVEC
GRILL ROAST
POPCORN
REHEAT
MINUTE
PLUS
KITCHEN
TIMER
STOP
CLEAR
START
TOUCH ON
CLOCK
POWER
LEVEL
100˚ F 150˚ F 275˚ F 300˚ F 325˚ F
350˚ F 375˚ F 400˚ F 425˚ F 450˚ F
12345
6789O
1
4
u
3
0
0
0
0
5
5
2
6
w7
9
8
q
e
r
t
y