MODEL EZ-3 & EZ-5 COUNTERTOP STEAMERS TROUBLESHOOTING
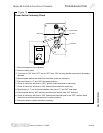
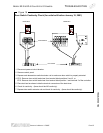
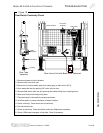
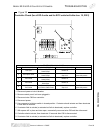
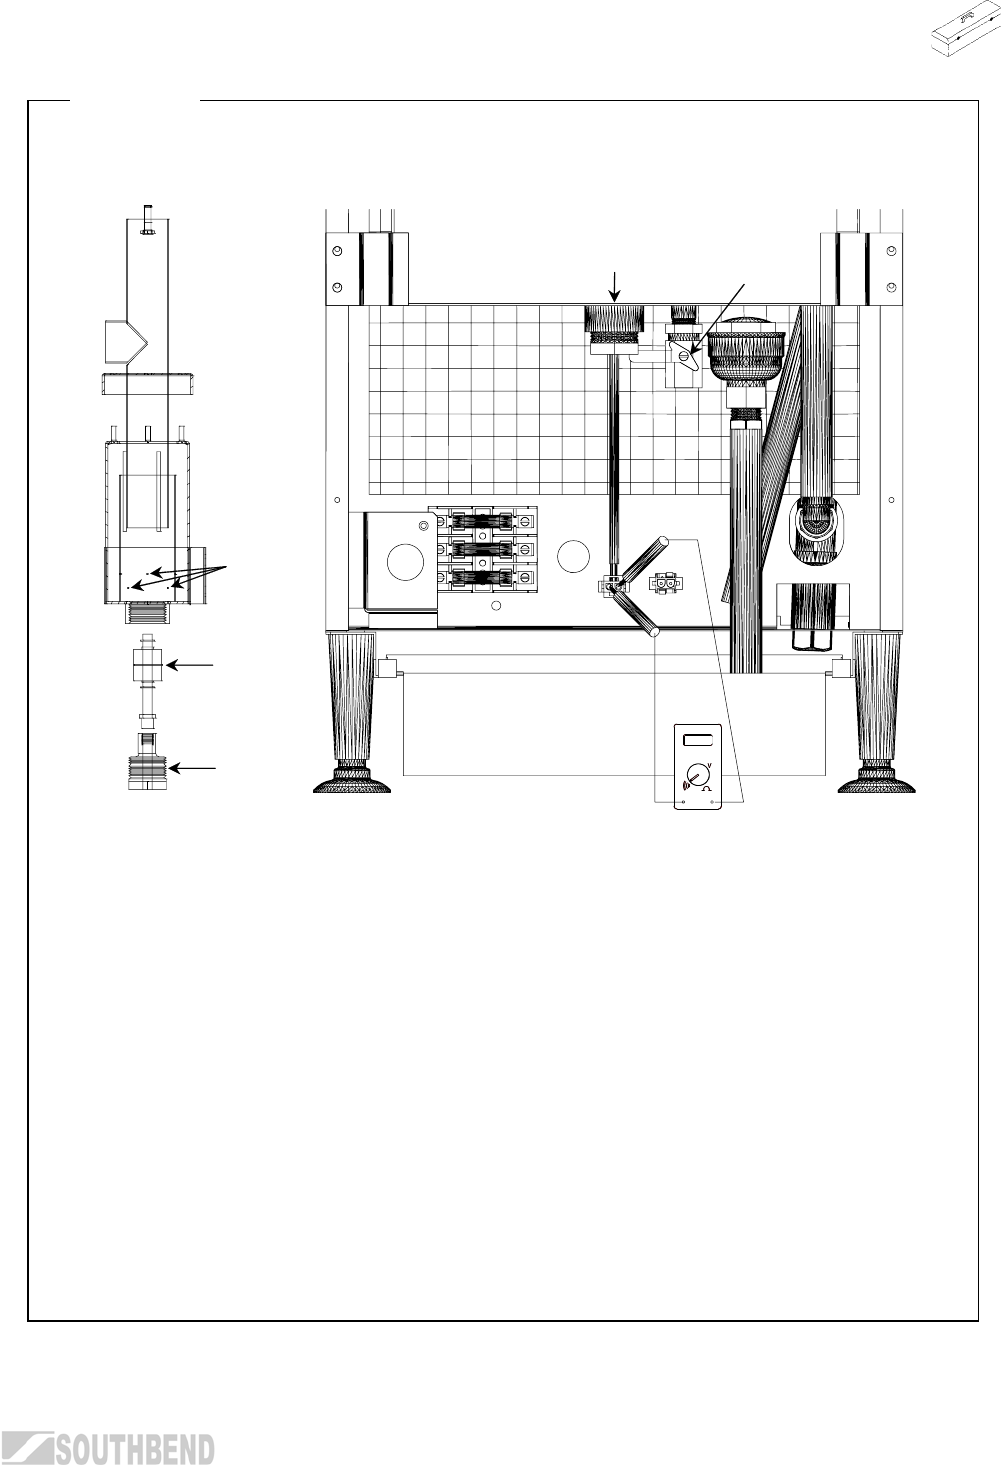
Figure 18
Float Switch Continuity Check
Water Seal Box
Float Tube
Assembly
Float Switch
Drain Valve
Rear View of Unit with Back Cover Removed
Coupling
Water
Passages
Float Tube
Assembly
1. Disconnect power at circuit breaker.
2. Remove rear cover from unit.
3. Disconnect 2 pin float switch plug from mating plug on back of unit (PL2).
4. Drain water seal box by opening 3/8" drain valve on box.
5. Remove float switch from box by removing float switch fitting from coupling on box.
6. Make sure float travels freely along stem.
7. Place test leads in float switch connector as shown.
8. Hold float switch in same orientation as when installed.
9. Check continuity. There should not be continuity.
10. Flip float switch over.
11. Check for continuity. There should be continuity. Replace as necessary.
12. Check 0.060 water passages in float tube. Clean if necessary.
TROUBLESHOOTING
OPERATOR’S MANUAL 1178387 PAGE 29


