


11
A. Prepare detergent water by mixing 2 oz. of
Palmolive detergent or equivalent in 2 gallons of
90° to 110°F (32° to 43°C) water. Place all parts
in detergent solution and clean with provided
brushes. Rinse all parts with clean 90° to 110°F
(32° to 43°C) water.
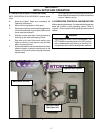
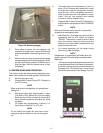
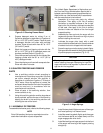
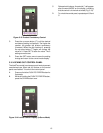
B. Wash the hopper and freezing cylinder with the
90° to 110°F (32° to 43°C) detergent water and
brushes provided (Refer to Figure 3-9).
C. Clean the rear seal surfaces from the inside of the
freezing cylinder with the 90° to 110°F (32° to
43°C) detergent water.
D. Clean the drip tray and insert with a soap solution.
Rinse with clean hot water.
3.10 SANITIZE FREEZER AND FREEZER
PARTS
A. Use a sanitizing solution mixed according to
manufacturer's instructions to provide 100 parts
per million strength solution. Mix sanitizer in
quantities of no less than 2 gallons (7.5 liters) of
120°F water. Allow the sanitizer to contact the
surfaces to be sanitized for 5 minutes. Any sanitizer
must be used only in accordance with the
manufacturer's instructions.
B. Place all parts in the sanitizing solution, then
remove and let air dry.
C. Using this sanitizing solution and the large barrel
brush provided, sanitize the rear of the barrel by
dipping the brush in the sanitizing solution and
brushing the rear of the barrel.
3.11 ASSEMBLY OF FREEZER
To assemble the freezer parts, refer to the following steps:
NOTE
Petrol Gel sanitary lubricant or equivalent must be
used when lubrication of parts is specified.
NOTE
The United States Department of Agriculture and
the Food and Drug Administration require that lu-
bricants used on food processing equipment be cer-
tified for this use. Use lubricants only in accordance
with the manufacturer’s instructions.
A. Assemble all o-rings onto parts dry, without
lubrication. Then apply a thin film of sanitary
lubrication to exposed surfaces of the o-rings.
Apply a thin film of sanitary lubricant to metal part
of rear seal. Also apply a thin film of sanitary
lubricant inside and outside of the front auger
support bushing.
B. Assemble the rear seal onto the auger with the
large end to the rear. Be sure the o-ring is in place
before installing the rear seal.
C. Lubricate the auger drive (rear) with a small
amount of white socket lubricant. A small container
of socket lubricant is shipped with the freezer.
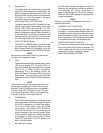
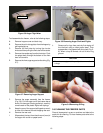
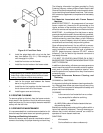
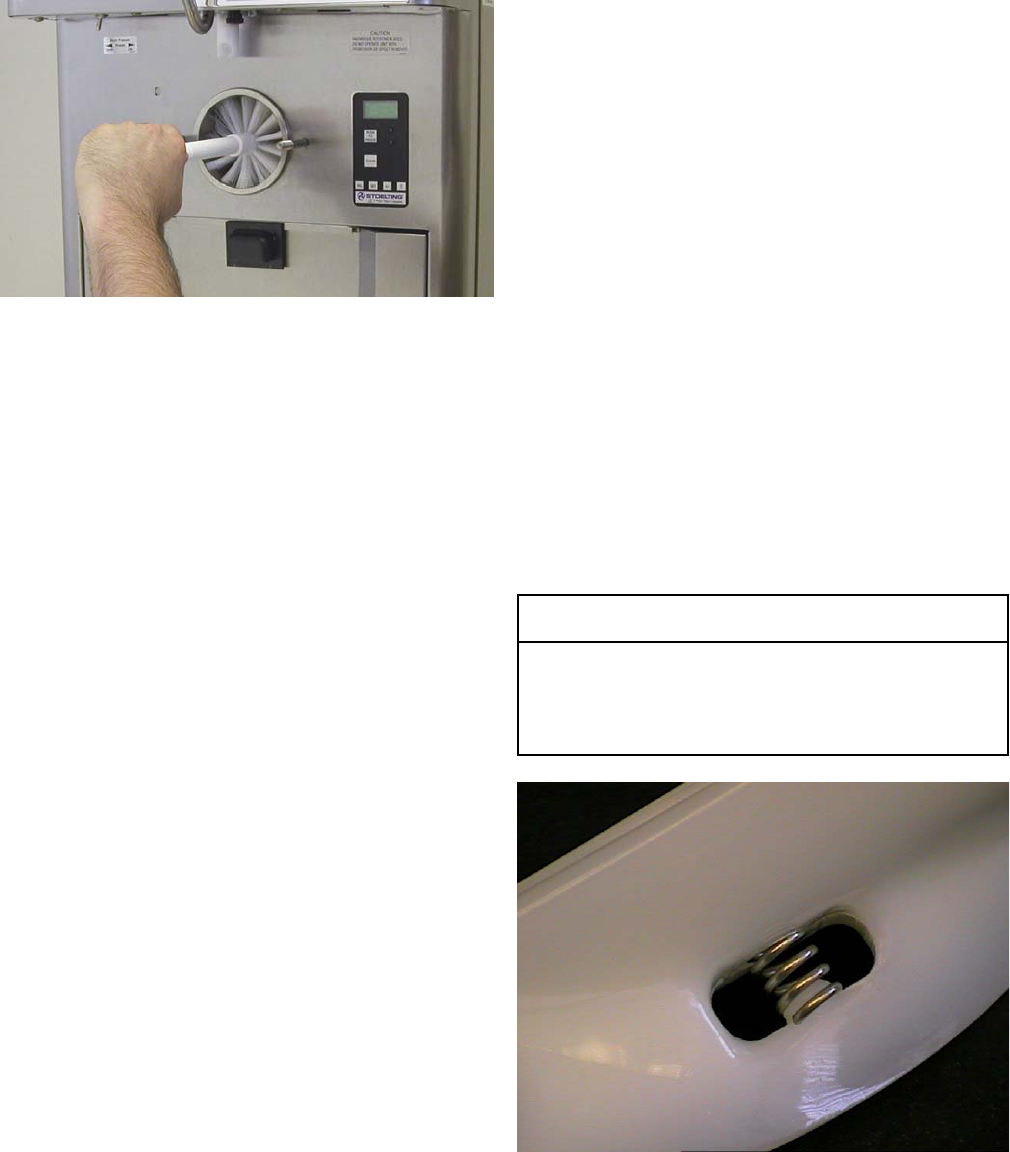
D. Screw the springs onto the studs in plastic flights.
Springs must be screwed into the flights completely
to provide proper compression (Fig. 3-10).
CAUTION
Do not place the mix inlet regulator into the hopper
before installing the auger. Attempting to install the
auger with the mix inlet regulator in place will dam-
age the mix inlet regulator.
E. Install the two plastic flights onto rear of the auger
and insert part way into freezer barrel.
F. Install the remaining plastic flights, push the auger
into the freezer barrel and rotate slowly until the
auger engages the drive shaft.
G. Install the bushing and auger support into the front
of the auger with one leg of the support pointing
straight up.
Figure 3-10 Cleaning Freezer Barrel
Figure 3-11 Auger Springs