


9
UNPACK THE UNIT
Uncrate the unit, remove its wood base and
d
iscard the shipping bolts that hold the wood
base to the bottom of the unit. Remove all
packing materials and tape.
IMPORTANT NOTE:
Do not discard the
kickplate, anti-tip blocking kit and hardware.
T
hese items will be needed for installation.
Retract the front leveling legs to allow you to
move the unit more easily during installation.
You will extend the leveling legs when the unit
is in its final position to reduce the possibility
of the unit tipping forward.
Remove the drain pan from the base of the
unit to avoid damage to the drain pan, and
allow for proper placement of the appliance
dolly.
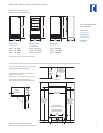
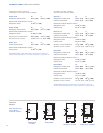
GRILLE REMOVAL
In order to prevent damage to the grille and to
access the power cord, the top grille assembly
s
hould be removed prior to moving the unit.
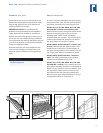
M
odels 611, 611G, 650, 650G, 661, 642, 685,
632 and 695—framed and stainless steel:
Remove three counter-sunk grille screws at the
b
ottom of the grille and cut the red nylon
shipping strap. NOTE: Grille screws are
accessed with door(s) open. Then tilt the grille
forward and release the springs from behind
the grille. Refer to illustration 1 below.
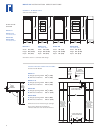
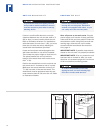
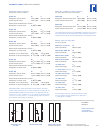
Models 601R, 601RG and 601F—framed and
overlay:
Remove the two black screws in the
lowest louver of the grille. Tilt the bottom of
the grille out and away. It will release from the
top of the grille. Refer to illustration 2 below.
Models 601R, 601RG and 601F—stainless
steel:
The lower grille snaps out by pulling
forward on the bottom of the grille.
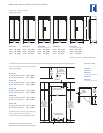
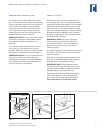
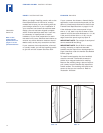
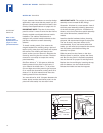
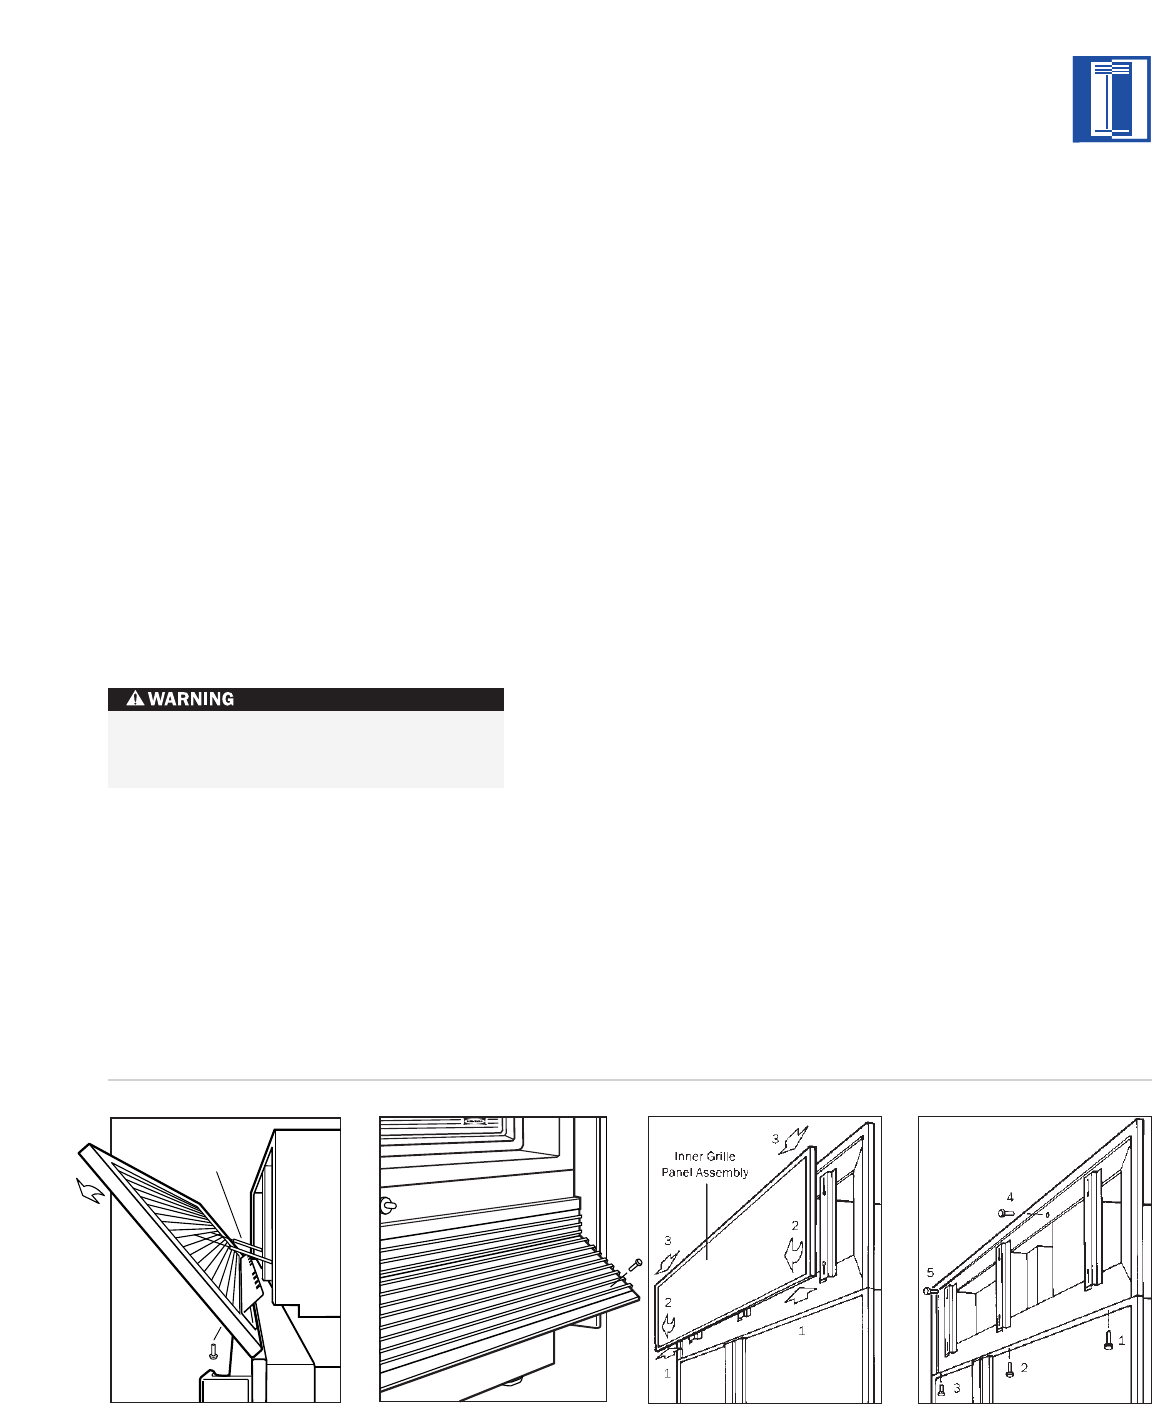
Models 611, 611G, 650, 650G, 661, 642, 685,
632 and 695—overlay:
First, remove the inner
grille panel assembly as shown in illustration 3
below. Lift up, then pull out at the bottom, pull
the top section down and out of the top key
slot. Remove the five mounting screws that
hold the outer grille panel assembly to the top
compartment. Refer to illustration 4.
Grille Springs
Grille
Screws
(inside door)
Illus. 1
Illus. 2
Illus. 3
Illus. 4
Keep door(s) and drawer taped closed
while moving unit.
BUILT-IN INSTALLATION INSTRUCTIONS