


7
BUILT-IN INSTALLATION INSTRUCTIONS
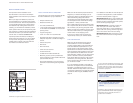
ELECTRICAL REQUIREMENTS
A 220-240 VAC, 50/60 Hz, 10 amp circuit breaker
a
nd electrical supply are required.A separate
circuit, servicing onlythis appliance, isrequired.
All Sub-Zero Built-In models are equipped with a
power supply cord with a 3-prong grounding
plug, which must be plugged into a mating
3
-prong grounding-type wall receptacle. Follow
local codes and ordinances when installing the
r
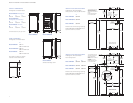
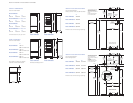
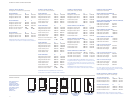
eceptacle.For location of the electrical supply,
refer to the Installation Specifications illustration
for your specific model on pages 4–6.
IMPORTANT NOTE:
A ground fault circuit
interrupter (GFCI)isnot recommended and may
cause interruption of operation.
IMPORTANT NOTE:
The Built-In line is
equipped with an appliance inlettype device.
This allows easy replacement of the power
cord. The appliance inlet is located on top of
the unit on the compressor shroud. When
replacing the power cord make sure that the
replacement cord is rated HO5VV-F3G1.0 or
equivalent to ensure safe operation of the
appliance.
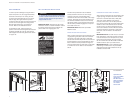
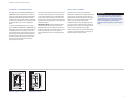
UNPACK THE UNIT
Uncrate the unit and inspect for any damages.
R
emove the wood base and discard the shipping
bolts and brackets that hold the wood base to
the bottom of the unit. Remove and discard all
packing materials.
IMPORTANT NOTE:
Do notdiscard the kick-
p
late, anti-tip bracket and hardware. Theseitems
will beneeded forinstallation.
R
etract the front leveling legs all the way up to
allow the unit to be moved into position more
easily. You will extend the levelinglegs when the
unit is in its final position to reduce the possibil-
ity of the unit tippingforward.
IMPORTANT NOTE:
The rear levelers mustbein
their lowest positioninorder to push the unit
back into the rough opening. Therefore, leveling
cannot be completed until the unit is in position.
Remove the drain pan from the base of the unit
to avoid damagetothe drain pan, and allow for
proper placement of the appliance dolly.
PLUMBING REQUIREMENTS
IMPORTANT NOTE:
A reverse osmosis system
c
an be used, provided there is constant water
pressure of 2.1 bar to6.9 bar supplied to the unit
at all times.
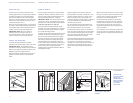
Rough in thecold watersupply line using 6 mm
OD copper line. The water line should be routed
u
p through the floor within 13 mm fromthe back
wall and no higher than 76 mm off the floor. If
y
ou haveto come through the wall, make sure
the water line is no more than 76 mm from the
floor.
Regardlessof the routing, allow .9 m of excess
copper tubing to remain outsidethe wall or floor
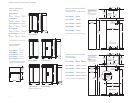
for easy connection to the unit. Locatethe water
supply line within the shaded area indicated in
the Installation Specifications illustration for
your specific model on pages 4–6.
Use aneasily accessible shut-off valve between
the water supply and the unit. Do not use
self-piercing valves. A saddle valve kit (4200880)
is available from your Sub-Zero dealer.
It is not recommended that the ice maker be
connected to a softened water supply. Water
softener chemicals, such as salt from a malfunc-
tioning softener, can damagethe ice maker and
lead topoor ice quality. If a softened water
supply cannot be avoided, be sure that the water
softener is well maintained and operating
properly.
IMPORTANT NOTE:
All installations must meet
local plumbing code requirements.
IMPORTANT NOTE:
This appliance shouldbe
connected to a potable water supply.
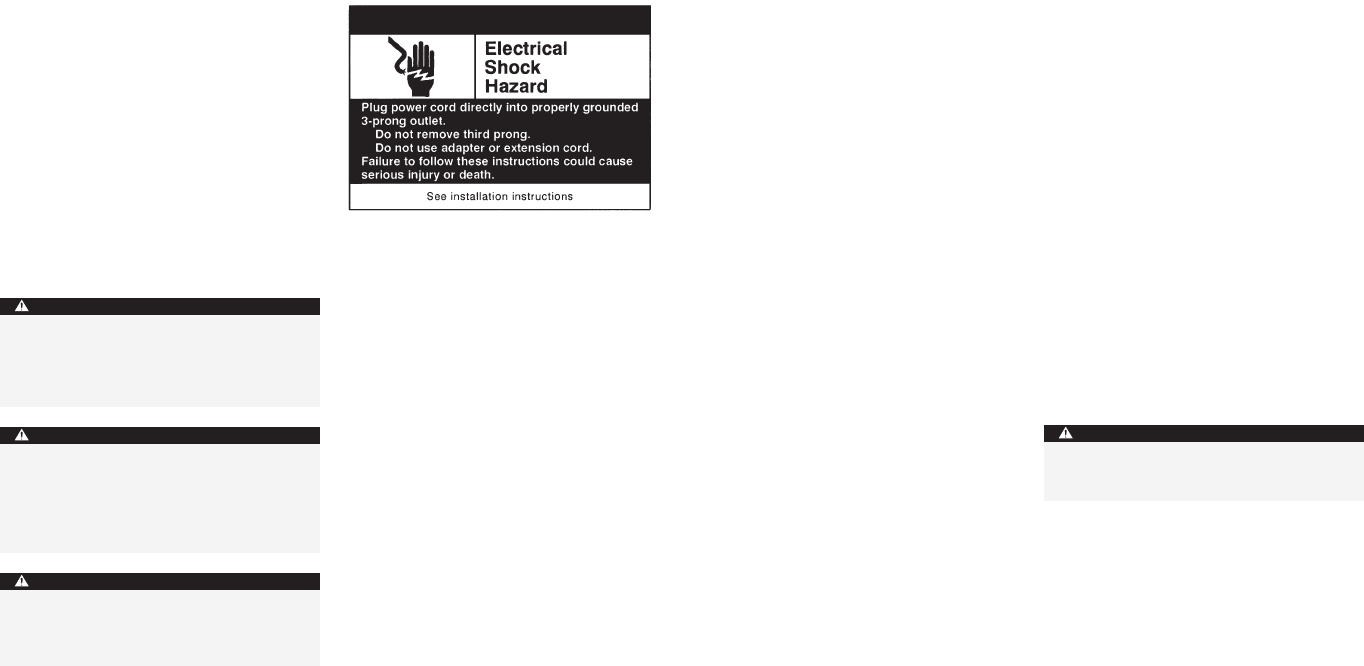
Do notuse an extension cord or two-prong
adapter. Electrical ground is required on this
appliance. Do not remove the power supply
cord ground prong.
WARNING
Alwaysshut power off at the circuit breaker
beforeperforming any installation, service or
maintenance.
WARNING
The outlet must be checked by a qualified
electriciantobesure that it is wired with the
correct polarity. Verify that the outlet
provides 220-240 VAC and is properly
grounded.
CAUTION
Be sure to secure thedoor(s) closed before
movingthe unit.
WARNING