


11
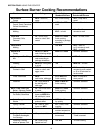
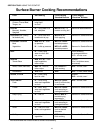
SECTION FOUR: USING THE COOKTOP
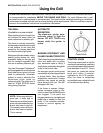
Operation of the ExtraLow
Burners
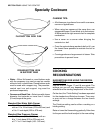
• XLO, the very lowest setting, is
achieved by cycling the flame
ON for approximately 8
seconds and OFF for 52
seconds of each minute.
• When the knob is set just below
the LO setting, the flame will
cycle ON for approximately 52
seconds and OFF for 8
seconds of each minute.
• To vary the amount of low heat
to suit the food and quantity, the
control can be set anywhere
within the LO and XLO range
marked on the knob.
• The number and dash
designations, shown in the
drawing, are for reference only.
Numbers do not actually
appear on the knob. The
number indicates the position
of the flame setting as
represented on the cooking
chart, Pages 15 and 16, with the
flame on longer at the #4 setting
than on #1 setting.
ExtraLow Techniques
• The type and quantity of food
affects which setting to use.
• The pan selected affects the
setting. Its size, type, material,
and whether a lid is used, all
affect the consistency of the
cooking temperature.
• To maintain a low or simmer
heat, bring food to a rolling boil.
Stir well, then cover the pan and
lower the heat to a setting just
below LO.
• Check periodically to see if the
control knob should be turned
to another setting.
• If an over-size pan is used, the
simmer action may occur
mainly in the center of the pan.
To equalize the temperature
throughout the food, stir the
food around the outer edges of
the pan into the food in the
center.
• It is normal to stir food
occasionally while simmering.
This is especially important
when simmering for several
hours, such as for a homemade
spaghetti sauce or beans.
• When lowering the flame
setting, adjust it in small steps.
• If the setting is too low to hold
a simmer, bring the food back
to a boil before re-setting to a
higher heat.
• It is normal not to see simmer
bubbles immediately after the
food has been stirred.
• There may be bubbling when
the flame cycles ON and no
bubbles when the flame is OFF.
Even when the flame is OFF,
there will be steam and a slight
quiver on the liquid’s surface.
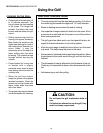
Each burner has its own electronic
igniter that sparks when the
burner is turned on. Each burner
should light in 4 seconds or less.
If a burner does not light, check
to see that the cap is positioned
correctly on the base.
If a burner fails to ignite, refer to
the section on Page 42, “Before
Calling for Service.”
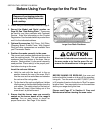
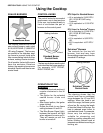
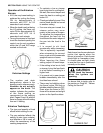
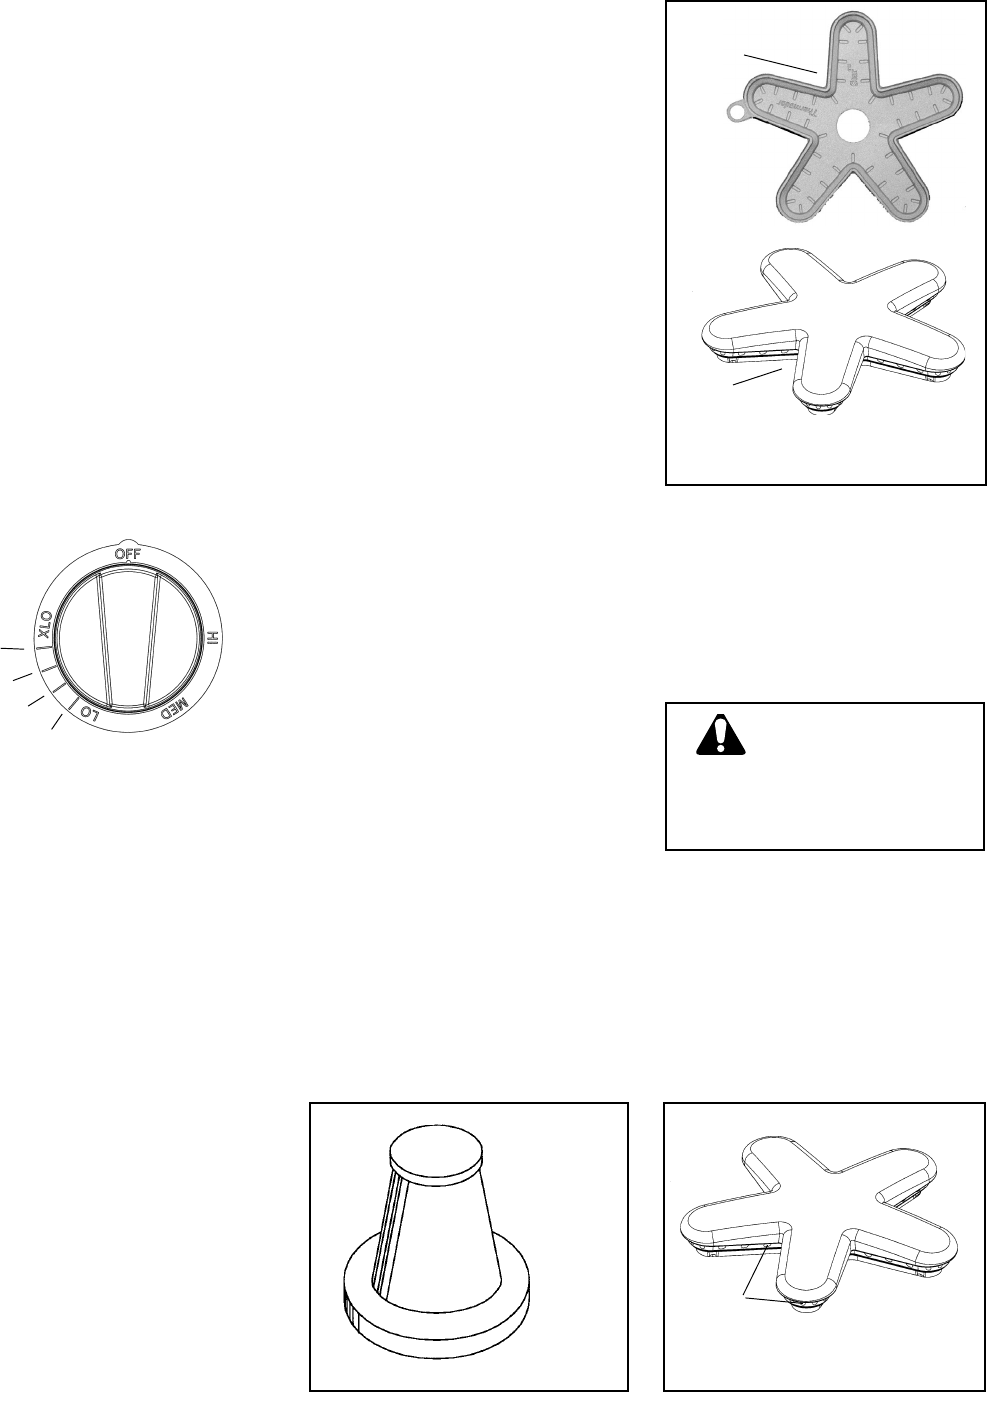
BURNER CAP
Ports
IGNITER
Star
®
Burner
Components
Burner
Cap
Brass
Burner
Base
ExtraLow Settings
1
2
3
4
CAUTION
Do not touch the burners
when the igniters are
sparking.