


MARINATEACCESSORYSPEEDFOODCANCELON/OFF
SEAL
STOP
TRAY FULL
MOIST
DRY NORMAL
GENTLE
MARINATEACCESSORYSPEEDFOODCANCELON/OFF
SEAL
STOP
TRAY FULL
MOIST
DRY NORMAL
GENTLE
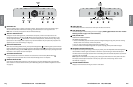
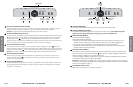
1
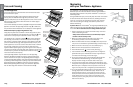
POWER BUTTON
Press the power button to begin. The Power Indicator, Speed Indicator and Food Indicator lights
will become illuminated. After Vacuum Sealing, press Power Button to turn appliance Off.
Note: After 12 minutes, the appliance will turn Off automatically.
2
TRAY FULL INDICATOR LIGHT
During the vacuum sealing process, small amounts of liquids, crumbs or food particles can be
inadvertently pulled into the Drip Tray (N). When excess liquid fills the Drip Tray, the unit will turn off
and the Tray Full Indicator
2
will activate. To resume normal operation, remove the Drip Tray, empty
liquid, wash in warm soapy water or place in top rack of dishwasher. Dry and place Drip Tray back into
appliance. (See “Care and Cleaning” on page 15.)
3
SPEED SETTINGS BUTTON
When vacuum sealing delicate items, press Speed Setting Button
3
so that the gentle speed indicator
light is illuminated. For more control you may press Seal/Stop Button
8
at any time to stop vacuum and
begin automatic sealing process. Note: Appliance will default to Normal speed upon pressing the Power
On Button or when power has been interrupted.
4
ACCESSORY MODE BUTTON
Press to achieve best vacuum for canisters and accessories. Push Accessory Mode Button
4
to begin vacuum process. Motor will run until Vacuum Sealing Process is complete.
5
MARINATE MODE BUTTON
A ten minute predetermined sequence of vacuum pulse to rest ratio allowing foods to get optimum
flavor infusion in the least amount of time. (See “Marinating with your FoodSaver
®
Appliance” section
on page 16.)
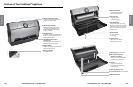
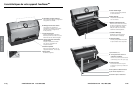
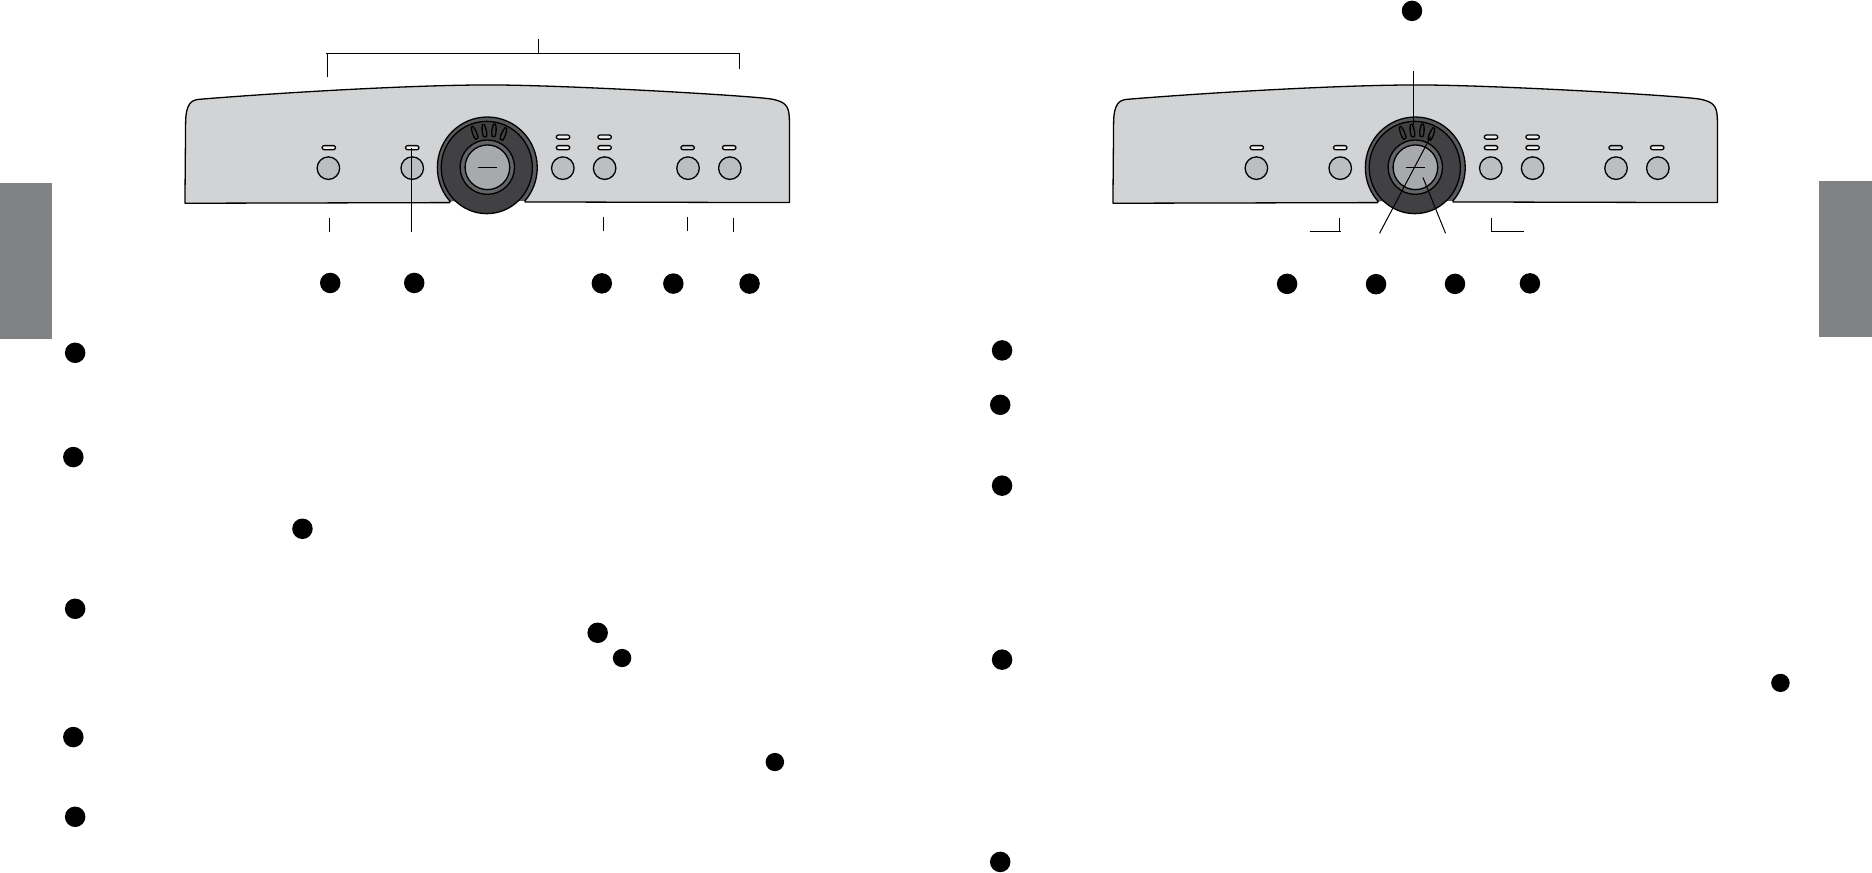
Power
Button
Marinate
Mode
Accessory
Mode
Speed
Settings
Indicator
LEDs
4
1
5
3
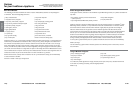
FEATURES
Seal/Stop
Button
Adjustable
Food Settings
Cancel
Button
Vacuum
Progress
Display
10
7
9
8
6
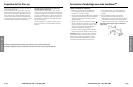
6
CANCEL BUTTON
Immediately halts the current function and opens the Vacuum Channel.
7
SEAL INDICATOR LIGHT
Constant Red light indicates sealing process is engaged. (Flashing light indicates error. See “Trouble-
Shooting” Section on page 21 for more information.)
8
SEAL/STOP BUTTON
CrushFree
™
Instant Seal feature-
This button has three uses:
1. Press to immediately stop the vacuum process and begin sealing the bag. This prevents crushing
delicate items such as bread, cookies and pastries.
2. Press to create a seal when making bags from a FoodSaver
®
Roll.
3. Press to create a seal on Mylar bags (such as a potato chip bag) to keep food sealed air-tight.
9
ADJUSTABLE FOOD SETTINGS BUTTON
For optimal vacuuming and sealing of moist or juicy foods, press the Adjustable Food Setting Button
9
until the Moist Indicator Light is illuminated. Choose the dry food setting for foods without liquid.
The Moist Food Indicator light will flash when Food Sealing Sensors automatically detect any moisture
or liquid in the drip tray (N).
Note: Appliance will default to Dry setting upon pressing the Power Button or when power has been
interrupted, unless liquid is detected in the Drip Tray. (See “Care and Cleaning” section of this
User Manual on page 15.)
10
VACUUM PROGRESS DISPLAY
Displays vacuum levels as the bag or canister is evacuated.
Tray Full
Indicator
2
FEATURES
Seal
Indicator Light
www.foodsaver.com 1-877-804-5383
EN-5
www.foodsaver.com 1-877-804-5383
EN-6