UV-SVN03D-EN 17
Unit Mounting
Note: All wall intake boxes should be
installed prior to mounting the unit
ventilator. Refer to Page 14 for wall
box installation instructions.
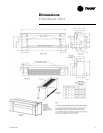
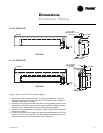
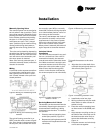
The 1/2” mounting or anchoring holes
are located on the back of the unit on
each end. See Figure 3.
1 Note: All mounting fasteners are to
be provided by the installer. Check
the gasket on the rear of the unit
and around the fresh air open-
ing. Gaps around the openings
can lead to outside air leaks into
the room.
2 Remove all electrical and piping
knockouts where required for in-
stallation.
WARNING
Improper Unit Lift!
Test lift unit approximately 24
inches to verify proper center of
gravity lift point. To avoid drop-
ping of unit, reposition lifting
point if unit is not level. Failure to
properly lift unit could result in
death or serious injury or possible
equipment or property-only dam
-
age.
3 Set the unit into selected location
and adjust leveling legs if neces
-
sary to ensure level fit.
Note: Care should be taken when
handling the unit to ensure that the
front return air grille does not
bend.
4 Push the unit tightly against the
wall to compress the seal on the
back edge of the unit and intake
opening. Anchor the unit by using
the 1/2” mounting holes in both
end pockets.
Units containing a falseback; The
falseback unit ventilator contains
mounting holes located on the
falseback metal. Use these holes
rather than the holes located in the
unit’s end pockets.
Note: Ensure the unit is level. Coils
and drain pans inside the unit are
pitched properly for draining before
shipment.
5 Ensure the unit rests tightly
against the wall. Check for proper
seal and that air does not leak un
-
derneath the unit.
Subbase (option)
A subbase may be used to increase the
unit height and aid in leveling the unit.
The subbase is shipped separately for
field installation. Slots and leveling
screws are provided on the subbase.
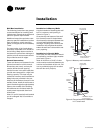
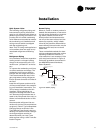
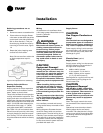
1 Remove the leveling legs provided
with the unit. See Figure 4.
Figure 4: Subbase with leveling legs
2 Set the unit on the subbase and
fasten with four, 3/8” x 16’ x 1”
hex head cap screws and 3/8" lock
washers.
Note: Hex screws and lock wash-
ers are provided by the factory.
They are located in a baggy and are
used to attach the base to the unit
ventilator. Pre-drilled slots in the
subbase flange will line up with
the weld nuts in the bottom of the
unit.
3 The bottom of the subbase has
weld nuts in four slots. Place the
leveling legs in those slots and lev
-
el the unit.
2"- 6"
Unit Base
Subbase
For leveling legs
Weld
Nuts
End Panels
When ordered as an option, end cov-
ers ship already attached to the verti-
cal unit ventilator. The following
section is for installing end covers pur-
chased as an add-on.
It is recommended end panels be in-
stalled on the unit ventilator after all
piping, wiring and accessory installa
-
tion is completed. To install the end
panel:
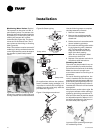
1 Insert the four factory provided
metal studs into the four pre-
mounted nuts on the inside of the
panel.
2 Align each stud with the four pre-
drilled holes on the side of the
unit.
3 Secure the panel to the unit by fas-
tening with the four factory pro-
vided nuts.
4 Do not overtighten screws.
CAUTION
Equipment Damage!
Do not run units for any length of
time without all panels and filters
properly installed. Failure to do so
may result in equipment failure.
Installation
!


