


Page 13 of 36
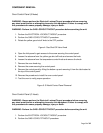
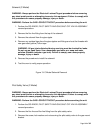
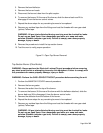
1. Perform the OVEN CONTROL PANEL removal procedure for the convection oven.
2. Tag and disconnect the electrical connectors from the top of the temperature control.
3. Remove the temperature control from the mount bracket.
4. Reverse the procedure to install the temperature control.
5. Test the oven to verify proper operation.
Figure 11: C Model Temperature Control Removal
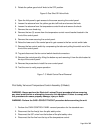
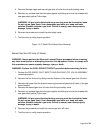
Solenoid, Pilot Safety and Gas Shut-Off Valve Assembly (C Model)
WARNING: Always perform the Electrical Lockout/Tagout procedure before removing
any sheet metal panels or attempting to service this equipment. Failure to comply with
this procedure can cause property damage, injury or death.
WARNING: Perform the GAS LOCKOUT/TAGOUT procedure before servicing the unit.
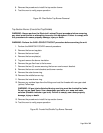
1. Perform the OVEN CONTROL PANEL removal procedure for the convection oven.
2. Disconnect the flex line from the tee fitting below the manual gas shut-off valve.
3. Disconnect the flex line from the top of the solenoid.
4. Tag and disconnect the electrical connectors to the solenoid.
5. Remove the two (2) screws securing the gas mount bracket.
6. Remove the gas mount bracket with the solenoid, pilot safety and manual gas shut-off
valve assembly from the oven.
7. Remove any residual tape from the pipe nipples and fittings and coat the threads with
new gas-rated (yellow) Teflon tape.
WARNING: All gas joints disturbed during servicing must be checked for leaks.
Do not use an open flame. Use a hazardous gas tester or a soap and water
solution (Bubbles indicate a gas leak). Failure to comply can cause property
damage, injury or death.
8. Reverse the procedure to install the solenoid, pilot safety and manual gas shut-off valve
assembly.
9. Test the oven to verify proper operation.
Figure 12: C Model Solenoid, Pilot Safety and Gas Shut-Off Valve Assembly Removal