


Page 29 of 36
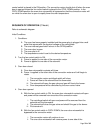
Oven Door Microswitch Test (C Model)
The oven door microswitch lever should be depressed when the oven door is closed.
WARNING: Always perform the Electrical Lockout/Tagout procedure before removing
any sheet metal panels or attempting to service this equipment. Failure to comply with
this procedure can cause property damage, injury or death.
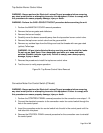
1. Verify that the pin attached to the oven door hinge contacts the oven door microswitch
lever when the oven door is closed. An audible click should be heard when the
microswitch lever is depressed and the microswitch contacts close.
2. Perform the OVEN DOOR MICROSWITCH removal procedure.
3. Use a VOM to perform a continuity test on the microswitch.
4. The rear contact on the bottom of the microswitch is the COMMON connector. The other
two connectors are the NORM CLOSED and NORM OPEN connectors.
5. Check continuity between the rear (COMMON) connector and one of the two other
contacts. If it is open, (no continuity) depressing the switch lever should close the
connection. If it is closed (continuity) depressing the switch should cause the connection
to open.
6. Repeat this procedure for the other microswitch contact.
7. If either contact fails to switch from open to closed (normally open contact) or fails to
switch from closed to open (normally closed contact), replace the microswitch.
8. Reverse the OVEN DOOR MICROSWITCH removal procedure to install the switch.
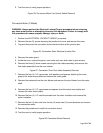
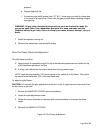
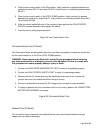
Figure 37: Oven Door Microswitch Test
Fan Control Switch Test (C Model)
WARNING: Always perform the Electrical Lockout/Tagout procedure before removing
any sheet metal panels or attempting to service this equipment. Failure to comply with
this procedure can cause property damage, injury or death.
1. Perform the CONTROL PANEL removal procedure.
2. Use a VOM to perform a continuity test on the fan control switch.
3. With the fan control switch in the OFF position, verify there is no continuity between the
contacts on either side of the switch.