


10
6
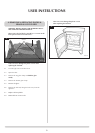
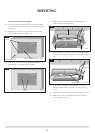
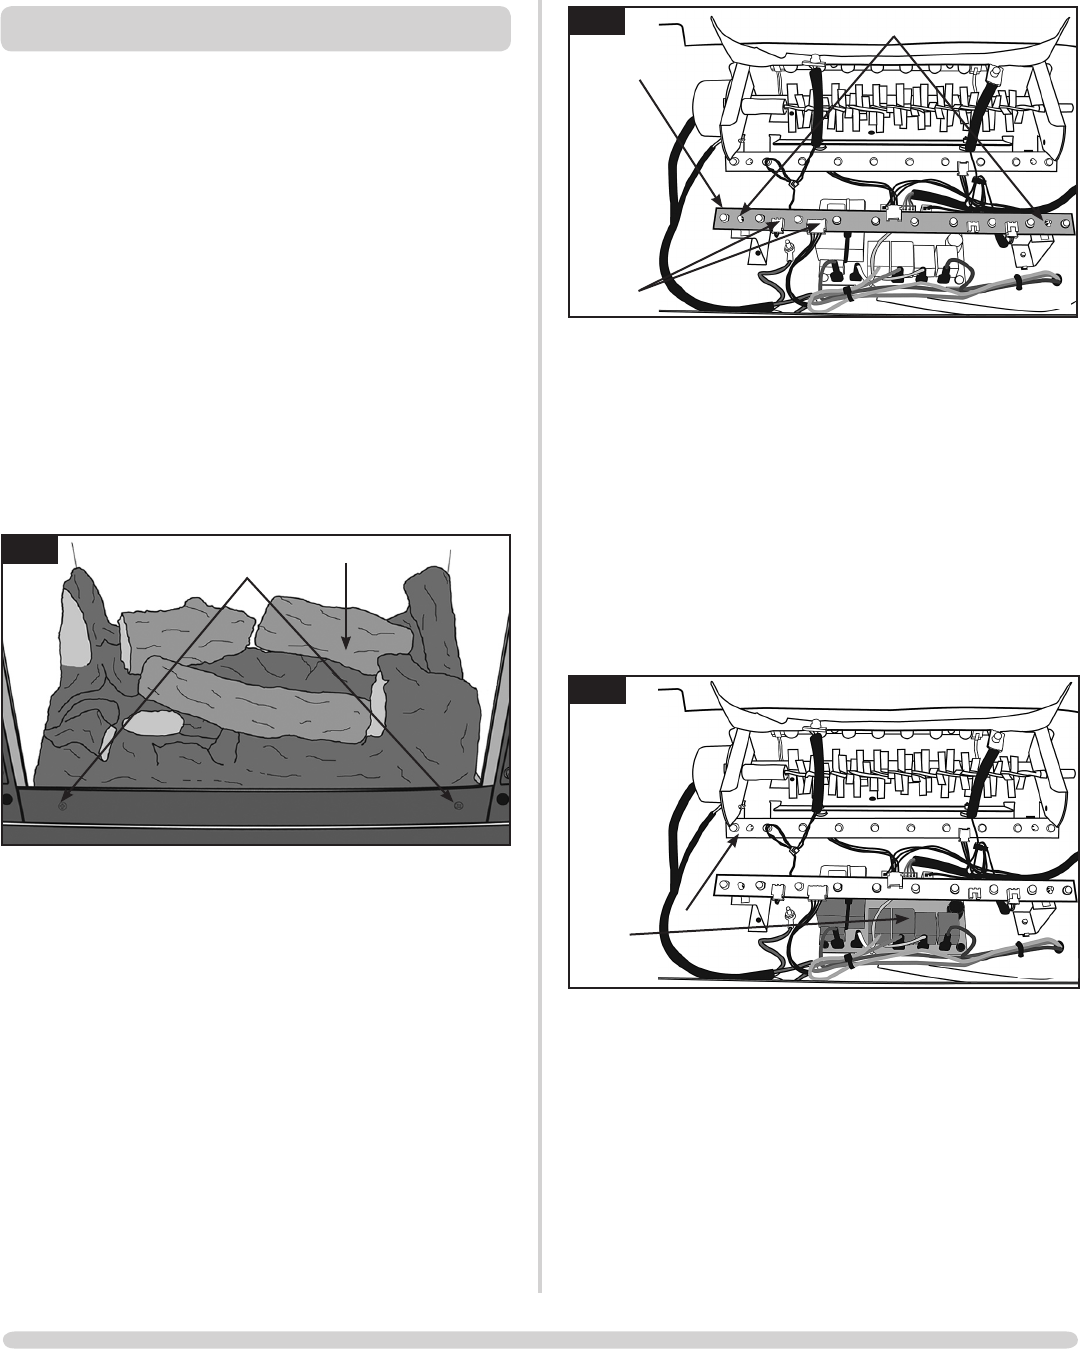
Front LED
board
Plugs
Push fasteners
AR2393
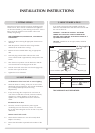
1.8 Dispose of the board at an appropriate
recycling centre.
1.9 To connect the new LED board push the fasteners
through the ready drilled holes and ensure that all wires are
correctly connected.
REPLACING THE PRINTED CIRCUIT BOARD
1.10 To remove the PCB first remove the front LED board
following instructions 1.6 & 1.7.
1.11 The PCB is fixed to the base of the appliance using
2 x push fasteners and 2 x screws (see Diagram 7).
Release board from fasteners and remove screws.
7
PCB
AR2392
1.12 The wires should now be disconnected from the PCB
one by one. As each wire is disconnected from the old
PCB attach it to the new PCB to ensure correct
orientation.
1.13 Fix the new PCB to the base of the appliance using the
2 x push fasteners and 2 x screws.
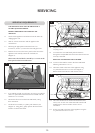
SERVICING
SERVICING REQUIREMENTS
THIS APPLIANCE MUST ONLY BE SERVICED BY A
SUITABLY QUALIFIED PERSON.
BEFORE UNDERTAKING ANY WORK ON THE
APPLIANCE:
1.1 Switch off the appliance and isolate it from the mains by
unplugging the unit.
1.2 Wait for at least 10 minutes until the appliance has
cooled down.
1.3 Following the appropriate instructions from User
Instructions, Section 4, remove the door and glass front.
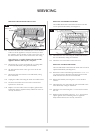
1.4 Remove the screws on the lower panel on the front of the
appliance and carefully remove the fuel bed (see
Diagram 5).
Please note: The fuel bed is secured by 2 x screws on the
lower panel on the front of the stove.
5
Screws
Fuel bed
AR2391
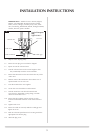
REPLACING FRONT LED BOARD
1.5 If an LED fails to light you will notice an uneven or unlit fuel
effect. To replace the front LED board (for middle and rear
boards see 1.21 onward):
1.6 Disconnect all wires from the front LED board, noting
their orientation.
1.7 The board is secured by 2 x plastic push fasteners (see
Diagram 6). Using pliers, gently squeeze the head of the
fasteners to release the board.