


11
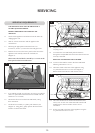
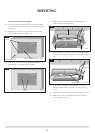
REPLACING THE MIDDLE LED BOARD
The middle LED board is attached to the motor unit but
can be replaced individually (see Diagram 9).
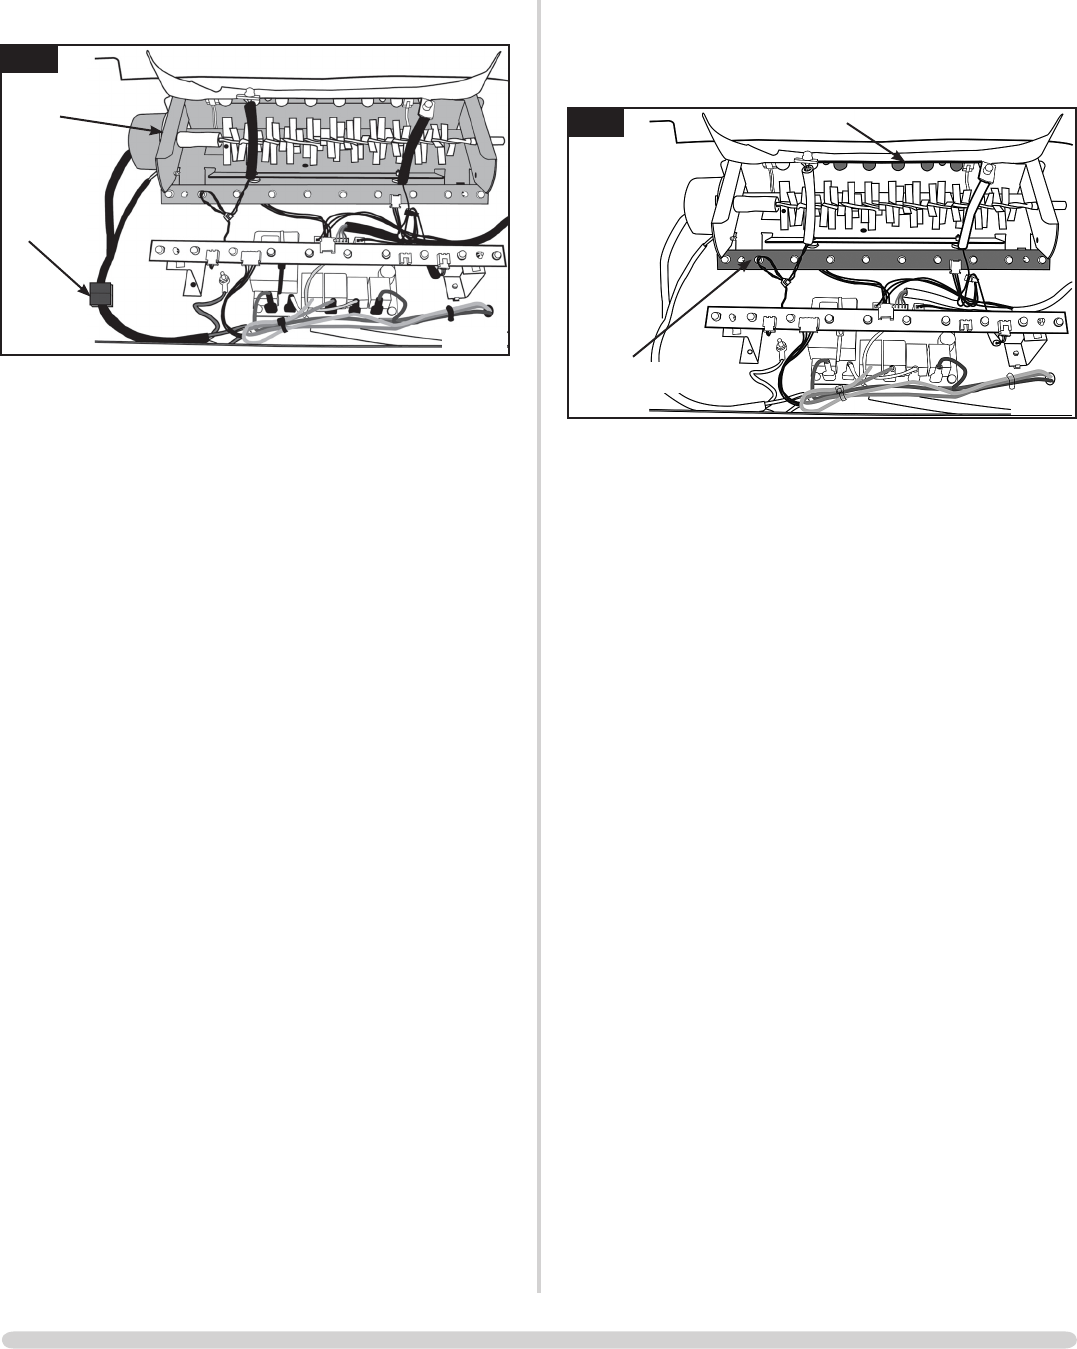
9
AR2395
Rear LED board
Middle LED board
1.21 Disconnect the wire connecting the middle LED board to
the rear LED board, noting its orientation.
1.22 Attach the new board and reconnect the wire.
REPLACING THE REAR LED BOARD
The rear LED board is attached to the motor unit but can be
replaced individually (see Diagram 9).
1.23 Remove the motor unit following instructions in 1.14 - 1.17
(it is not necessary to disconnect the motor unit from the
PCB) and rotate to access the rear LED board.
1.24 Release the board by removing the 2 x screws at either
end of it.
1.25 Disconnect the wire connecting the rear LED board to the
front LED board, noting its orientation.
1.26 Attach the new board using the 2 x screws and reconnect
the wire.
1.27 Replace motor and effects unit (see 1.14 - 1.20). Ensure to
replace gaskets when reattaching motor to appliance
body and that all wires are correctly connected.
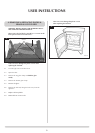
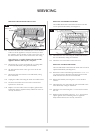
REPLACING THE MOTOR & EFFECTS UNIT
8
Motor unit
AR2394
Plug
1.14 The motor & effects unit is attached by 4 x screws located
at the rear of the appliance. It may be necessary to move
the appliance from its location to gain access to the rear of
the stove. Remove the 4 screws on the lower rear casing.
Note: There are 2 x gaskets between the unit and the
appliance. Remove and keep in a safe place.
1.15 Disconnect the 2 x wires connecting the 2 x 'flying' LEDs
to the front LED board, noting their orientation.
1.16 Lift and rotate the motor unit to give access to the rear
LED board.
1.17 Disconnect both wires from the rear LED board, noting
their orientation.
1.18 Unplug the cables connecting the motor unit and the PCB.
1.19 The motor and effects unit can now be removed and
replaced as a whole unit.
1.20 Replace in reverse order. Ensure to replace gaskets when
reattaching motor to appliance body and that all wires are
correctly connected.
SERVICING