System Administrator Screens
312353B 37
Add a Client PC to the Matrix System
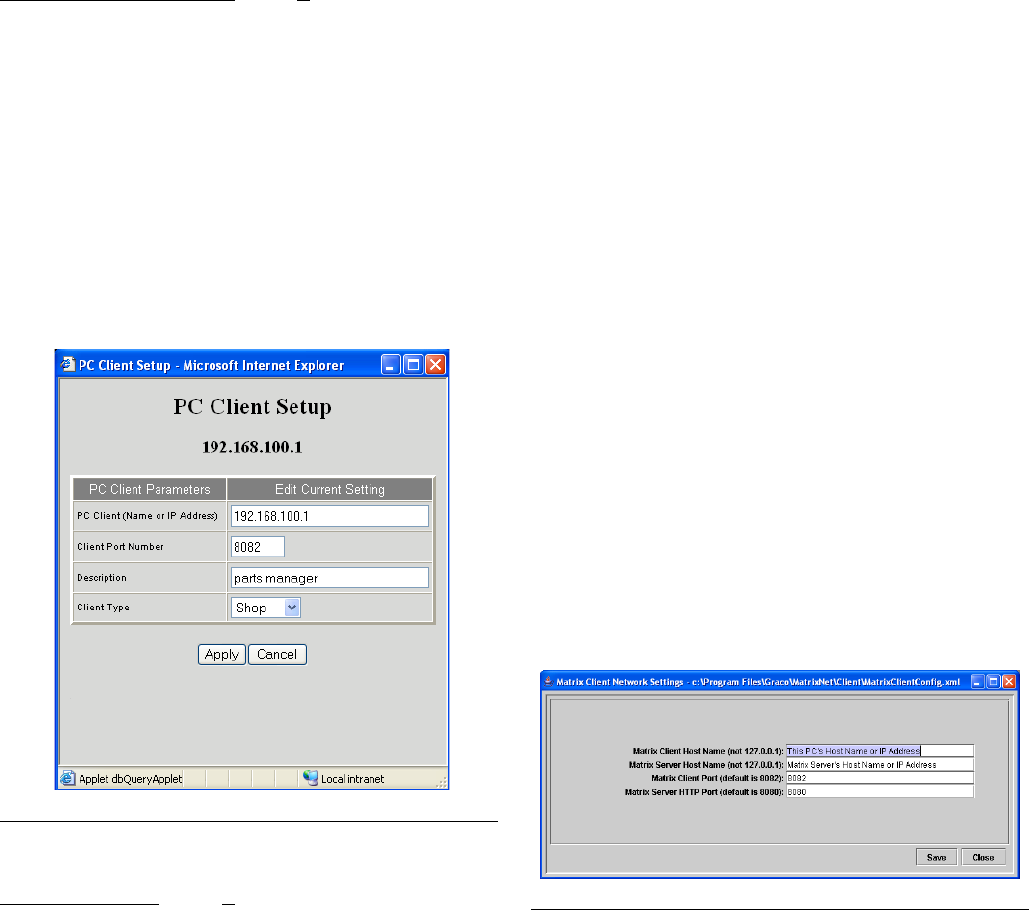
At the Matrix Server PC (FIG. 67):
1. Click Add Pc Client Button; this adds a new row to
the bottom of the table.
2. Click New Row’s Modify Link.
3. In the PC Client field, enter the host name or IP
address of the client PC (remember this name or
address; it will be needed when configuring the
Matrix software at the client PC).
4. Enter an appropriate description for this PC in the
Description field and select its Client Type. Click
Apply.
At the client PC (
FIG. 68):
1. Run the installation program from the Matrix instal-
lation cd, choosing Matrix Client Only as the instal-
lation type.
2. When the installation is complete, the installation
program prompts you to reboot the PC. Before
doing so, navigate in Windows to Start / All Pro-
grams / Graco / Matrix / Edit Matrix Client Net-
work Settings.
3. Set the Matrix Client Host Name to the client PC’s
actual host name or IP address.
• Do not set this to 127.0.0.1.
• This entry must match exactly with the
name/address give for this PC in the PC client
table on the System Configuration page in the
Matrix setup screens (F
IG. 68).
4. Set the Matrix Server Host Name to the Matrix
Server’s actual host name or IP address.
• Do not set this to 127.0.0.1.
5. Unless there are known conflicts with the port num-
bers, they can be left at the factory defaults.
6. Click Save and exit.
7. Reboot the client PC.
See the Software Installation Troubleshooting section on
page 21.
F
IG. 67
FIG. 68
