6
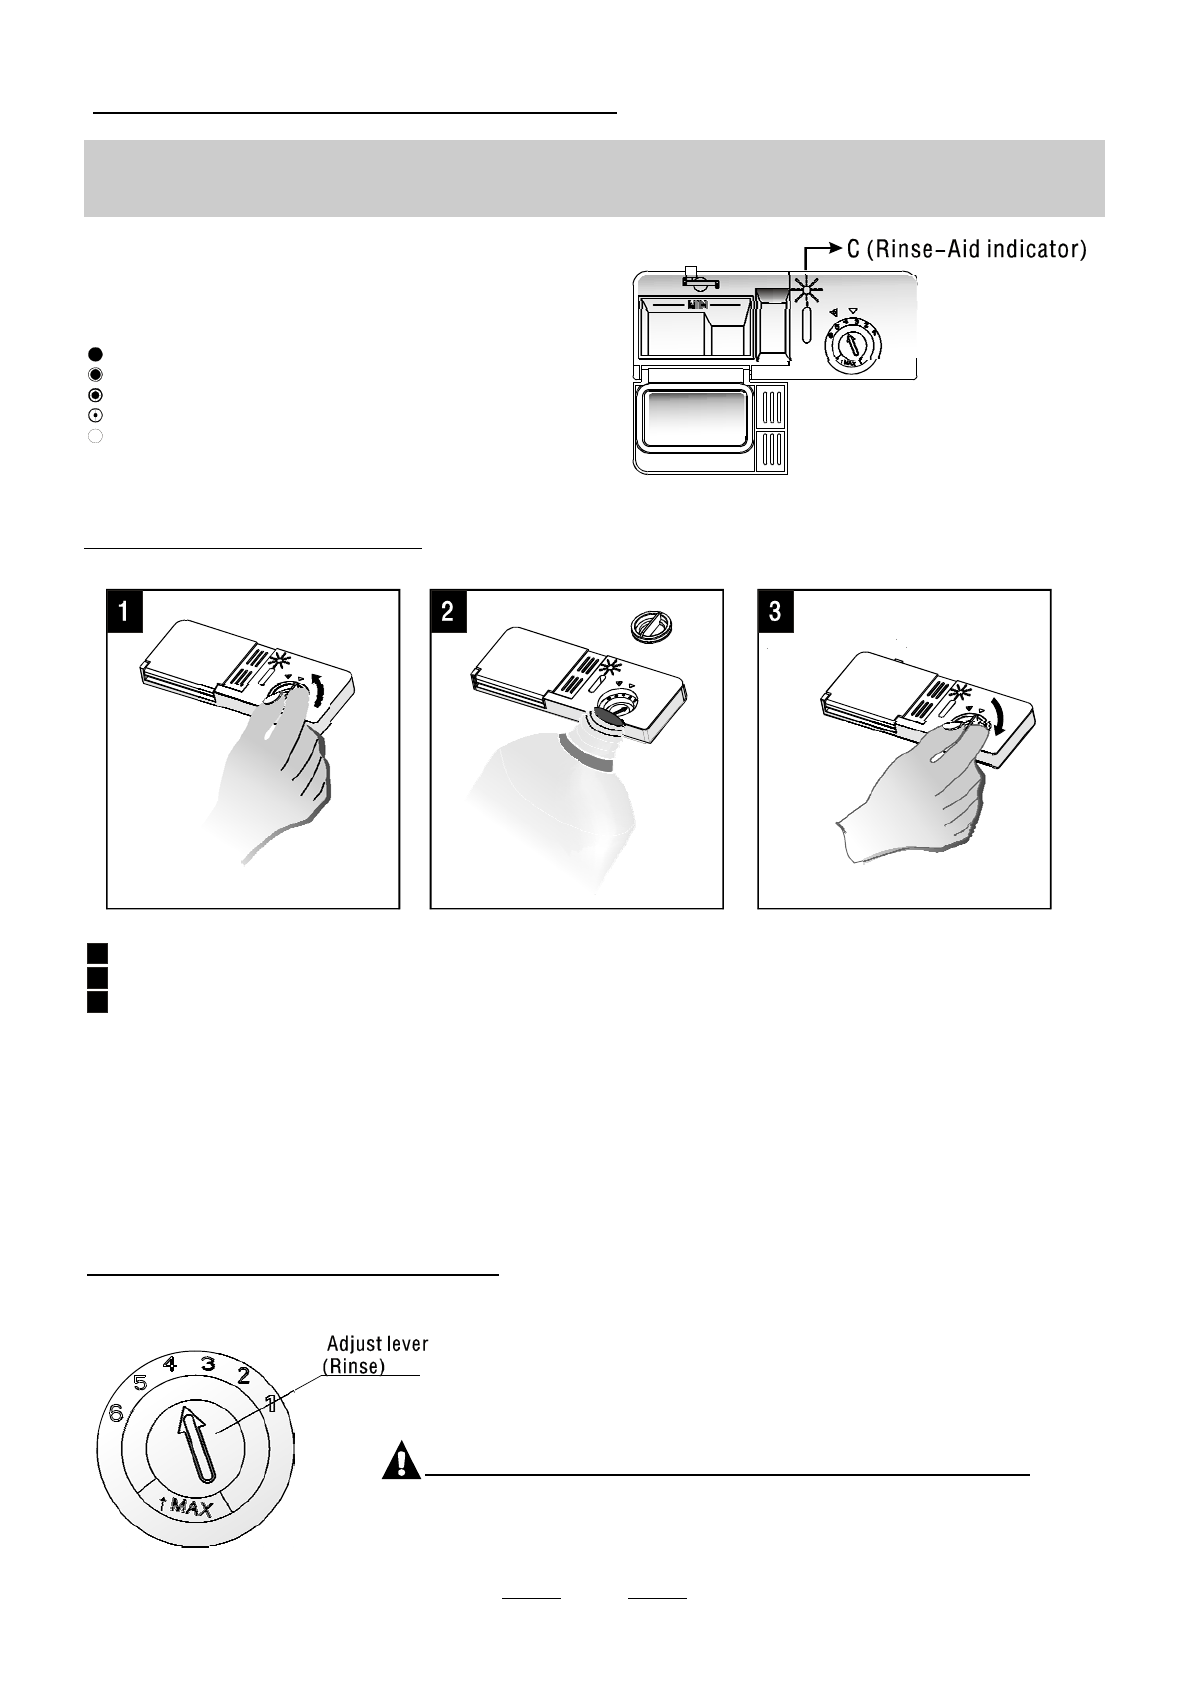
RINSE AID DISPENSER
To open the dispenser, turn the cap to the "open" (left) arrow and liftit out.
Pourthe rinse aidinto thedispenser,being careful not to overfill.
Replace the capby inserting it aligned with "open"arrow andturning it to the closed (right) arrow.
Be careful not to overfillthe dispenser, because this could cause over sudsing. Wipe away any spills
with a damp cloth. Don'tforget toreplacethe cap beforeyou close dishwasher door.
Attention!
Cleanup any rinse aid split during fillingwith anabsorbent cloth toavoid excess foaming
duringthe nextwash.
Adjusting Rinse Aid Dispenser
1
2
3
As the rinse aid diminishes, the size of the black dot
on the rinseaid level indicator changes,as illustrated below.
Full
3/4full
1/2full
1 / 4 full- Should refillto eliminate spotting
Empty
If there is no rinse-aid warning light in the control panel, you can judge the amount of rinse-aid bythe colorofthe optical level
indicator "D" located next to the cap. When the rinse-aid container isfull, the whole indicator will be dark .As the rinse-aid
diminishes, thesize of thedarkdot decreases. Youshould neverlet the rinse aid get below 1 / 4 full.
The rinse aid dispenserhas sixscales. Always start withthe dispenserset on "4".
If spots and poor drying area problem, increasethe amount of rinseaid dispensed
by removing the dispenserlid and rotating the dial to "5". If the dishes stillare not
drying properly or areshow spots, adjust the dialto the next higher lever untilyour
dishes arespot-free. The recommended setting is "4". (Factoryvalue is "4".)
Increase the dose if there are drops of waterorlimespots onthedishesafterwashing.
Reduce it if there are sticky whitish stains on your dishes or a bluish film on glassware or
knife blades.
NOTE:
When to Refill the Rinse Aid Dispenser


