


16
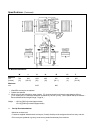
Operation (Continued)
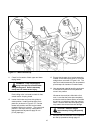
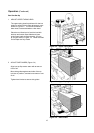
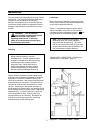
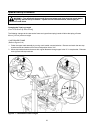
3. RUN BOXES TO CHECK ADJUSTMENT
(Figure 3-5)
Turn electrical switch to "On" to start drive belts.
Move box forward under upper taping head until
it is taken away by drive belts. If box is hard to
move under head or is crushed, raise head
slightly. If box movement is jerky or stops under
upper head, lower upper head slightly to add
more pressure between box and drive belts.
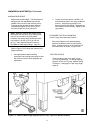
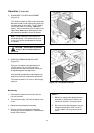
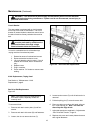
Figure 3-6 Compression Rollers
CAUTION If drive belts are allowed
to slip on box, excessive belt wear
will occur.
4. POSITION COMPRESSION ROLLERS
(Figure 3-6)
Push box into machine and alternately turn
"On/Of" switch "On" and "Off" until box is
positioned where flap compression rollers can
be adjusted against top edge of box.
Pivot both flap compression rollers against top
edge of box and lock in place with hand knobs.
Turn electrical switch "On" and run box through
machine.
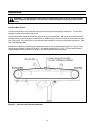
Box Sealing
1. Feed boxes to machine at minimum 455 mm
[18 inch] intervals.
2. Turn electrical supply "Off" when machine is not
in use.
3. Reload and thread tape as necessary.
4. Be sure machine is cleaned and lubricated
according to recommendations in "Maintenance"
section of this manual.
Note Upper head has unique feature for
overstuffed boxes. The head will raise up to
13 mm [1/2 inch] to compensate for this type
of condition.
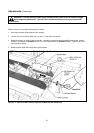
Notes
1. Machine or taping head adjustments are
described in "Adjustments" Section I for
machine or Section II for taping heads.
2. Box drive motors are designed to run at a
moderate temperature of 40°C [104°F].
In some cases, they may feel hot to the
touch.
Figure 3-5 Check Adjustments