


Clearspan OpEasy® Basic Provisioning User Guide R4.0 Aastra – 2827-006
2014 Clearspan® is a Registered Trademark of Aastra Technologies Ltd. Page 20 of 34
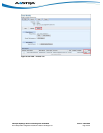
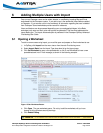
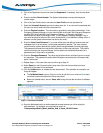
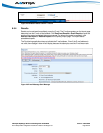
6) Click Enable Content.
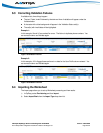
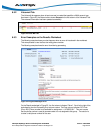
The worksheet is now available for editing as shown in the following figure.
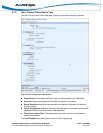
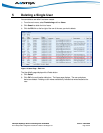
Figure 16 Clearspan Import Worksheet
The following is a description of the basic worksheet starting at the top.
The Basic worksheet has two tabs:
Users–There are only 10 fields that must be entered on the worksheet. The commands
are Add, Remove, and Done.
Voice Mail–The voice mail fields are generated automatically.
The Advanced Import worksheet has 10 tabs. Within each tab are all possible commands that
can be used and the definitions of those commands. The Advanced Import function is
addressed in the 287704 CS Advanced Provisioning User Guide.
The name of the new worksheet, which is shown centered at the top, is
“ClearspanImportBasic_” followed by the Enterprise name and Group name. You should save
this file to another name that is more meaningful to you. There are tags displayed that you can
use if desired.
In row 2 are the Enterprise Name and Group Name headers and below the headers are the
actual enterprise and group associated with this worksheet.
To the right of the Enterprise and Group name headers is the Validate button. It is used to
perform validation of data that is entered in the worksheet.
In row 4, the “Uploaded at” field will always be followed by “(not yet loaded)” when looking at
a Clearspan Import worksheet that has not been processed (or “run”). However, once a
worksheet is run, a Results worksheet is generated, and on the Results worksheet the “(not
yet loaded)” will be replaced with the date and time the worksheet was processed.
The value in row 5, column N is the version number (e.g. v217) of the worksheet.
Rows 7 and 8 identify the required information that will be needed to create Clearspan users.
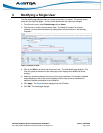
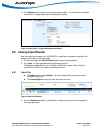
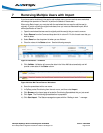
6.2 Adding Users in the Worksheet
After you have retrieved and opened an Excel worksheet to use, fill it in with the changes you want
to import.
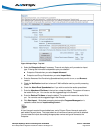
1) Click on a cell in column B and select Add from the Command drop-down list. You can only
Add or Remove users in the Basic worksheet. The Done command ends the processing at
the row where it appears.
2) Enter the Last Name and the First Name. Most characters are acceptable but the first
character cannot be a ‘+’. The combination of first and last name must be at least 5
characters.
3) Enter the E-mail Address. The address must contain the ‘@’ symbol.