


35
Read all instructions before installing or using this appliance.
Installation Instructions
Save these instructions for future reference.
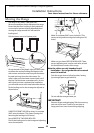
Moving the Range
The range is very heavy. Take great care.
We recommend two people maneuver the range.
Ensure that the fl oor covering is fi rmly attached,
or removed to prevent it being disturbed when
moving the range around. You will need the
leveling tool.
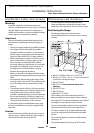
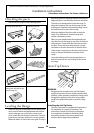
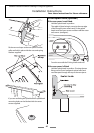
Pull the drawer out to its furthest point.
Lift up the ends of the plastic clips (one each side)
to release the catches holding the drawer to the
side runners and at the same time pull the drawer
forward and away from the side runners. For
safety’s sake push the drawer runners back out of
the way. Put the drawer somewhere safe - do not
refi t it until you have completed the installation,
you will need access to the area behind the drawer.
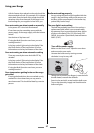
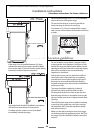
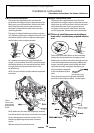
Fit the leveling tool on the rectangular adjuster as
shown below.
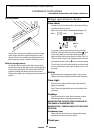
LOWER THE FRONT ROLLER by doing 14 complete
(360°) turns clockwise. (This means turning and
removing the leveling tool 56 times).
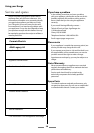
Now LOWER THE TWO REAR ROLLERS.
First fi t the leveling tool on the hexagonal adjusting
nut as shown below.
Make 10 complete (360°) turns clockwise. (This
means turning and removing the leveling tool 20
times).
Make sure you lower BOTH REAR ROLLERS. There
are two adjusting nuts, one for each roller, at both
the front bottom corners of the range.
Note the rollers are only intended to aid
installation - the range should not be moved
once it is installed.
Push the range close to its fi nal position, leaving
just enough space to get behind it.
Do not refi t the storage drawer yet
IMPORTANT!
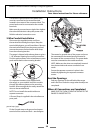
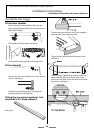
Remove all tape and packaging. Take the accessory
pack out of the oven. Check to be sure that no
range parts have come loose during shipping.