


5
Installation
Packing Material
Remove protective packing materials from range. Tape
residue can be cleaned with a soft cloth and alcohol.
Range Location
Underwriter’s Laboratories Inc. specifies that range can be
installed flush against right and left base cabinets, and
rear vertical wall. Range can also be installed flush
against left or right vertical wall extending above 36 inch
standard counter top height.
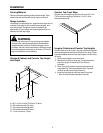
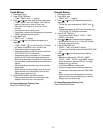
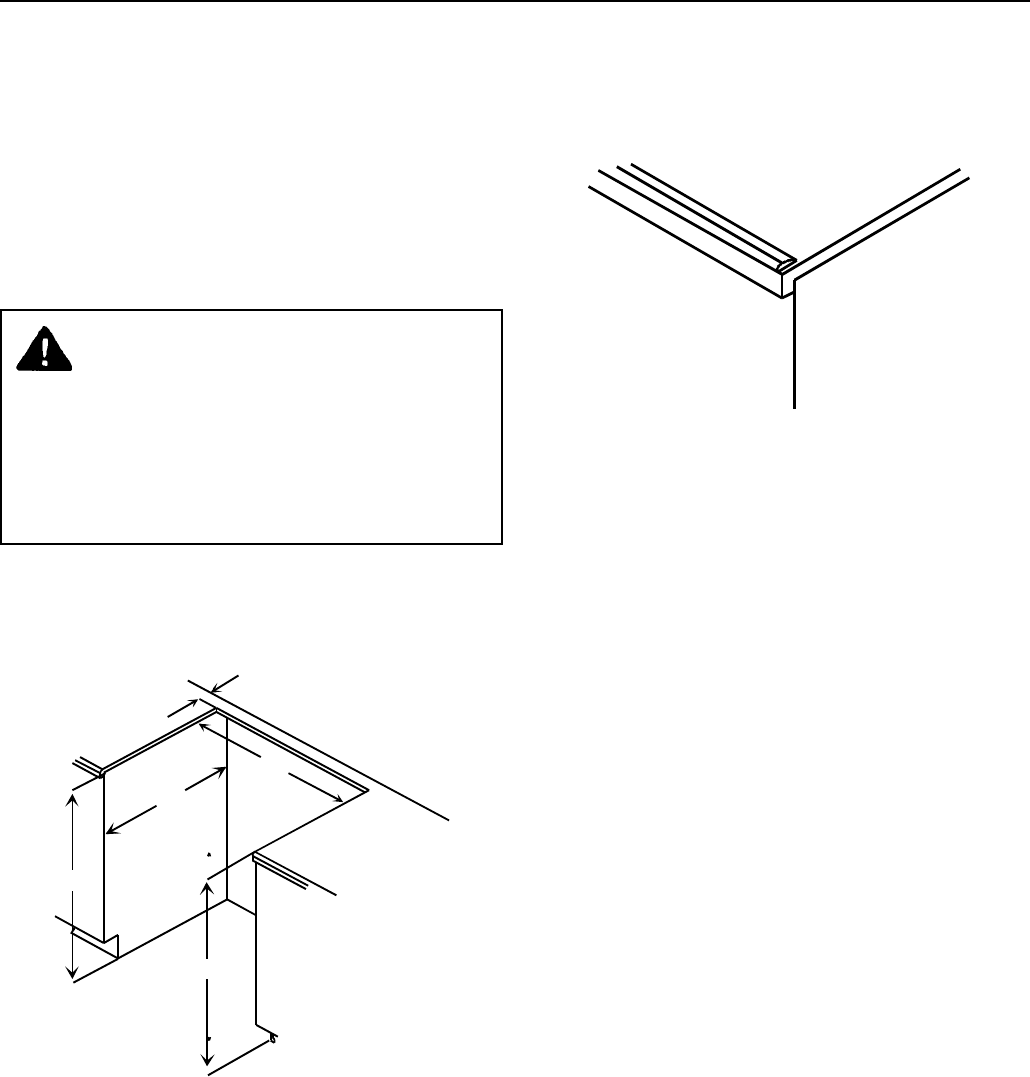
Standard Cabinet and Counter Top Height
and Depth
A
C
B
D
E
A—30
1
/8 to 30¼ inches (76.5cm to 76.8cm)
B—36 inches standard (91.4cm)
C—35 inches standard (88.9cm)
D—23 inches standard (58.4cm)
E—½ inch minimum (1.2cm)
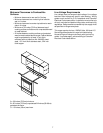
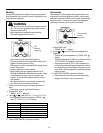
WARNING
To avoid risk of burns or fire by reaching over heated
surface units, cabinet storage space located above
range should be avoided. If cabinet storage is to be
provided, the risk can be reduced by installing a range
hood that projects horizontally a minimum of 5 inches
beyond the bottom of the cabinets.
Counter Top Front Edge
Counter top front edge may require cutting to fit 31 inch
(78.74cm) wide range top. Allow for ½ inch (1.2cm)
overlap on each side.
Irregular Cabinet and Counter Top Heights
Counter tops such as ceramic tile tops can cause cabinet
and counter top to be higher than 36 inches (91.4cm). Follow
instructions below when counter top is higher than 36 inches
(91.4cm).
1. Raise leveling legs to maximum level.
2. Measure from floor to range top. If measurement is
less than height of counter top floor must be
shimmed.
3. Shim floor using a piece of plywood same size as
range opening. Secure plywood to floor. Plywood
must be as secure as original flooring.
4. Install anti-tip bracket and slide range into place.
• See “Anti-tip Bracket Installation” section.