


- 9 -
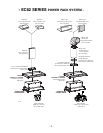
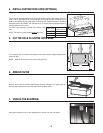
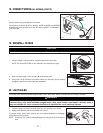
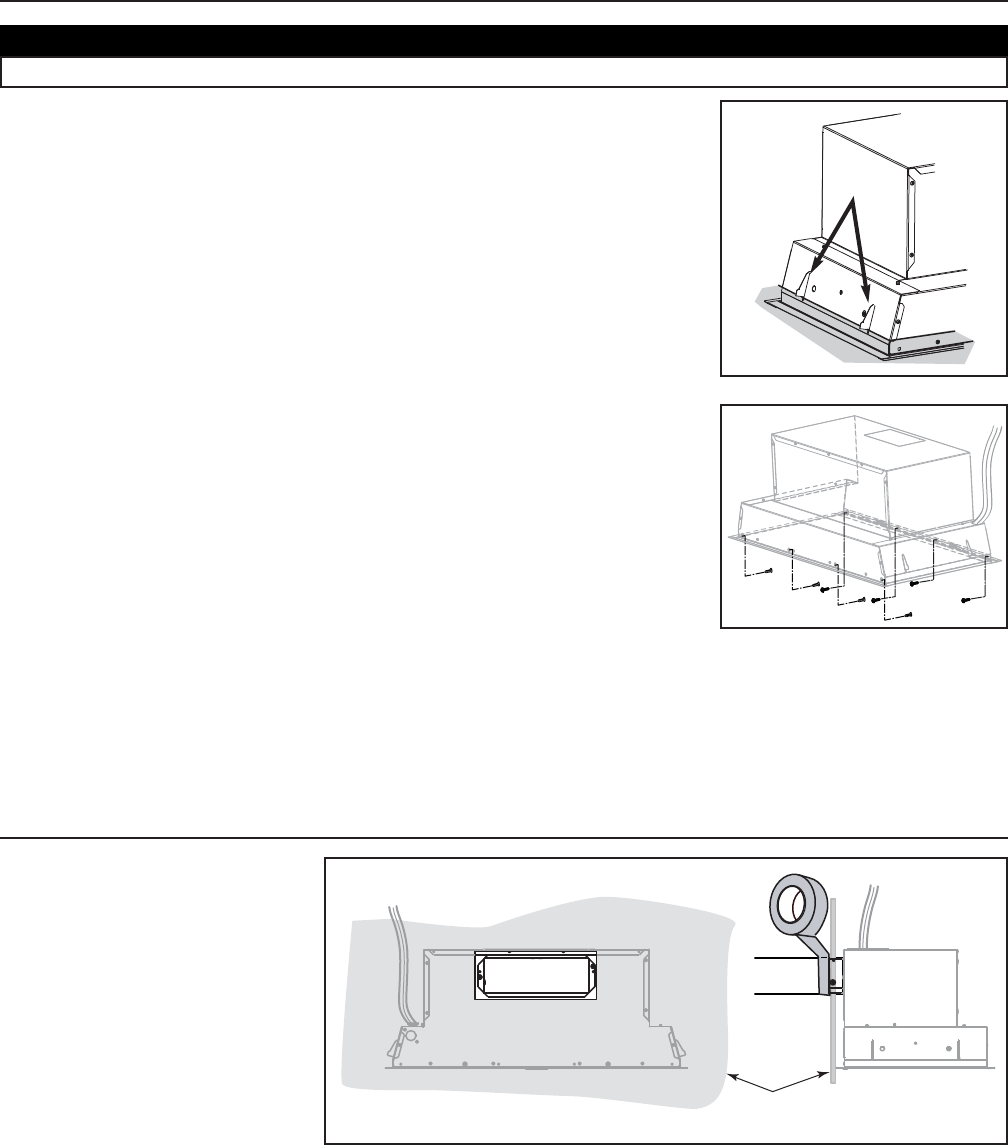
14. INSTALL THE POWER PACK
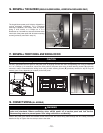
Lift the power pack in custom hood until the bottom of the clasping springs
(2 per side) rests on the top of the custom hood base (grey zone in illustration at right).
From inside the power pack, using provided no. 8-10 x 1/2” screws, mount the power pack
to the custom hood base. To do so, raise the front until its flange rests on the outer side of
the custom hood base and use 2 screws to secure in place. Do the same for the back, then
complete the installation with 2 additional screws on the front and back. See figure at right
for mounting screws specific locations.
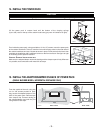
VERTICAL EXHAUST INSTALLATION ONLY
Make sure the adapter/damper enters the ducting and the damper opens freely. Wherever
it is possible, seal connections with metal foil duct tape.
CAUTION
Take care not to kink ducting or pinch electrical cable when installing the power pack.
HD0370
HH0126
CLASPING
SPRINGS
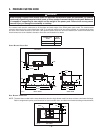
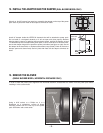
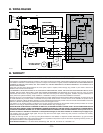
From the outside of the wall, using two
no. 8 x 3/8’’ screws provided in parts
bag, secure the adapter/damper to the
back of the power pack. Remove tape
from damper flap. Connect ducting to
the adapter/damper and seal the joint
using metal foil duct tape.
15. INSTALL THE ADAPTER/DAMPER ON BACK OF POWER PACK
(SINGLE BLOWER MODEL, HORIZONTAL DISCHARGE ONLY)
WALL
BACK VIEW SIDE VIEW
HH0127A