


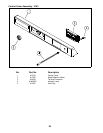
Refrigerator Removal Procedures
Improper removal and installation of the refrigerator
can cause injury or property damage. Before attempt-
ing the procedures below, review the "Important Safety
Information" on page 1 and the procedures below.
EuroVan Camper
1. Turn off the
g
as suppl
y
at the main tank.
2. Turn the refri
g
erator’s mode selector to "OFF".
3. Remove the vehicle’s middle bench seat.
4. Remove the refri
g
erator’s s
y
stem cover located
on the left front of the refri
g
erator b
y
removin
g
5
retainin
g
screws.
5. Remove 5 retainin
g
screws securin
g
refri
g
erator
to enclosure.
6. Remove the monitor panel located directl
y
above
the refri
g
erator b
y
removin
g
6 retainin
g
screws.
CAUTION
:
It is not necessary to disconnect
wiring from the monitor panel. Pull
panel forward and away from the
monitor panel’s mounting bracket.
Lay monitor panel on galley top.
Take care not to scratch the galley
and its surrounding surfaces, or
the face of the control panel.
7. Remove the monitor panel’s mountin
g
(
frame
)
bracket b
y
removin
g
four retainin
g
screws. The
retainin
g
screws are located on both the left and
ri
g
ht sides of the bracket.
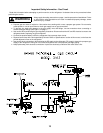
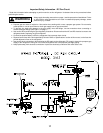
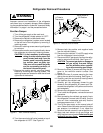
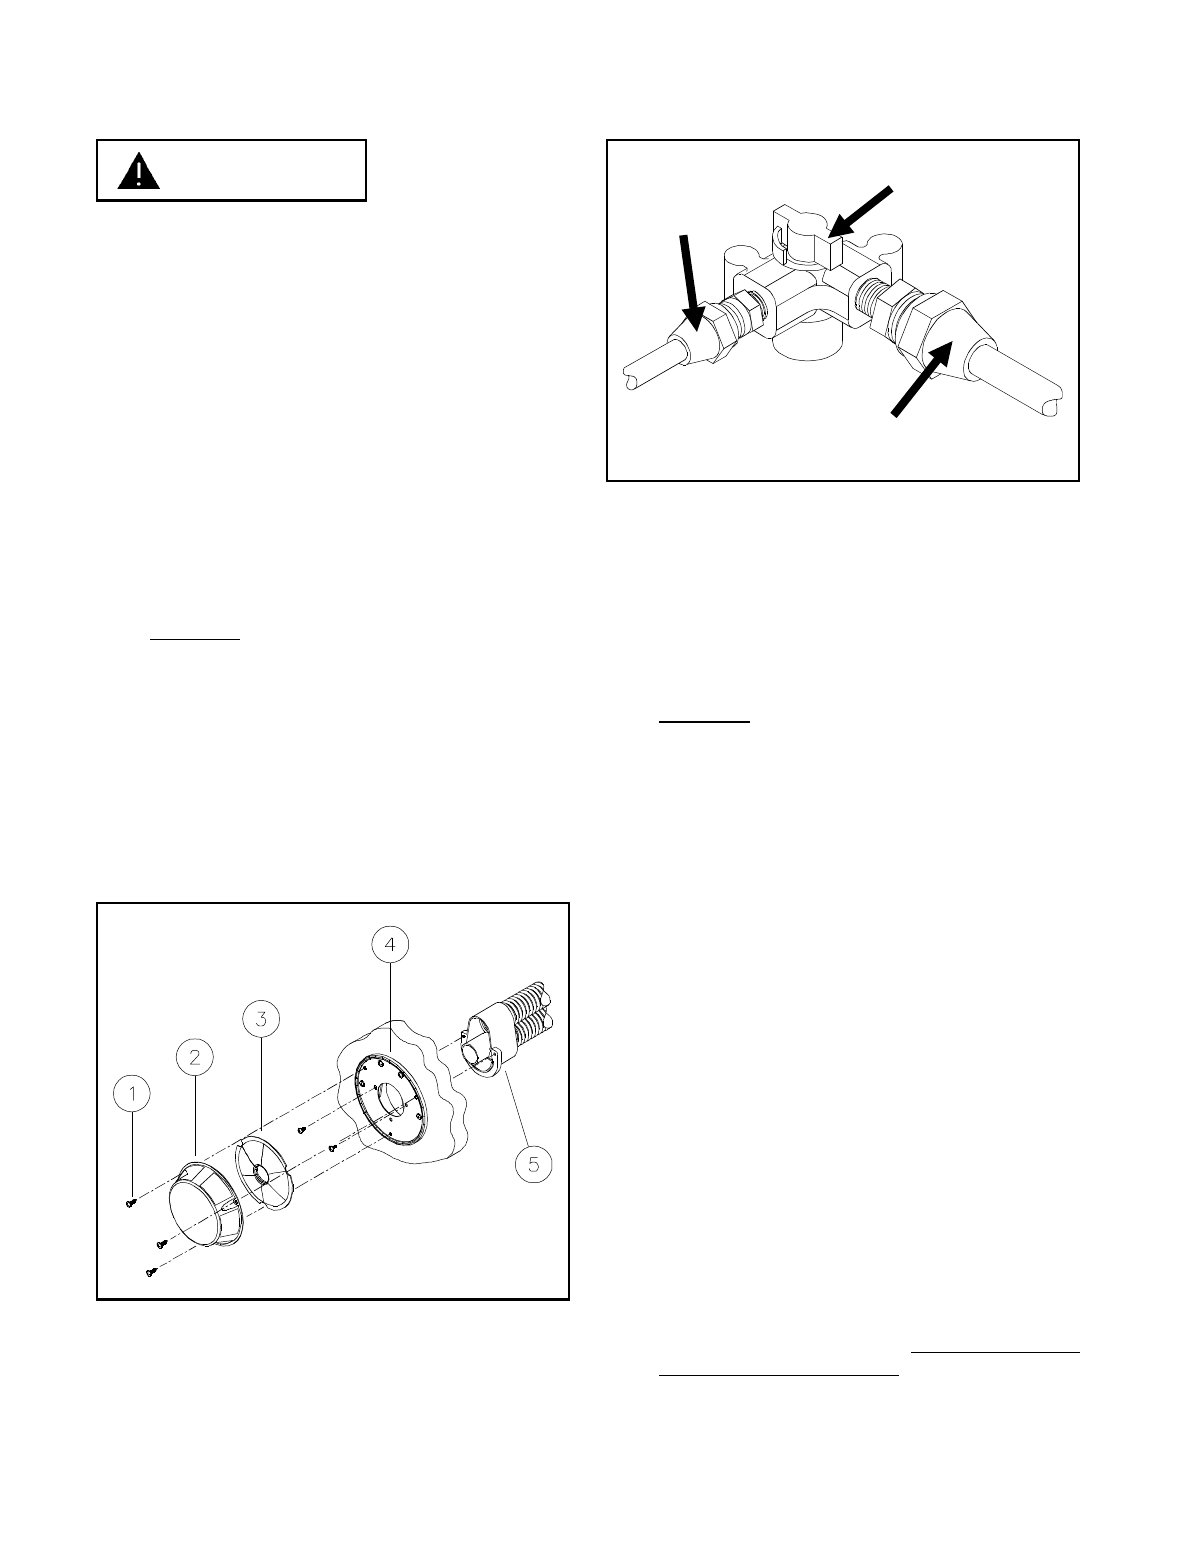
8. Turn the manual shut-off valve located on top of
the refri
g
erator to "OFF". See Fi
g
ure 12.
9. Remove both the positive and ne
g
ative leads
from the vehicle’s batter
y
.
10. Disconnect the vehicle’s 12 volt DC suppl
y
wires
from the refri
g
erator’s terminal block.
11. Disconnect the LP
g
as suppl
y
line from the refri
g
-
erator’s manual shut-off valve. See Fi
g
ure 12.
CAUTION
:
To prevent gas leaks or damage to
the gas supply lines and fittings,
use two wrenches when connect-
ing or disconnecting gas fittings.
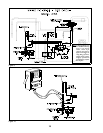
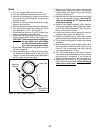
12. Remove the three
(
3
)
screws securin
g
the vent
cover to the vehicle’s exterior surface. See
Fi
g
ure 11.
13. Remove the two
(
2
)
screws securin
g
the inner
disk to the vent terminal housin
g
. See Fi
g
ure 11.
14. Carefull
y
push the vent terminal housin
g
inward
until free from the vehicle’s wall.
15. Carefull
y
pull the refri
g
erator forward to
g
ain
access to the refri
g
erator’s AC power cord. Dis-
connect the refri
g
erator’s AC power cord from the
wall receptacle.
16. Remove the refri
g
erator from it’s enclosure.
17. To re-install the refri
g
erator, reverse the removal
procedure.
18. After connectin
g
the vehicle’s
g
as suppl
y
line to
the refri
g
erator’s manual shut-off valve, turn the
valve on. Use a manometer and verif
y
that the
input
g
as pressure is at 11" W.C..
19. Turn off the
g
as suppl
y
at the manual shut-off
valve. Observe the manometer and verif
y
that the
g
as pressure is maintained. If not, locate the
source of the leak, correct it, and re-test the unit.
20. Appl
y
leak test solution to all
g
as fittin
g
s and
verif
y
that there are no leaks.
Do not test for gas
leaks with an open flame.
Valve Shown in
Off Position
LP Gas
Suppl
y
Line
U-Tube to
Thermostat
Fi
g
ure 12 - Manual Shut-Off Valve
Fi
g
ure 11 - Vent Terminal Housin
g
WARNING
20