


17
Please note!
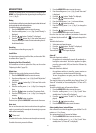
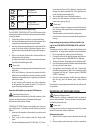
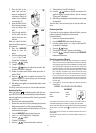
Iftheinfuserisdiculttoinsert,beforeinsertion,squeezethe
two levers shown in the gure to make it smaller.
8. Once inserted, make sure the two red buttons have
snapped out.
PUSH
9. Close the infuser door.
10. Replace the water tank.
Cleaning the milk container
Clean the milk container each time you prepare milk as de-
scribed below:
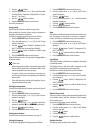
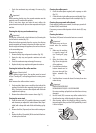
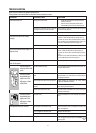
1. Remove the lid.
2. Remove the milk
spout and intake
tube.
3. Turn the froth
adjustment dial
clockwise to the
“INSERT” position
(see gure) and pull
o upwards.
4. Wash all the com-
ponents thoroughly
with hot water and
mild washing-up
liquid. All compo-
nents are dishwash-
er safe, placing them in the top
basket of the dishwasher.
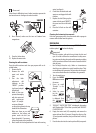
Make sure there are no milk
residues on the hollow and
groove under the dial (see
gure alongside). If necessary,
scrape the groove with a toothpick.
5. Rinse inside the froth adjustment dial seat with running
water (see gure).
6. Check that the intake tube and
spout are not clogged with milk
residues.
7. Replace the dial (lining up the
arrow with the word “INSERT”),
the spout and the milk intake
tube.
8. Place the lid back on the milk
container.
Cleaning the hot water/steam nozzle
Each time you prepare milk, clean the nozzle with a sponge to
remove milk residues from the gaskets.
DESCALING
Descale the machine when the message “DESCALE” and the
relative symbol “ ” ash on the display.
Important!
• Descalercontainsacidswhichmayirritatetheskinand
eyes. It is vital to follow the manufacturer’s safety warn-
ings given on the descaler pack and the warnings relating
to the procedure to follow in the event of contact with the
skin and eyes.
• Use De’Longhi descaler only. Under no circumstances
should you use sulphamic or acetic based descalers. Their
use invalidates the guarantee. Failure to descale the appli-
ance as described above also invalidates the guarantee.
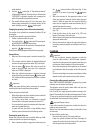
1. Turn the machine on.
2. Press the MENU/
ESC button to enter
the menu.
3. Press < or > until
“Descale” is dis-
played.
4. Select by press-
ing the
button: “Conrm?”
is displayed. Press
the but-
ton to conrm.
5. “DESCALE”, “EMPTY DRIP TRAY” is displayed, alternating
with “Remove lter” (if the lter is present) and “ADD DES-
CALER PRESS OK”.
6. Empty the water tank (A9) completely and remove the
water softener lter (if present). Empty the drip tray (g.
29) and grounds container, then put them back in the ap-
pliance.
7. Pour the descaler into the tank up to level A (correspond-
A
B