8
The anti-tip guard
The anti-tip guard must be fitted to
prevent the cooker from tipping over
with abnormal loads.
The anti-tip guard only works
when the cooker has been pushed
into place.
HOW
YOU
FIX
THE
ANTI
-
TIP
GUARD
TO
THE
COOKER
:
1 Before fitting the anti-tip guard,
make sure that the cooker has been
adjusted to the correct height and
is standing level (see page 7).
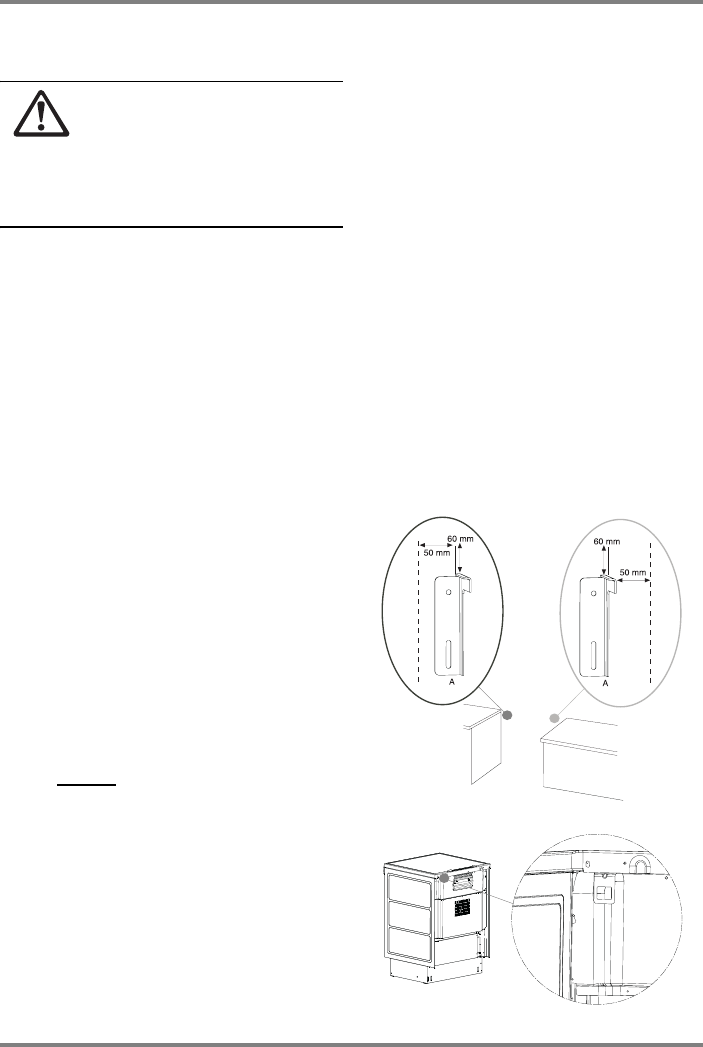
2 The attachment (B) is fitted to the
left side when delivered. Measure
out where the anti-tip guard (A) is
to be located, 60 mm (2.4") down
from the edge of the ceramic glass
plate and 50 mm (2.0") from the
wall(cupboard). Screw it firmly
into solid material or use suitable
reinforcement. The entire anti-tip
guard (A+B) can also be located
on the right-hand side (
SEE
F
IG
. 1).
Make sure that the surface
behind the cooker is smooth.
If there are tiles or a moulding
behind
the edge of the ceramic
glass plate then there must be a
space with the same dimension
between the anti-tip guard and
the wall. This is so that the anti-
tip guard is firmly attached to
the cooker and functions
correctly.
Check that the anti-tip guard
projects at least 20 mm (0.8")
into the hole in the back of the
cooker (B) when the cooker is
pushed in (
SEE
F
IG
. 2).
NOTE! If the space between the bench
cupboards is greater than the width of the
cooker, then you must adjust the side
measurement if you want to centre the
cooker..
2
1


