EN
10
Installation instructions
5. Installation (all models)
Your Fisher & Paykel Active Smart™ refrigerator is fitted with front and rear rollers, designed for
moving the product in the forwards and backwards direction.
Avoid moving the product in a sideways direction as this may damage the rollers or the floor
covering/ surface.
1
Your refrigerator will arrive with the front leveling feet wound up making moving this product
into its final location a simple task.
2
Roll the refrigerator into its final position making sure there is the correct air gap between the
product and the surrounding cabinetry. See minimum clearance in cabinetry dimensions table
(refer to page 7).
3
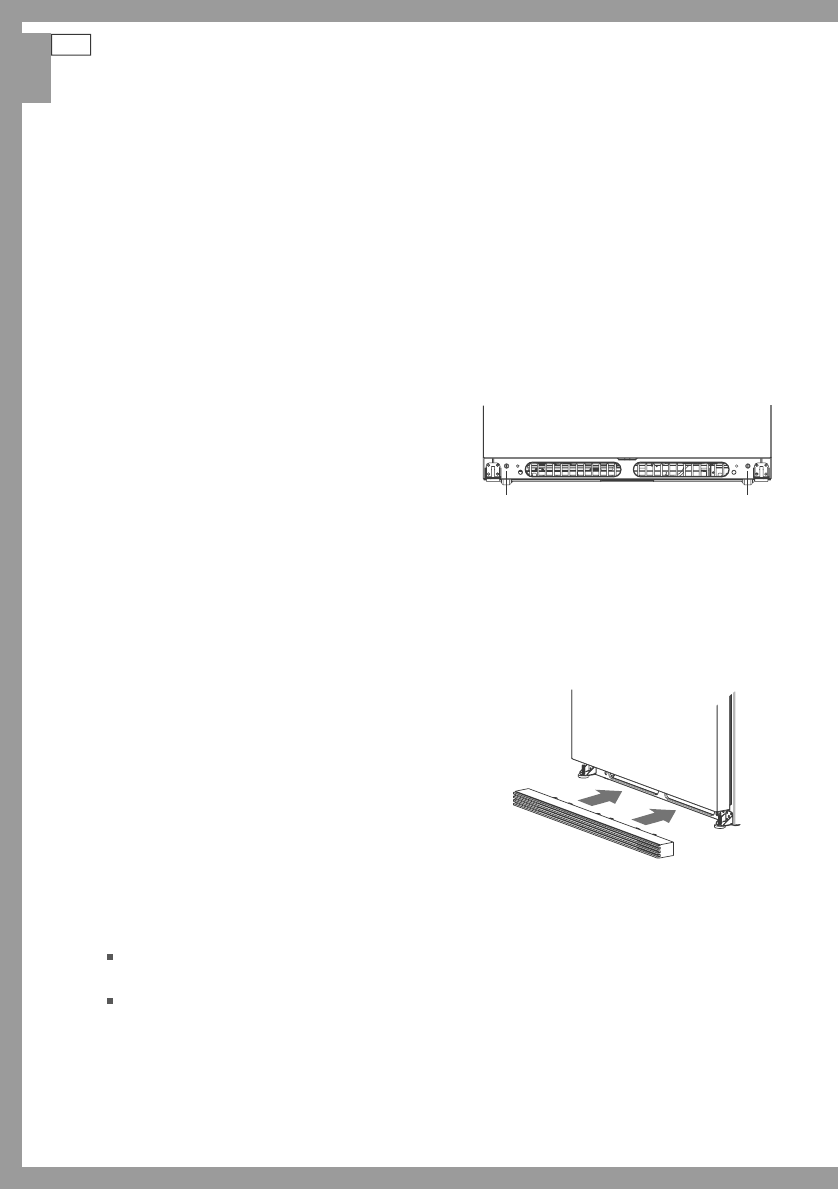
Using a hex headed screwdriver, or socket set,
turn the front adjustment screws (
a
) clockwise
to raise the product and counterclockwise to
lower the front of the refrigerator.
4
Ensure product is sitting backward with the front
approximately ⁄” (10 mm) higher than the back.
This will ensure a good door-closing action.
5
Align your refrigerator with cabinetry:
a
Align the sides of the refrigerator with
cabinetry by adjusting the right-hand side
adjustment screw.
b
Adjust the left-hand side adjustment screw
until it touches the floor and takes a small
amount of weight.
c
Once the refrigerator is in place and aligned
with the cupboards/alcove, push gently on the
front top and check if the product is rocking or
stable. If the product is rocking, refer to steps
7 – 10.
d
If the product is stable and no door leveling is
required, place toe grille onto the bottom of
the product (refer to figure 4):
Align the toe grille mounting clips with the
lower cabinet slots.
Push the toe grille firmly until it snaps into
place.
Fig.4 Toe grille installation
Fig.3 Adjustment screws
a a


