6
960 ProSoft Control
Conditioner Systems
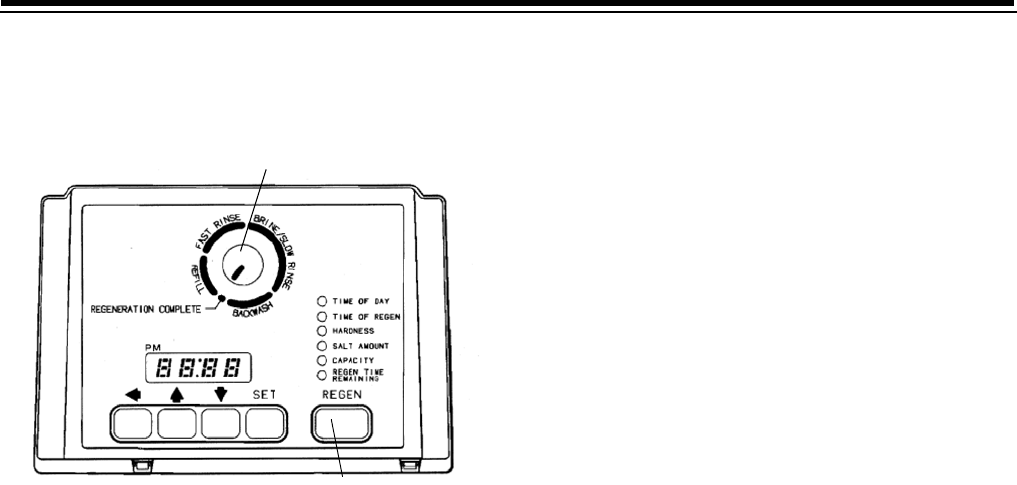
Figure 6
Programming
This section covers all aspects of programming the control.
The control is shipped from the factory with default values
for Hardness and Capacity. These default values will result
in a system capacity of 100 gallons (1 cubic meter). While
the control will operate with these values, they should be
changed to meet the actual operating conditions.
Note that some parameters have a single unit of measure
option such as the Rinse Time which is only entered in
minutes. Other parameters have dual units such as Salt
Amount which can be entered in pounds or kilograms. To
select which units are active, look for a comment in the
NOTES column of Table 1 and Table 3. It will reference
another parameter that selects which units are active. For
example, Parameter P12 (Table 3) selects U.S. units if it is
set to “0” and metric if it is set to “1.”
Level I Parameters (Table 1)
Level I Parameters are identified as those that have an LED
indicator on the front panel. The green indicator
illuminates next to the name of the active control setting.
The end user has access to all of these parameters. In
general, pressing the down arrow (↓) button displays the
Level I Parameters in the following order:
• Time of Day
• Time of Regeneration
• Hardness
• Salt Amount
• Capacity
If you continue to press the down arrow (↓) button, the
parameters start over with Time of Day. Pressing the up
arrow (↑) button displays the parameters in reverse order.
Refer to Table 1 for a description of these parameters and
the available ranges for each parameter.
Press the SET button and the far right number on the
display starts flashing. If you want to change this number,
press the up arrow (↑) button to increase the number or
the down arrow (↓) button to decrease the number. To skip
the number without changing, press the left arrow (←)
button. When you reach the far left digit, pressing the left
arrow (←) button will return you to the far right digit.
Note: If you press and hold either the up arrow (↑) button
or the down arrow (↓) button for more than one second,
the flashing number will increment or decrement at the
rate of 10 counts per second.
When the number is correct, press the left arrow (←)
button. The first number stops flashing and the next
number starts flashing. You can only change the flashing
number. Continue changing numbers until you reach the
desired setting. Press the SET button. The numbers stop
flashing and the control accepts the new setting. After
approximately 30 seconds, the control starts alternating
the display between Time of Day and Capacity.
Note: If a beep sounds, the new setting is not accepted
because it was outside the allowable range. The old value
will be displayed.
Time of Day
Press the SET button. The display will show the Time of
Day with the minutes digit blinking. If you want to change
this number, press the up arrow (↑) button to increase the
number or the down arrow (↓) button to decrease the
number. To skip the number without changing, press the
left arrow (←) button. The first number stops flashing and
the next number starts flashing. You can only change the
flashing number. When you have reached the far left digit,
pressing the left arrow (←) button returns you to the far
right digit. Continue changing numbers until you reach the
desired setting. Press the SET button to enter the value.
Cycle Indicator
Regen Button


