


– 13 –
CONTROL PANEL UPDATES
WARNING: DISCONNECT ELECTRICAL POWER TO THE MACHINE AND FOLLOW
LOCKOUT / TAGOUT PROCEDURES.
The DRO2 series ovens have different software configurations for the control panel depending on the
date of manufacture. This is identified by a Control Version Number.
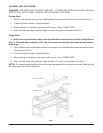
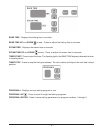
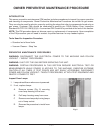
The Control Version Number is indicated in the serial number, which is printed on a label on the back
of the control panel display box. To access the back of the box, open the electrical panel on the left
side of the oven. The label may read FFA4-9426 or FFB1-9544-0814 or FFB1-9611-XXXX.
On models with Control Version Number 9611 and up, the number will be displayed on the control panel
for 2.5 seconds after you press OFF.
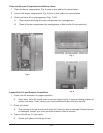
Control Version 9544 and Up
Setting additional cook time in minutes.
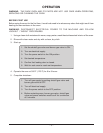
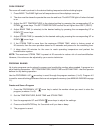
1. Reset the BAKE TIME using the UP and DOWN
arrow keys.
2. If the STEAM TIME is programmed, set the STEAM TIME to 00.
3. Press TIMER START. Do not press ENTER as this will change the program settings.
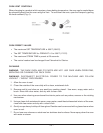
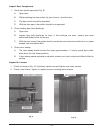
Control Version 9611 and Up
This version is fitted with a volume control adjustment for the timer beeper. The volume control is
located on the back, bottom right corner of the control panel display box. To access the back of the box,
open the electrical panel on the left side of the oven.
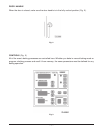
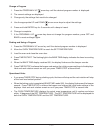
Setting additional cook time in minutes and seconds (5-second increments).
1. Press TIMER STOP.
2. Timer displays 0.00 minutes and seconds. Use the UP and DOWN arrow keys to adjust the time.
Press TIMER START to begin countdown.
3. When timer display reaches 0.00, the display flashes and the beeper sounds. Press TIMER
STOP.
4. Set more time by repeating this procedure. When the product is done, unload the oven and press
TIMER STOP again to revert back to the original program.
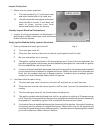
Models Built After June 2001
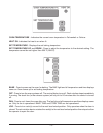
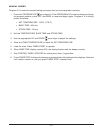
When the oven heat is first turned on, the control goes through a short monitoring sequence to make
sure the burner is operating correctly. The HEAT ON has a tricolor LED to indicate status.
Yellow The control is monitoring the purging cycle.
Green The burner is on and the heat is on; heating is OK.
Red Indicates a burner malfunction during the monitoring sequence. The display will flash and
a buzzer will sound, indicating that the monitoring sequence has stopped. To reset the
control after a burner malfunction, turn the control panel off then back on.