


– 5 –
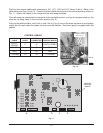
Fully assembled units have the coil and fan unit, probes and controls prewired. Place assembled unit
in final position ready for connection of refrigeration lines and electrical supply. Compressor unit can
be located remote or self-contained (mounted on top of the cabinet with quick-connect couplings and
lines in place). Alternatively, the chiller can be shipped disassembled (knocked down), requiring on-
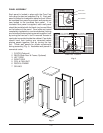
site assembly. When chillers are shipped dissassembled, lay out panels in a staging area. Lay panels
on foam blocks used for packing to avoid scratches on the panels. Identify fasteners and components.
LOCATION
Allow reasonable clearance for installation of electrical and refrigeration lines above the chiller cabinet.
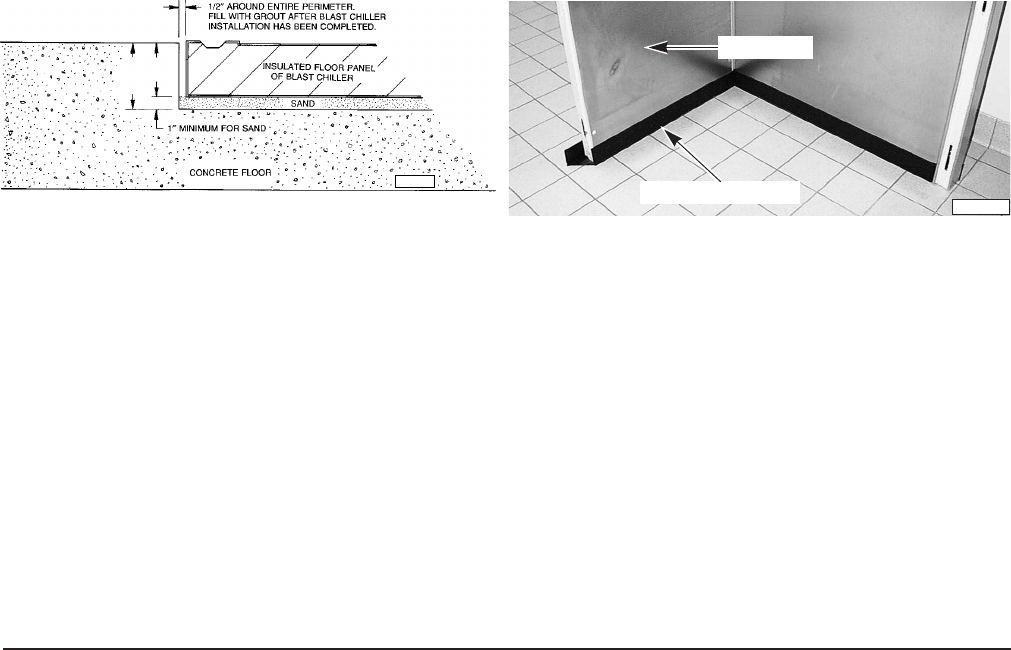
INSTALLATION WITH OPTIONAL INSULATED FLOOR PANEL
The chiller can be ordered with an optional 3" deep floor panel, without a floor panel or with a stainless
steel sheet floor. When installed with 3" insulated floor panel, the chiller can be installed in a recessed
area of the floor or with an optional ramp.
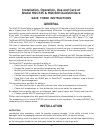
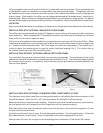
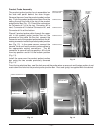
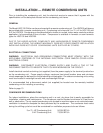
The floor panel is preferred to be installed in a recessed area so carts can roll flat into the Chiller. When
installing a recessed floor, a pit must be constructed in the concrete slab at least 4 inches in depth with
a
1
⁄2" clearance around the perimeter. The 4 inch depth is a minimum requirement. Floor panels are 3
inches in depth, the remaining inch is used for sand to facilitate leveling (Fig.1). The interior floor of
the cabinet should be even with the building floor.
INSTALLATION WITHOUT OPTIONAL INSULATED FLOOR PANEL
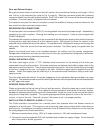
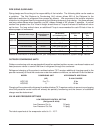
If no insulated floor panel is ordered, black vinyl screeds are provided. The wall panels of the chiller
cabinet are inserted in the black vinyl screeds during installation (Fig. 2). The chiller should be installed
on a smooth level surface. If necessary, further leveling may be provided by shimming between the
floor and wall panels.
Fig. 1 Fig. 2
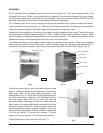
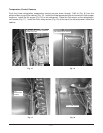
INSTALLATION WITH OPTIONAL STAINLESS STEEL SHEET METAL FLOOR
The stainless steel sheet metal floor can be glued directly to the building floor before erection of the
QuickChill cabinet. Mark the 40" x 50" floor area where the QuickChill will be erected.
Make sure the floor is level before proceeding. If the floor is not level the wall panels will not be vertical,
the roof panels will not fit properly and the hinged door will not operate properly.
Both the building floor and the stainless steel sheet must be clean, dry and free from grease, oil, wax
or other surface contaminants.
Avoid glue contact with skin or eyes. Provide adequate ventilation. Do not breathe fumes. Follow the
glue manufacturer's instructions. Refer to assembly instructions shipped with the floor.
Allow at least 24 hours for the glue to set before beginning installation of the QuickChill cabinet.
PL-41153-1
WALL PANEL
BLACK VINYL SCREED
4”
MIN.
3”
PL-53060