


– 7 –
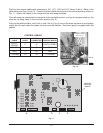
PL-41106-1
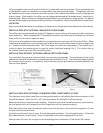
HEX WRENCH IN LOCKING HOLE
RIGHT SIDE PANEL
REAR PANEL
ASSEMBLY
If a 3" insulated floor is supplied, position and level floor panel first. Cam lock the wall panels to the
insulated floor panel. Black vinyl screeds are only supplied if the insulated floor panel is not ordered.
If the stainless steel sheet metal floor is to be installed, refer to the Technical Data / MSDS from the
adhesive manufacturer and follow the Assembly Instructions provided.
For all panels, peel off all vinyl coverings to expose the stainless steel surfaces inside and outside.
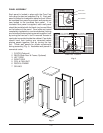
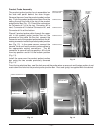
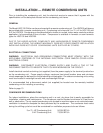
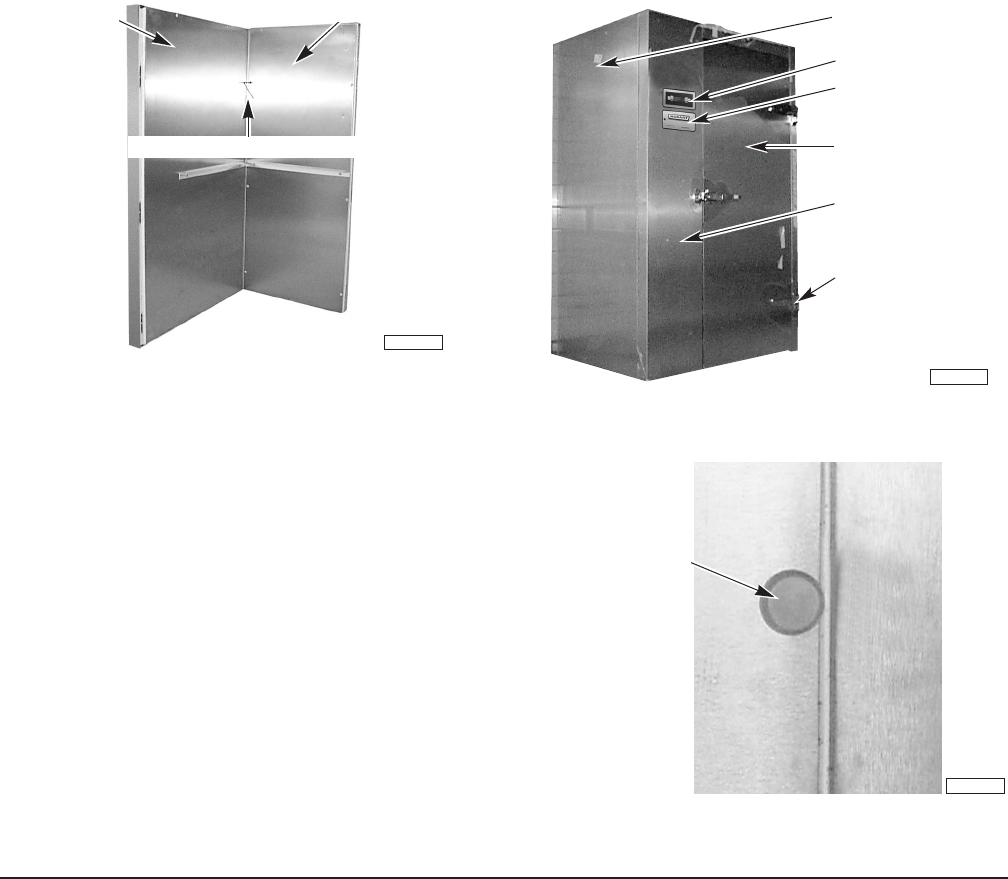
Lock wall panels to rear panel (Fig. 5). Cabinet must be plumb and level. Shimming may be installed
inside the screed, between the screed base and the bottom of the panel itself.
Install coil and fan section on the left side if the cabinet is right hinged and vice-versa. Two pre-attached
nuts are foamed inside the panel to accept
3
/8" bolts. Tighten the coil and fan section in place. Make
sure the gasket is in place around the back of the coil and fan section. This gasket should prevent the
condensate water from dripping behind the pan onto the cabinet floor.
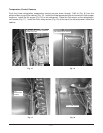
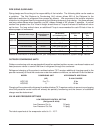
If installing with black vinyl screeds, remove door from hinges of door frame. Remove the shipping
brace from the bottom of the door frame. Install the door frame by locking to side wall panels. If
insulated floor panel is present, cam lock to floor panel. Reinstall the door in its hinges (Fig. 6).
Fig. 5 Fig. 6
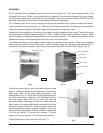
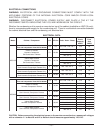
Position and cam-lock the roof to the wall and door frame
panels. Cabinets without an insulated floor panel must
have both sides of the door frame anchored to the
building floor (Fig. 4). Using a #19 drill bit appropriate for
the floor construction, make two .166" diameter holes in
the floor where each side of the door jam must be
anchored. Before fastening to the floor, make sure the
door frame is the same width at top and bottom and that
the door closes and fits well. Fasten the door jam to the
floor using the two cement screws, supplied. If the door
handle is out of adjustment, the door strike can be moved
in or out as follows: 1) Loosen both screws. 2) Move
strike in or out as needed. 3) Re-tighten both screws.
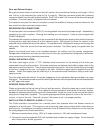
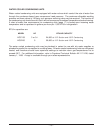
Install plug buttons in all cam lock holes (Fig. 7).
Fig. 7
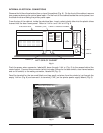
PL-41550-1
CONTROLS
DOOR FRAME
HINGE
FRONT DOOR
LEFT SIDE PANEL
PRINTER(S)
PL-41113-1
PLUG BUTTON