


– 5 –
ELECTRICAL
This machine is provided with a three-prong grounding plug. The outlet to which
this plug is connected must be properly grounded. If the receptacle is not the proper grounding
type, contact an electrician.
CLEAN BEFORE USING
The 3813 or 3913 slicer must be thoroughly cleaned and sanitized after installation and before being
used. Refer to Cleaning, pages 8 – 11.
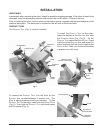
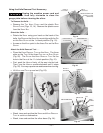
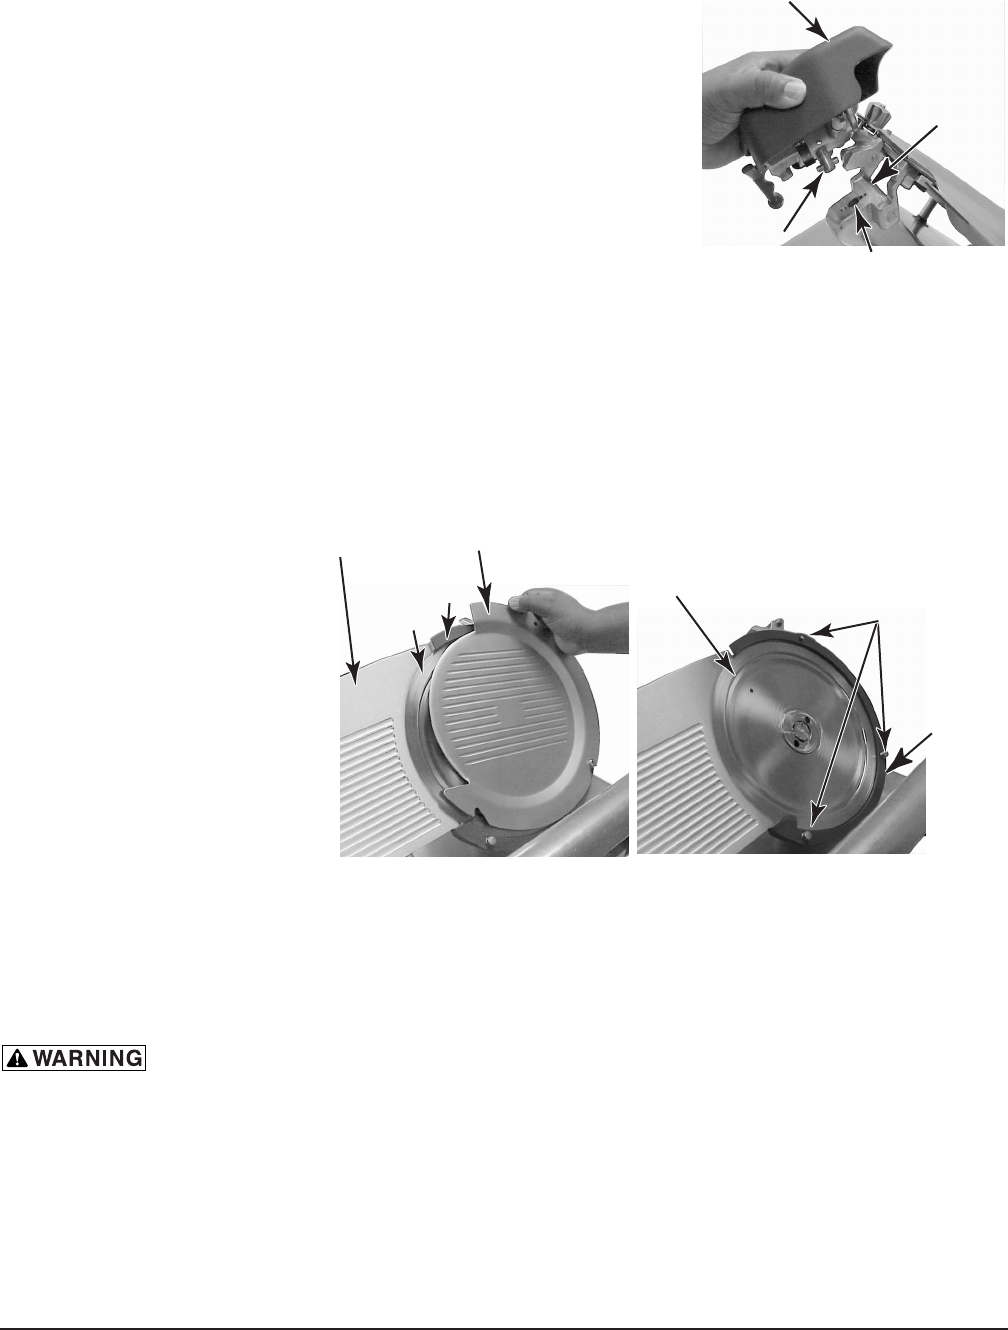
TOP KNIFE COVER
The T
OP KNIFE COVER, and the plastic RING GUARD COVER underneath it, are shipped in place and secured
with the L
ATCH KNOB on the TOP KNIFE COVER (Fig. 7).
To remove the T
OP KNIFE COVER, turn the LATCH KNOB (Fig. 7) counterclockwise and lift the TOP KNIFE
COVER off the three guide PINS (Figs. 5, 6). Remove the plastic RING GUARD COVER by lifting it from the
guide P
INS (Fig. 6).
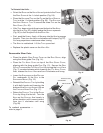
To reassemble the plastic R
ING
GUARD COVER on the RING
GUARD, position it using the
three guide P
INS (Fig. 6). Then,
reassemble the T
OP KNIFE
COVER over the plastic RING
GUARD COVER; position the TOP
KNIFE COVER using the three
guide P
INS (Fig. 5).
Secure the R
ING GUARD COVER
and TOP KNIFE COVER by turning
the L
ATCH KNOB counter-
clockwise while lowering the
T
OP KNIFE COVER; then, release
the L
ATCH KNOB and turn it
clockwise until snug (Fig. 7).
Fig. 5 Fig. 6
TOP KNIFE COVER
KNIFE
GAUGE PLATE
RING GUARD
COVER
PINS ON
RING GUARD
PLASTIC
RING
GUARD
COVER
KNIFE
(KNIFE COVER REMOVED)
SHARPENER
ROD & PIN
SHARPENER
MOUNT
SLOT
Fig. 4
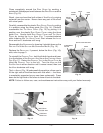
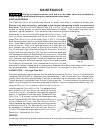
SHARPENER
The S
HARPENER is mounted on top of the slicer (Fig. 4). You can
remove it by lifting it straight up. Reinstall the S
HARPENER by lowering
it back onto the S
HARPENER MOUNT so the ROD AND PIN on the bottom
of the S
HARPENER fit the SLOT in the SHARPENER MOUNT (Fig. 4). To use
the S
HARPENER, refer to page 12.