


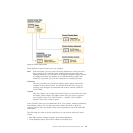
Filtering in the Contents pane simply hides data that has already been retrieved
from the database. If your database has so many objects that retrieval time is an
issue, you may prefer to retrieve only a subset of the objects (for example, tables).
This filtering is referred to as Object Filtering and is explained in the next section.
Object filtering:
Object filtering enables you to work with a subset of all the objects in the database
in the Control Center. For example, if you only need to work with your own tables
and not those created by someone else, you can set up an object filter so that only
those tables will be retrieved from the database. You will not have to wait for data
about the other tables to be retrieved.
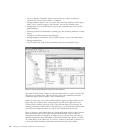
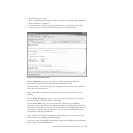
Right-click on an object folder in the object tree and select Filter->Create. The Filter
notebook opens allowing you to select which objects you would like to retrieve
from the database.
Once you have created a filter, the filter icon will appear beneath the filtered object
in the object tree to indicate that a filter has been set. To remove the filter and
display all the objects in the Contents pane, right click the object folder and select
Filter->Remove.
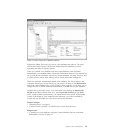
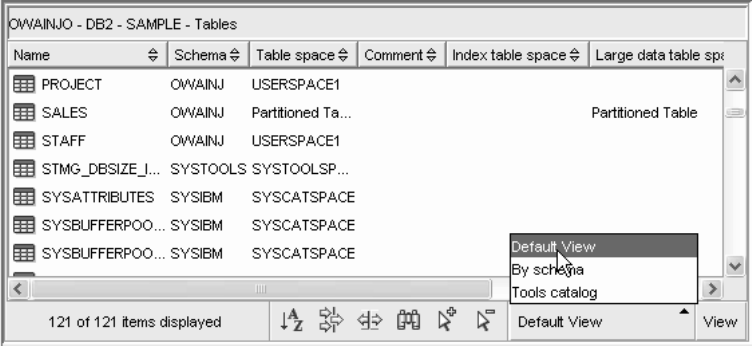
You can further customize your view by selecting the filter icon from the toolbar at
the bottom of Contents pane described above. This filtering will only hide data
that has already been retrieved from the database.Filtering enables you to work
with a subset of displayed objects in the Control Center. Two forms of filtering
exists. The first form of filtering allows you to create a customized view of objects
which you would like to appear in the Contents pane of the Control Center.
Infopops:
An infopop is a pop-up window that is displayed when a control in a window or
notebook has focus and you press F1. Holding the mouse cursor over a control in a
window or notebook also causes the infopop to display. Infopops contain a
description of the field or control. They may also list restrictions and requirements
or provide instructions.
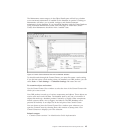
Figure 2. Contents Pane view
Chapter 7. DB2 administration and development tools 41