


9
SECTION 2: INSTALLATION/OPERATION INSTRUCTIONS
INSTALLATION INSTRUCTIONS
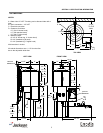
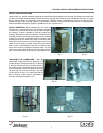
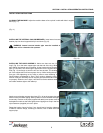
ALIGNING THE MACHINE: Adjust the machine base to line up hole in table with hole in support
block (Fig. 11).
(Fig. 11)
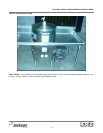
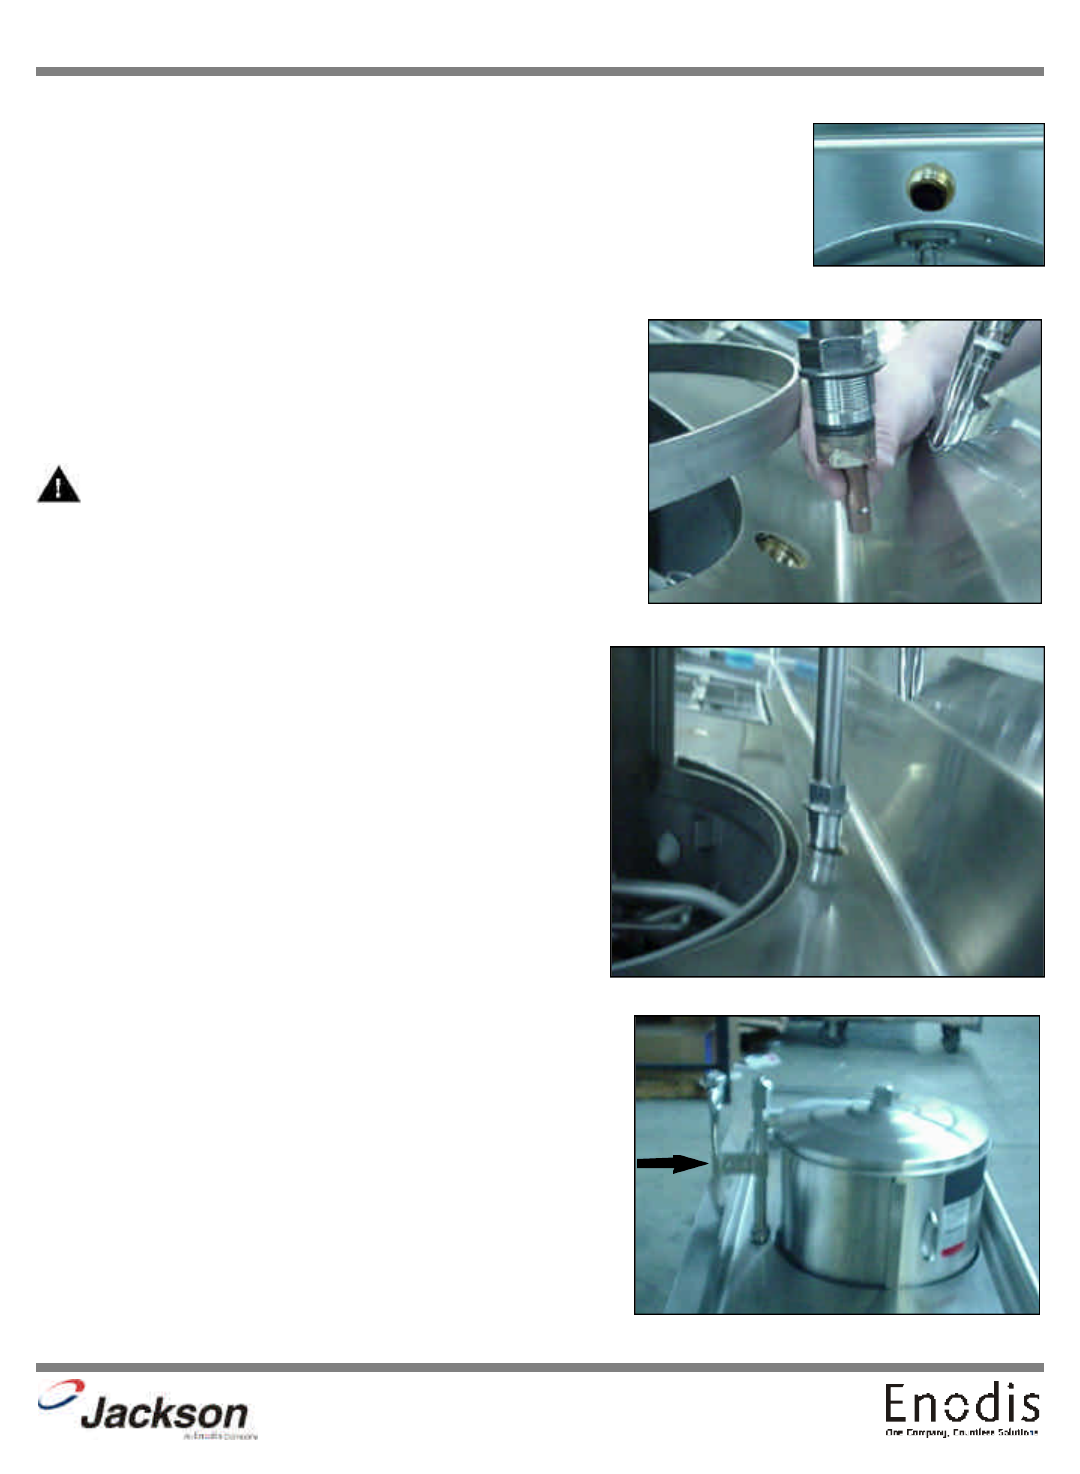
INSTALLING THE INTERNAL VACUUM BREAKER: Insert internal vacuum
breaker pipe into hood support block pin end down (Fig.12).
WARNING: Internal vacuum breaker pipe must be installed or
there will be a hazard to the operator.
(Fig. 12)
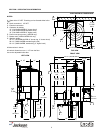
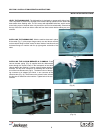
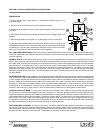
INSTALLING THE HOOD ASSEMBLY: Make sure there are two “O-
rings” (Fig. 5) on the lower support pipe near the end of the ring. While
also holding the internal vacuum breaker, lift the hood and hood support
pipe up over table. Set hood support pipe down into the support block
hole (Fig. 13) and begin to work the hex nut into the hole. The locating
pin in the support block will insure proper line up. While holding the sup-
port pipe, start tightening nut by hand to prevent cross threading. It
should tighten considerable by hand. Then continue tightening with a
wrench. It may be necessary to work support pipe back and forth to seat
nut properly. When the nut is tight, it should force flat the stainless steel
and rubber washers tight to the table top.
(Fig. 13)
Attach vacuum breaker support pipe clamp (Fig. 14) to the support pipe and
external vacuum breaker piping. Slide up about 12” from the table and tight-
en securely. Position cover plate (supplied with table) over square cutout in
backsplash on table so that it fits tightly around piping then snap in the four
nylon fasteners (supplied) to hold in place.
Rotate the hood to insure it is free, if not, check level of machine, tightness
of table to machine flange, centering of machine, level of table and hood
support pipe.
(Fig. 14)