


17
SECTION 4: SERVICE PROCEDURES
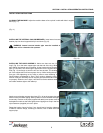
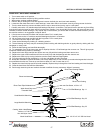
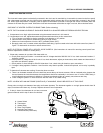
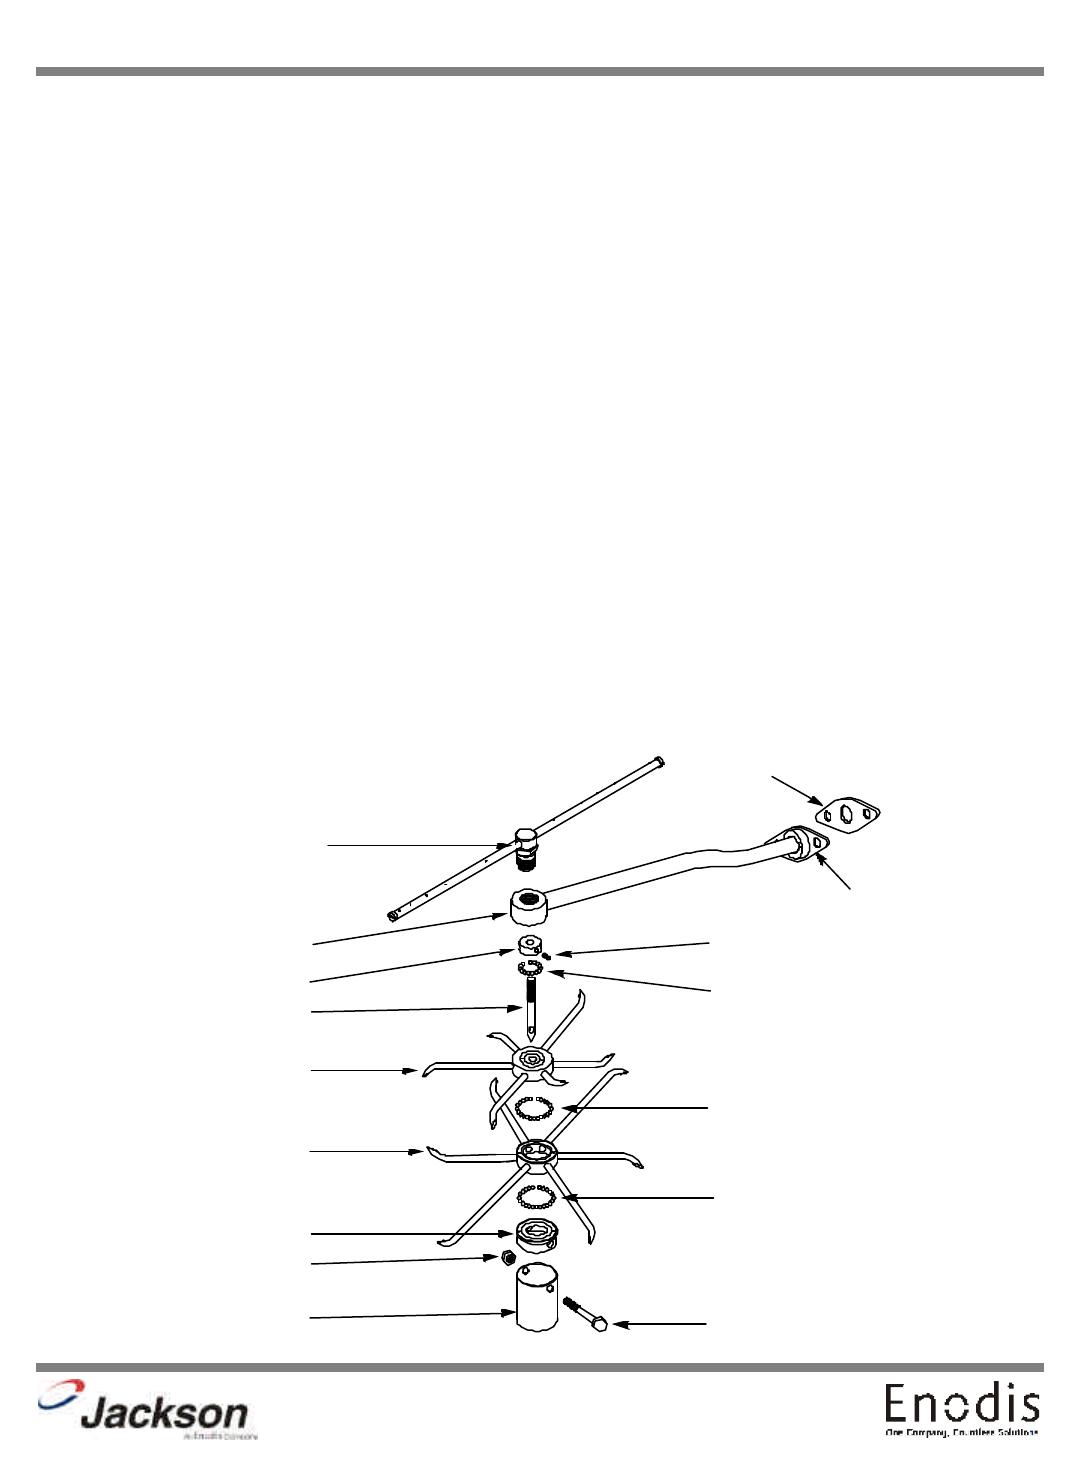
RINSE HEAD / WASH HEAD ASSEMBLIES
1. Turn master switch to off position.
2. Open hood and drain machine by lifting overflow strainer.
3. When empty, replace overflow strainer.
4. Remove the pin holding the rinse feed pipe and remove the feed pipe and rinse head assembly.
5. Locate the allen head set screw in wash head cap, insert allen wrench and loosen screw by turning counter clockwise.
6. Turn the wash head cap counter clockwise until the cap is removed and put the cap in a safe place.
7. Carefully remove the 1/4” stainless steel ball bearings and place in a container. Take special care to prevent any from falling
through the wash tube base for these will fall into the motor impeller. If any should fall into this area, the motor will have to be
removed to retrieve the ball bearings. If any should drop in the machine, you will be able to locate and retrieve these if you left
the overflow strainer in as suggested in step #3 above.
8. Lift and remove the small manifold with the short tubes. Put in a safe place.
9. Carefully remove the 1/4” stainless steel ball bearings and place in a container.
10. Lift and remove the large manifold with the long tubes. Put in a safe place.
11. The lower fixed race may be left in place.
12. Clean the ball bearings by soaking in a deliming solution.
13. The ball bearing race ways may be cleaned by either brushing with deliming solution or gently clean by rubbing with fine
sandpaper or emery cloth.
14. Rinse the ball bearings and manifolds thoroughly.
15. To reassemble, first, fill the lower race way to capacity with the 1/4” ball bearings then remove one. This will give proper
movement needed during rotation of assembly.
16. Replace the lower large manifold and fill the race way fully with the bearings and then remove one.
17. Replace the upper small manifold and fill the race way fully with the bearings and then remove one.
18. Replace the wash cap by turning clockwise onto the center shaft and finger tighten.
19. Turn the wash cap counter clockwise by a 1/4 turn and tighten the allen set screw.
20. Rotate the manifolds in opposite directions, see if they rotate freely. A rule of thumb, is to select the longest tube in the bot-
tom manifold and make sure it moves up and down at least 1/8” and no more than a 1/4”.
21. Replace the rinse feed pipe and rinse head assembly. Replace the pin through the rinse feed casting and rinse feed pipe.
22. Close the hood doors and refill the dishwasher.
23. Run through several cycles and recheck the wash manifolds for easy movement. Adjust if necessary.
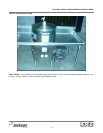
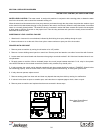
Rinse Arm Assembly
Rinse Feed Pipe Weldment
1/4” S/S Ball Bearings Qty. 11
1/4” S/S Ball Bearings Qty. 23
1/4” S/S Ball Bearings Qty. 23
Wash Head Cap
Small Manifold Wash Arm
Casting, Wash Head Bottom
Locknut, 1/4”-20 S/S
Hex with Nylon Insert
Wash Head Base
Set Screw, 10-24 x 1/2”
Bolt, 1/4”-20 x 2 3/4” S/S Hex Head
Large Manifold Wash Arm
Rinse Feed Casting
Rinse Feed Casting Gasket
Threaded Shaft